Back up cloud models and files
Exercise: Back Up Cloud Models and Files
Objective
Task 1: Replacing Negatively Affected Project Files
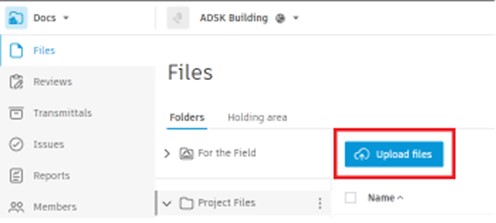
- To back up project files, simply use the Autodesk Docs rive to drag and drop the file into its respective folder or use the web interface’s Upload Files button.
- If previous versions of the file are wanting to be kept, make sure to upload the clean version with the same name while not deleting the affected file.
Task 2: Replacing Revit Cloud Workshared (RCW) Models
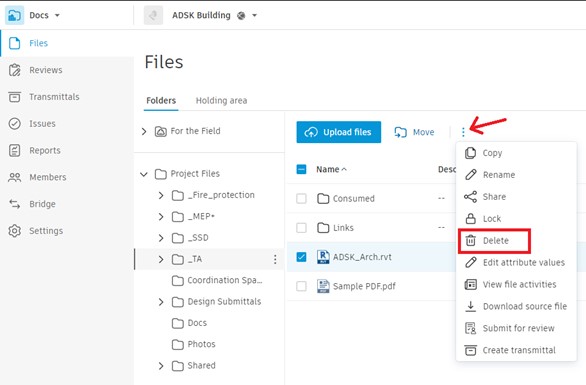
- Identify the latest clean version of the model which will be used to replace the negatively affected RCW model.
- Make sure to delete the model completely from your cloud project.
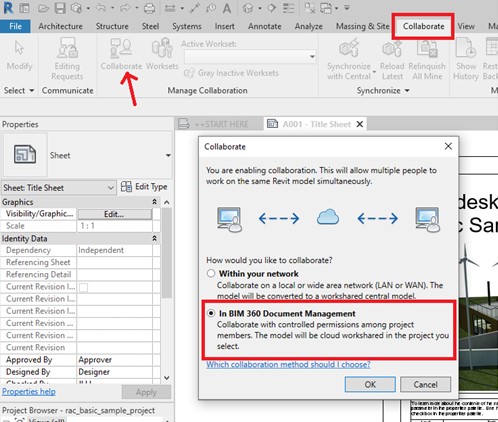
- Upload the clean model version form the Collaborate tab in Revit using the Collaborate in Cloud option.
- In the case that a Sync with Central is wanting to be used to back-up a negatively affected model, follow along with the video demonstration.


