Understand cloud version history
Exercise: Understand Cloud Version History
Objective

Task 1: Accessing the Cloud Version History for Any File Type
- Log in to your project on any of the supported web browsers for Autodesk Docs (Chrome, Firefox, Edge, or Safari).
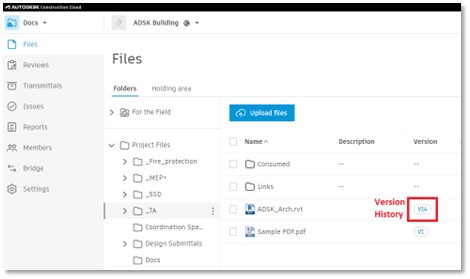
- Once logged in, navigate to the Docs module of the project where you can see your folder structure.
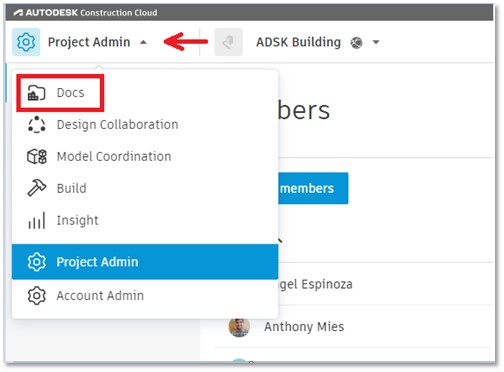
- Click the version history box next to any file in the folder structure.
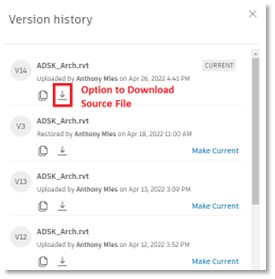
- This will bring up the Version History dialog box where the source file for any version of the file can be downloaded.
Task 2: Increasing the Cloud Version History for Project Files (Except RCW Models)
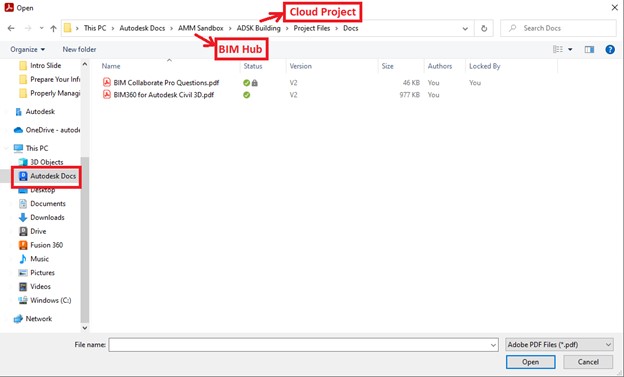
- From the welcome/home screen of any desktop product, navigate to the file using the Autodesk Docs drive that comes from the Desktop Connector.
- In this case I am opening a pdf using Adobe Acrobat DC.
- Perform edits as usual to the file using the desktop application.
- When finished, save and close the file and the cloud version history will increase by 1.
Task 3: Increasing the Cloud Version History for RCW Models
- Open the Revit application in which the project model is being design in.
- In this case, I am opening a model in Revit 2020.
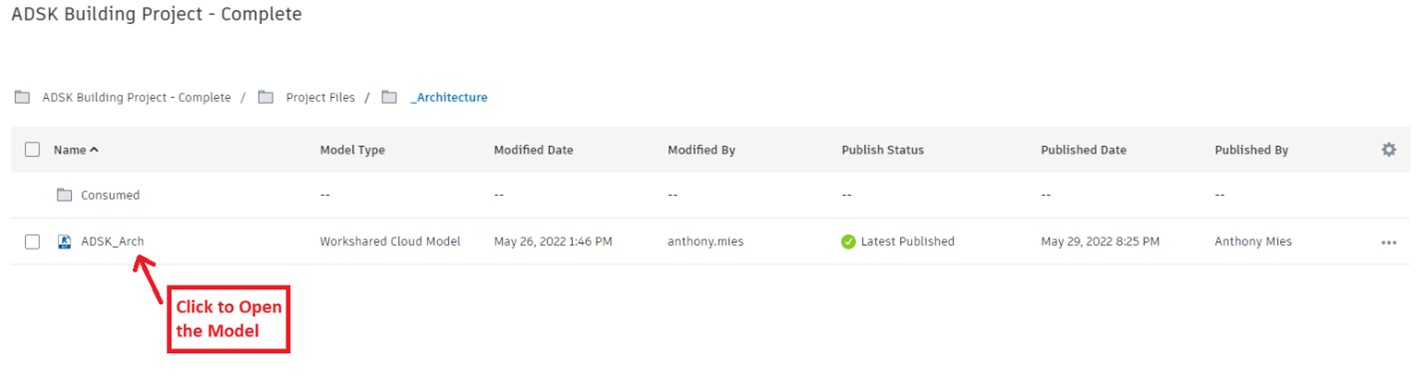
- Once the model is opened, perform any changes and normal while of course Syncing with Central as often as you can.
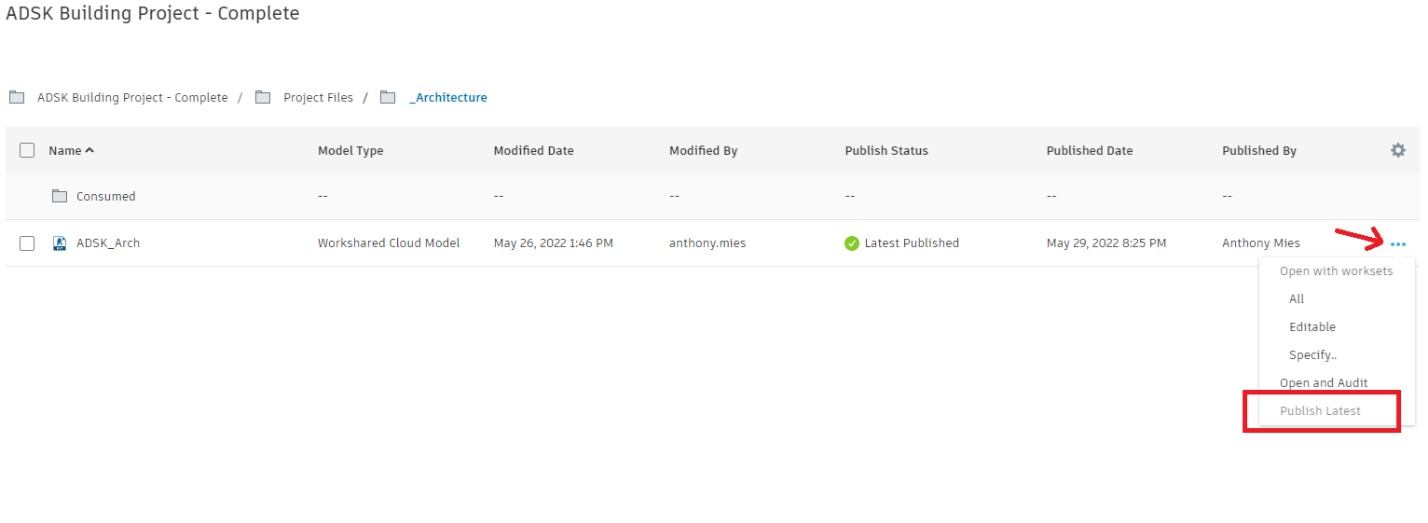
- Create a new publish of the model to increase its cloud version history through the same screen as opening the model.
- You can also create a publish schedule for RCW models using the Design Collaboration module. That workflow can be found in the following resource: Create a Publish Schedule for RCW Models.
Task 4: Ensuring Project Files Are Cached to the Local Machine
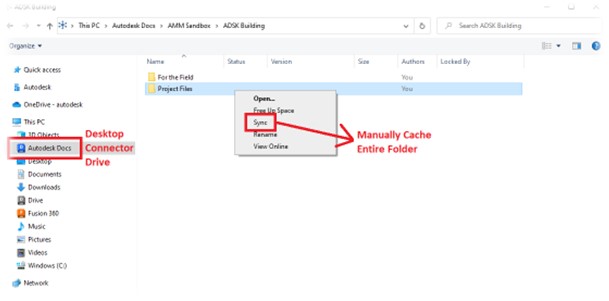
- Navigate to the folder structure in the Autodesk Docs drive in your File Explorer.
- Once there, entire folders, or individual files can be cached to the user’s local machine.
- The different statuses that files can have can be found in this resource: File Icon Statuses.


