Configure user-defined flags in InfoAsset Manager
Step-by-step guide
Data flags are a powerful tool for recording the source and integrity of data in a network. Some types of version-controlled items, such as networks, support data flags for many of their data fields. InfoAsset Manager includes several standard built-in data flags. Additional user-defined flags can be added to indicate information about the data.
To access and edit user-defined flags:
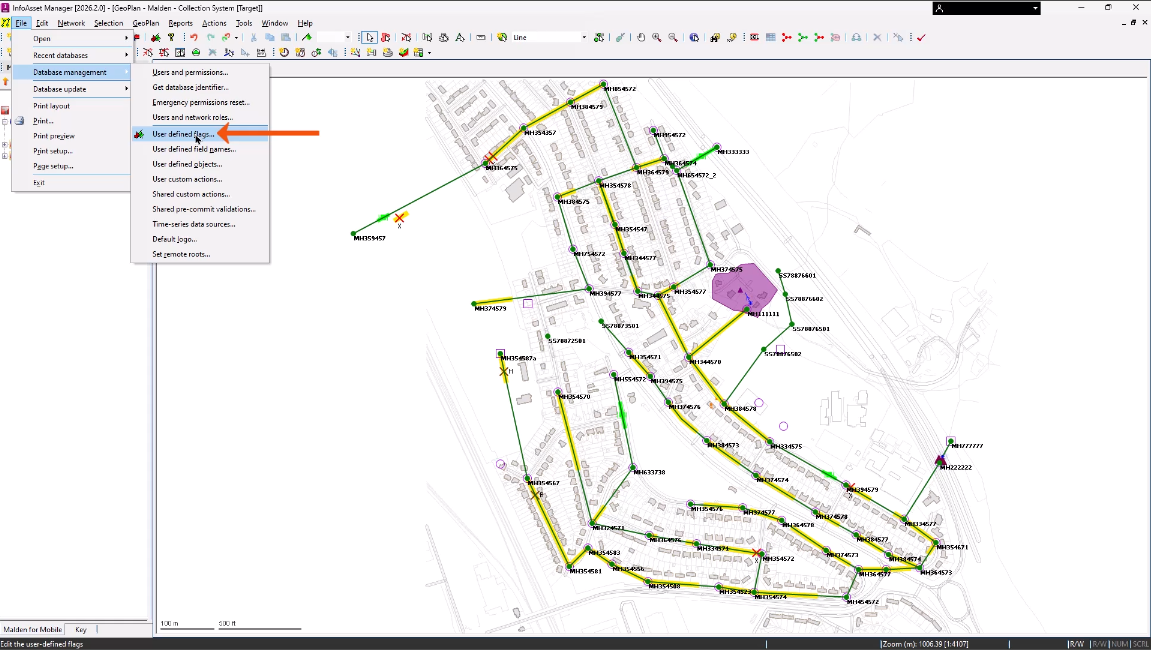
- From the File menu, select Database management > User defined flags.
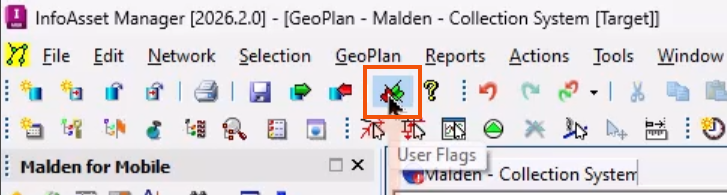
- Alternatively, from the File toolbar, click User Defined Flags.
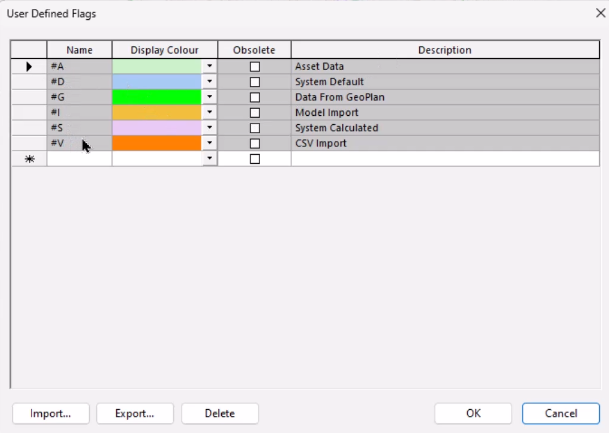
This opens the User Defined Flags dialog, with columns for the Name, Display Color, and Description of each flag.
Default flags appear at the top of the list in gray. These are required by some features and are typically used to show the origin of data or to mark data for some form of automatic update. Additionally, the names of default built-in flags start with the number sign (#) to differentiate them from user-defined flags.
When starting a project, it is best practice to first define the flags to be used in the networks.
Flags should indicate the data source and may also include a numerical value to represent the accuracy or confidence level of the data. They can be assigned one at a time or in bulk, and can also be selected for automatic assignment to any changes.
Defined flags are available to everyone using the database, can be exported and imported into a different database, and can be edited at any time.
To add a user-defined flag:
- In the User Defined Flags dialog, in the first blank row, enter a Name, such as initials.
- Add a Description, such as a first and last name.
- Expand the Display Color drop-down and choose a color for the flag.
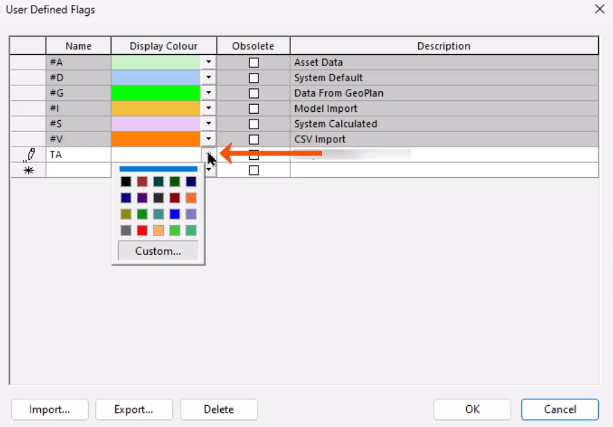
- If needed, click Custom to open the Colour dialog and assign a custom color.
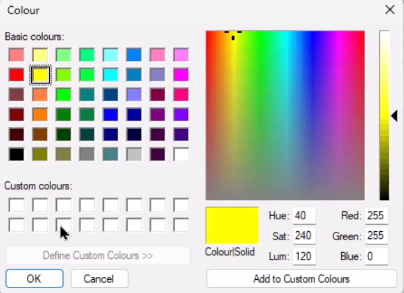
To see the flag text more easily, choose lighter colors. Colors can also be designated to coincide with the confidence level in data.
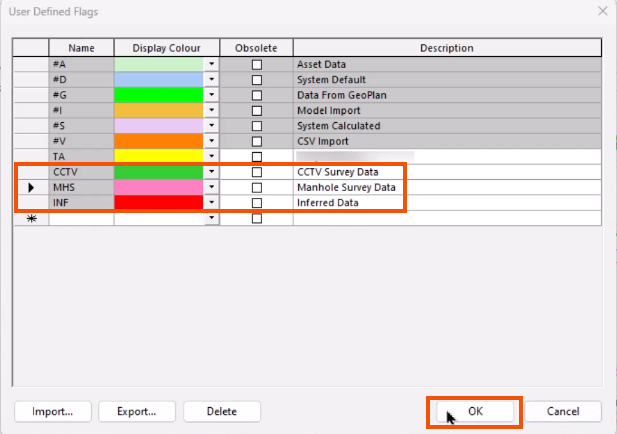
- Repeat the process to create flags with the following names and descriptions:
- CCTV - CCTV Survey Data
- MHS - Manhole Survey Data
- INF - Inferred Data
- Click OK to save the flags.
To automatically apply a flag to future editing operations:
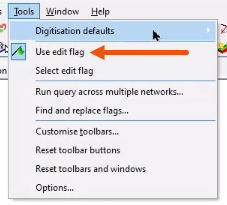
- From the Edit toolbar, click Use edit flag.
- In the drop-down that appears, select a user defined flag, such as CCTV.

- Expand the Tools menu to see that the Use edit flag option is enabled.
The selected flag will be applied to all changes made on the Grid windows or property sheets, including pasting from the clipboard and adjusting or replacing a block of values.
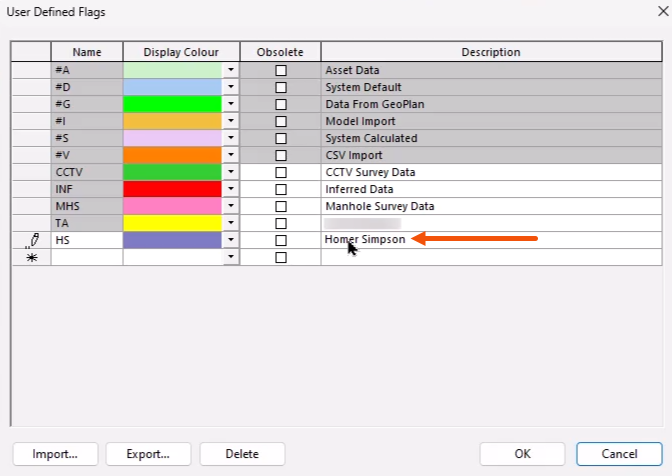
A useful example for a facility is to set up a flag for each user, as shown below, so that all changes can be easily tracked.
- To stop flagging data created in the network, click Use edit flag again to deselect it.

- To import and export flag settings in CSV format, from the User Defined Flags dialog, click Import or Export.
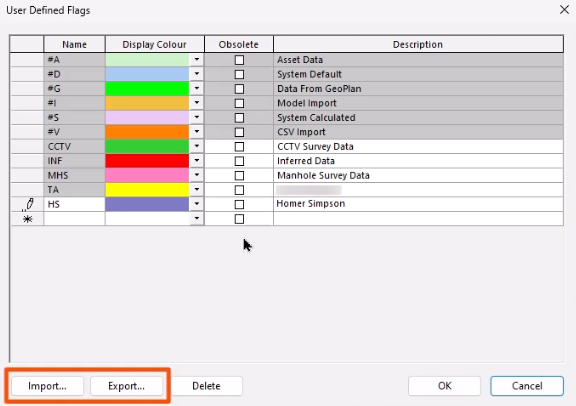
This allows the settings to be transferred between different databases or organizations.


