& Construction

Integrated BIM tools, including Revit, AutoCAD, and Civil 3D
& Manufacturing

Professional CAD/CAM tools built on Inventor and AutoCAD
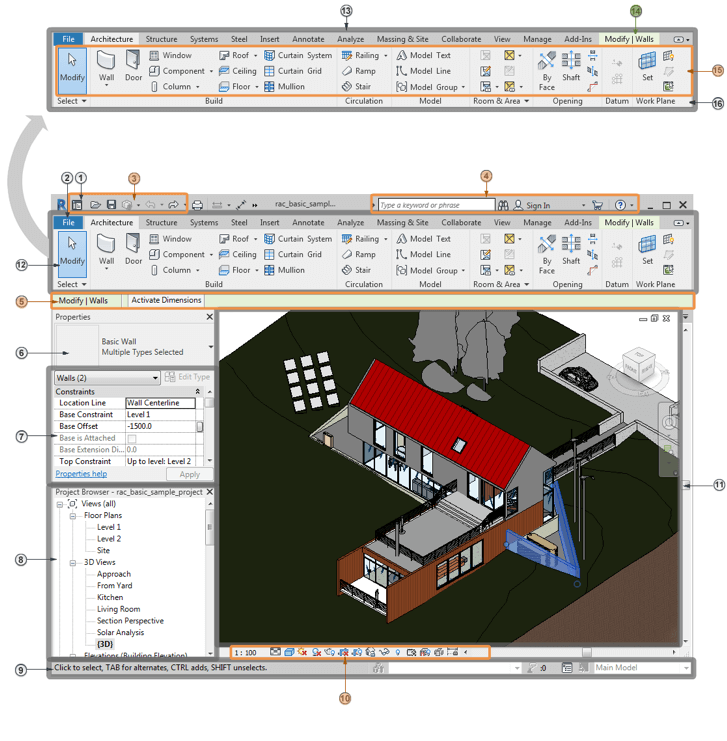
Learn where and how to perform common functions: open and arrange views of a model, modify element properties, use tools on the ribbon and the Quick Access toolbar, and change the view display on the View Control Bar.
With a few clicks, you can change the interface to better support the way you work.

Located on the lower left of your Revit screen, the Project Browser acts as a table of contents for your project. Use it to navigate and open views of the model. You can organize, sort, filter, and customize the Project Browser to support your workflow.

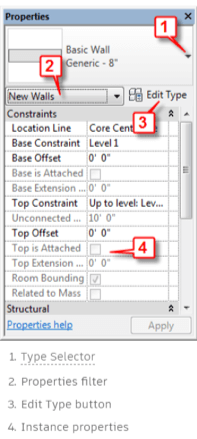
The Properties palette lets you view and modify parameters for selected elements. If no element is selected, it displays the properties of the current view. The palette appears by default to the left of the drawing area above the Project Browser.

You can undock the Properties palette so that it floats anywhere in the drawing area or on the desktop. You can also dock it to any edge of the drawing window or combine it with the Project Browser to save space.