Step-by-step guide
When creating an Informed Design product definition in Inventor, once the source content is defined and parameters are set in the desired order, you can author the rules to be used in the product definition.
Rules are authored using Google Blockly, a library for building beginner-friendly, block-based programming languages.
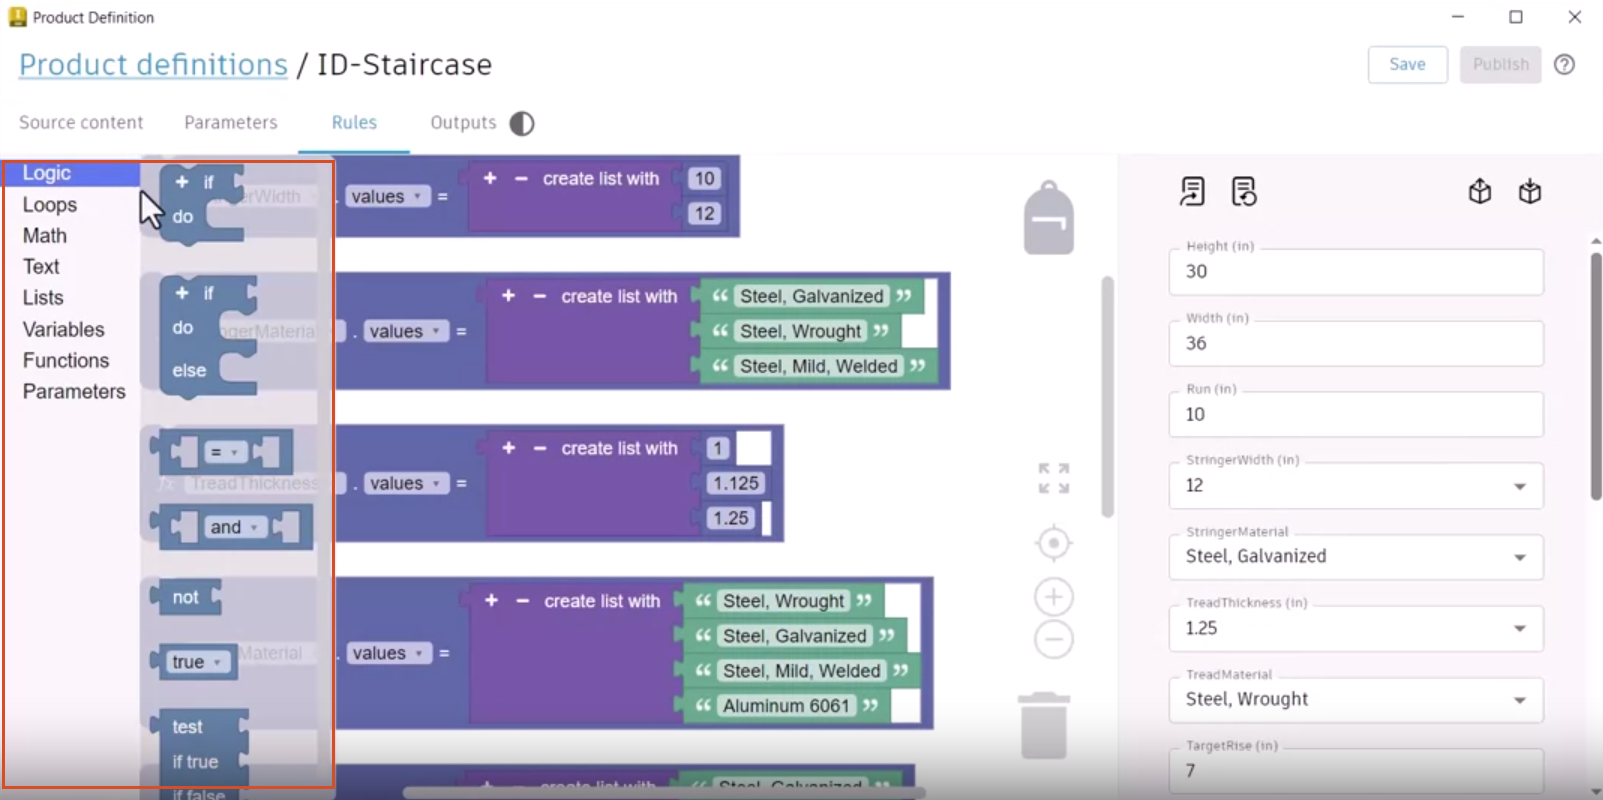
- Begin in the Product Definition dialog box, on the Rules tab. In this example, there are already constraints defined.
On the left is the Rules workspace toolbox, which has a variety of blocks sorted into categories, such as Logic, Math, Variables, and Functions. These are used to build block rules.
- Click each of the block categories to see the available blocks.
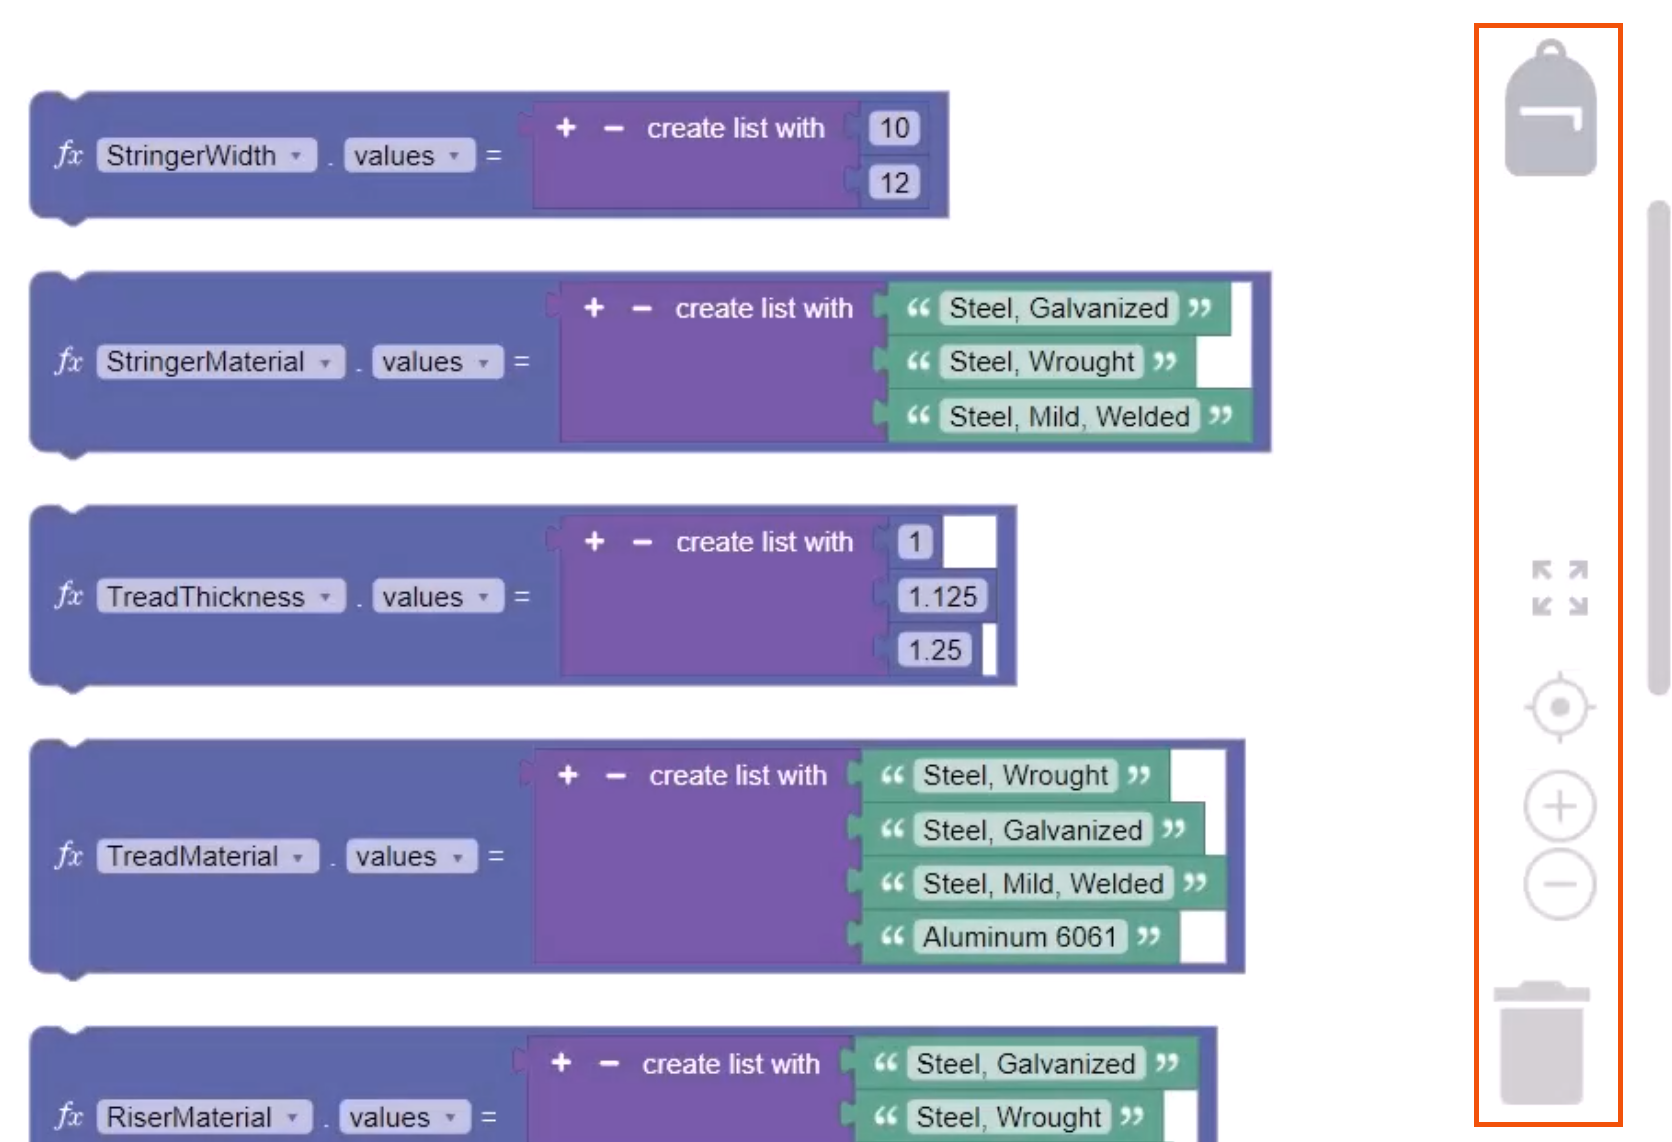
The middle area of the workspace is the canvas. Here, constraints are defined for product customization.
On the side of the canvas are tools to zoom in or out, or delete blocks. Drag and drop blocks on the backpack to save them for reuse.
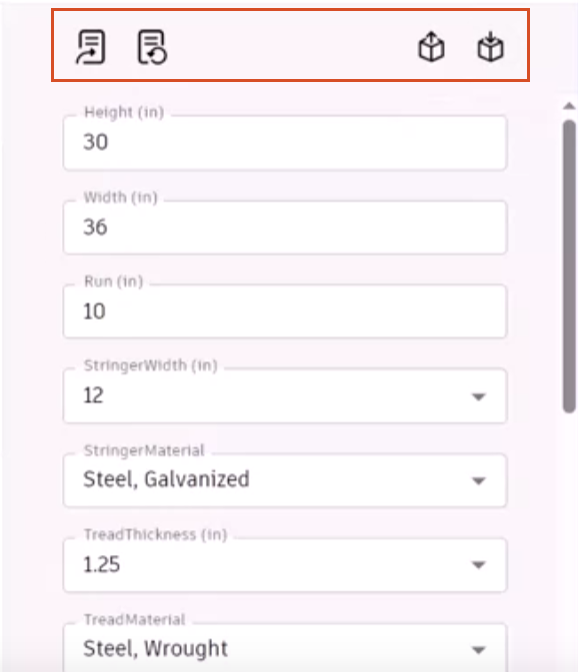
On the right side of the Rules workspace, the Form preview lists the adopted parameters in the order defined. Values can be entered and edited to test and preview behavior enforced by rules in the canvas.
At the top of the Form, the following synchronization controls are available:
- Update form
- Reset to defaults
- Get model values from the Inventor model
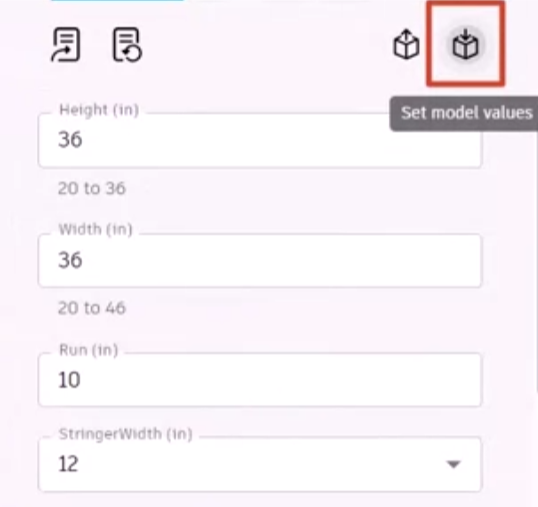
- Set model values to update the Inventor model using the Form values
To create a new rule, add blocks to the canvas:
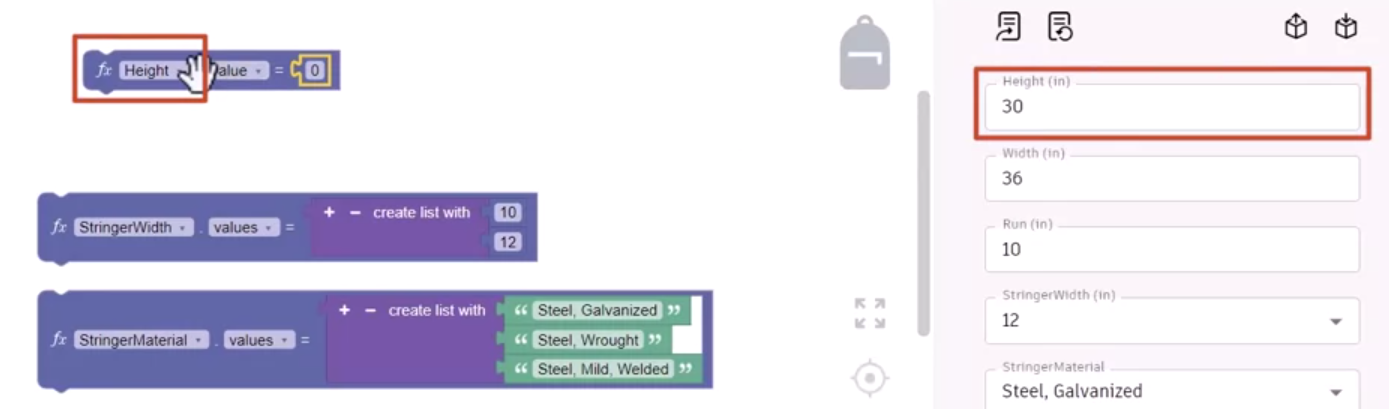
- In the toolbox, click Parameters. Select and drag the Height block to the top of the canvas.
- Click Math. Drag the top Value block and drop it directly onto the corresponding space in the Height parameter on the canvas. Notice that each block resembles a puzzle piece.
The Height entry in this block corresponds to the Height entry in the Form preview.
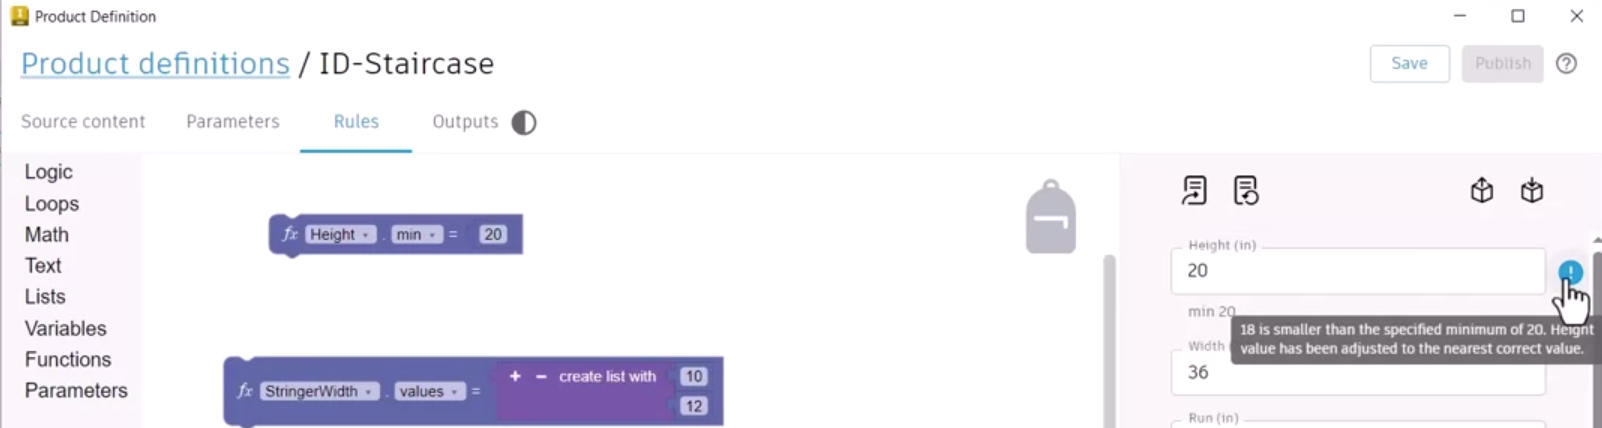
- For Height, change the value to min, and then enter a value of 20.
- In the Form, click Update form. The Form preview displays min 20 under the Height parameter.
- For the Height parameter, change the value to 18, and then press ENTER.
The value is rounded up to 20, as that is the minimum value set for this parameter.
- Hover the pointer over the Information icon for a more detailed explanation.
- Use CTRL+C and CTRL+V to copy and paste the Height block. Drag the duplicate and connect it below the Height block. An audible click confirms the connection.
- For this block, change the Value to max, and then set the value to 90.
- Update the form again. The rule under Height now displays as 20 to 90. Only values between 20 and 90 are accepted for this parameter.
To change an allowed min or max value, simply update the block with the new value, and then click Update form.
- Copy and paste the block two more times to create Width parameters with a min value of 20 and a max value of 46.
- Update the Form again to verify the corresponding rules update.
In addition to minimum and maximum rules, other options, such as increment, readOnly, or message rules can be applied.
Setting up rules here and publishing them allows the user to bring the model into the Revit environment with these controls as constraint limits set by the product manufacturer.
- To test rules, in the Form, click Set model values to update the Inventor model. The model updates in the graphics window.
- With source content defined, parameters set, and rules authored, click Save to save the product definition locally.