Perform validation in InfoAsset Manager
Step-by-step guide
Validation options can be used to examine a network for missing values, errors, and inconsistencies. Validation can be carried out at any time on the whole network, on a zone, or only on currently selected network objects. It is also possible to have the network validated automatically when committing changes to the database, if pre-commit validations have been defined.
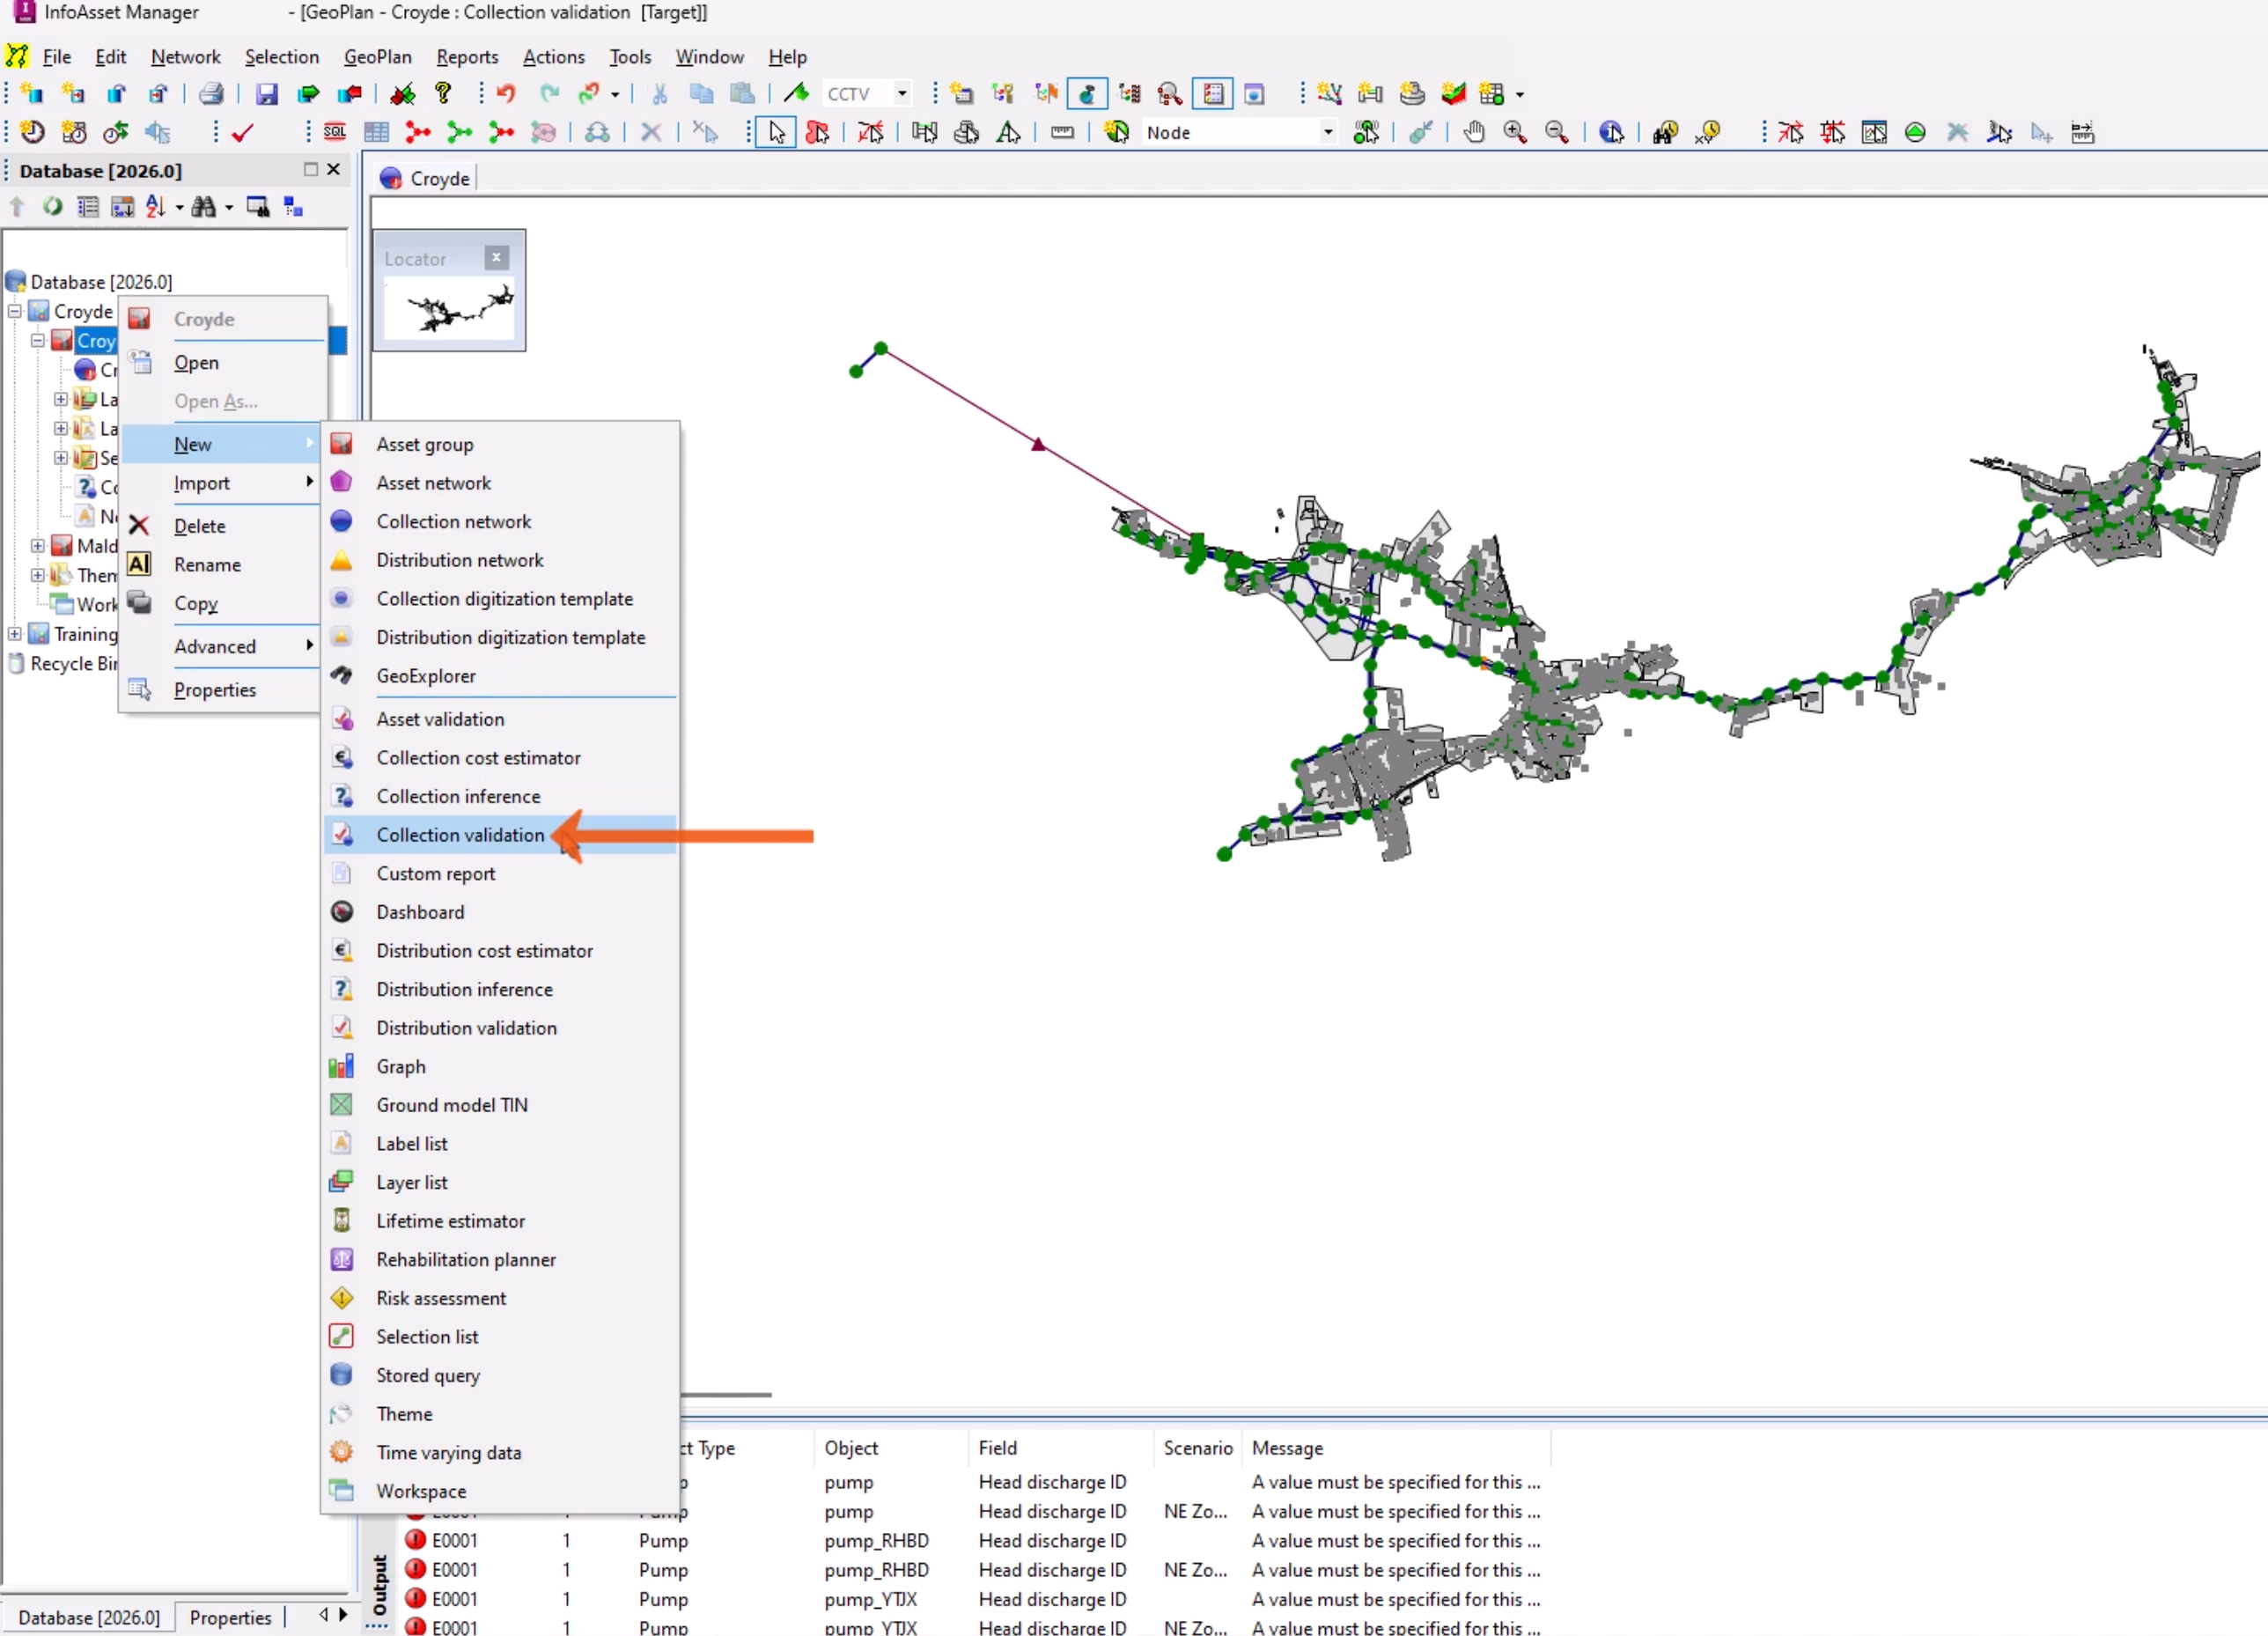
To validate the network, first, a validation data object containing a set of validation rules must be created.
- From the Explorer window, right-click an Asset Group and select New > Collection Validation.
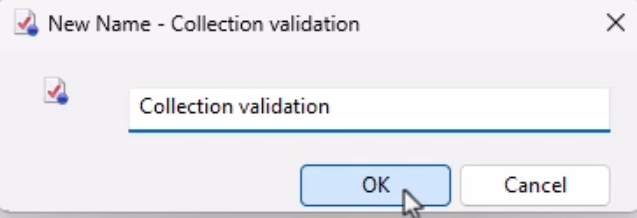
- In the New Name popup, add a Name, such as “Collection validation”.
- Click OK.
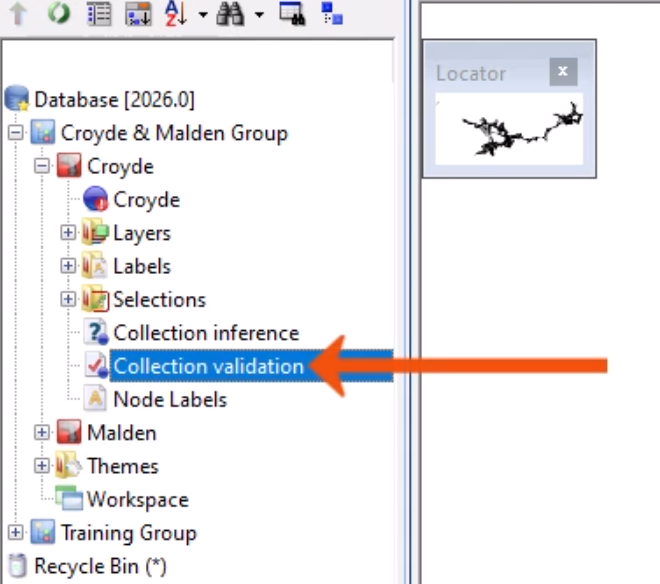
- Double-click the new object.
This opens the Validation Editor, which is used to view and edit the parameters for a Validation object, such as switching rules on or off, adjusting parameters and priority levels, or creating rules.
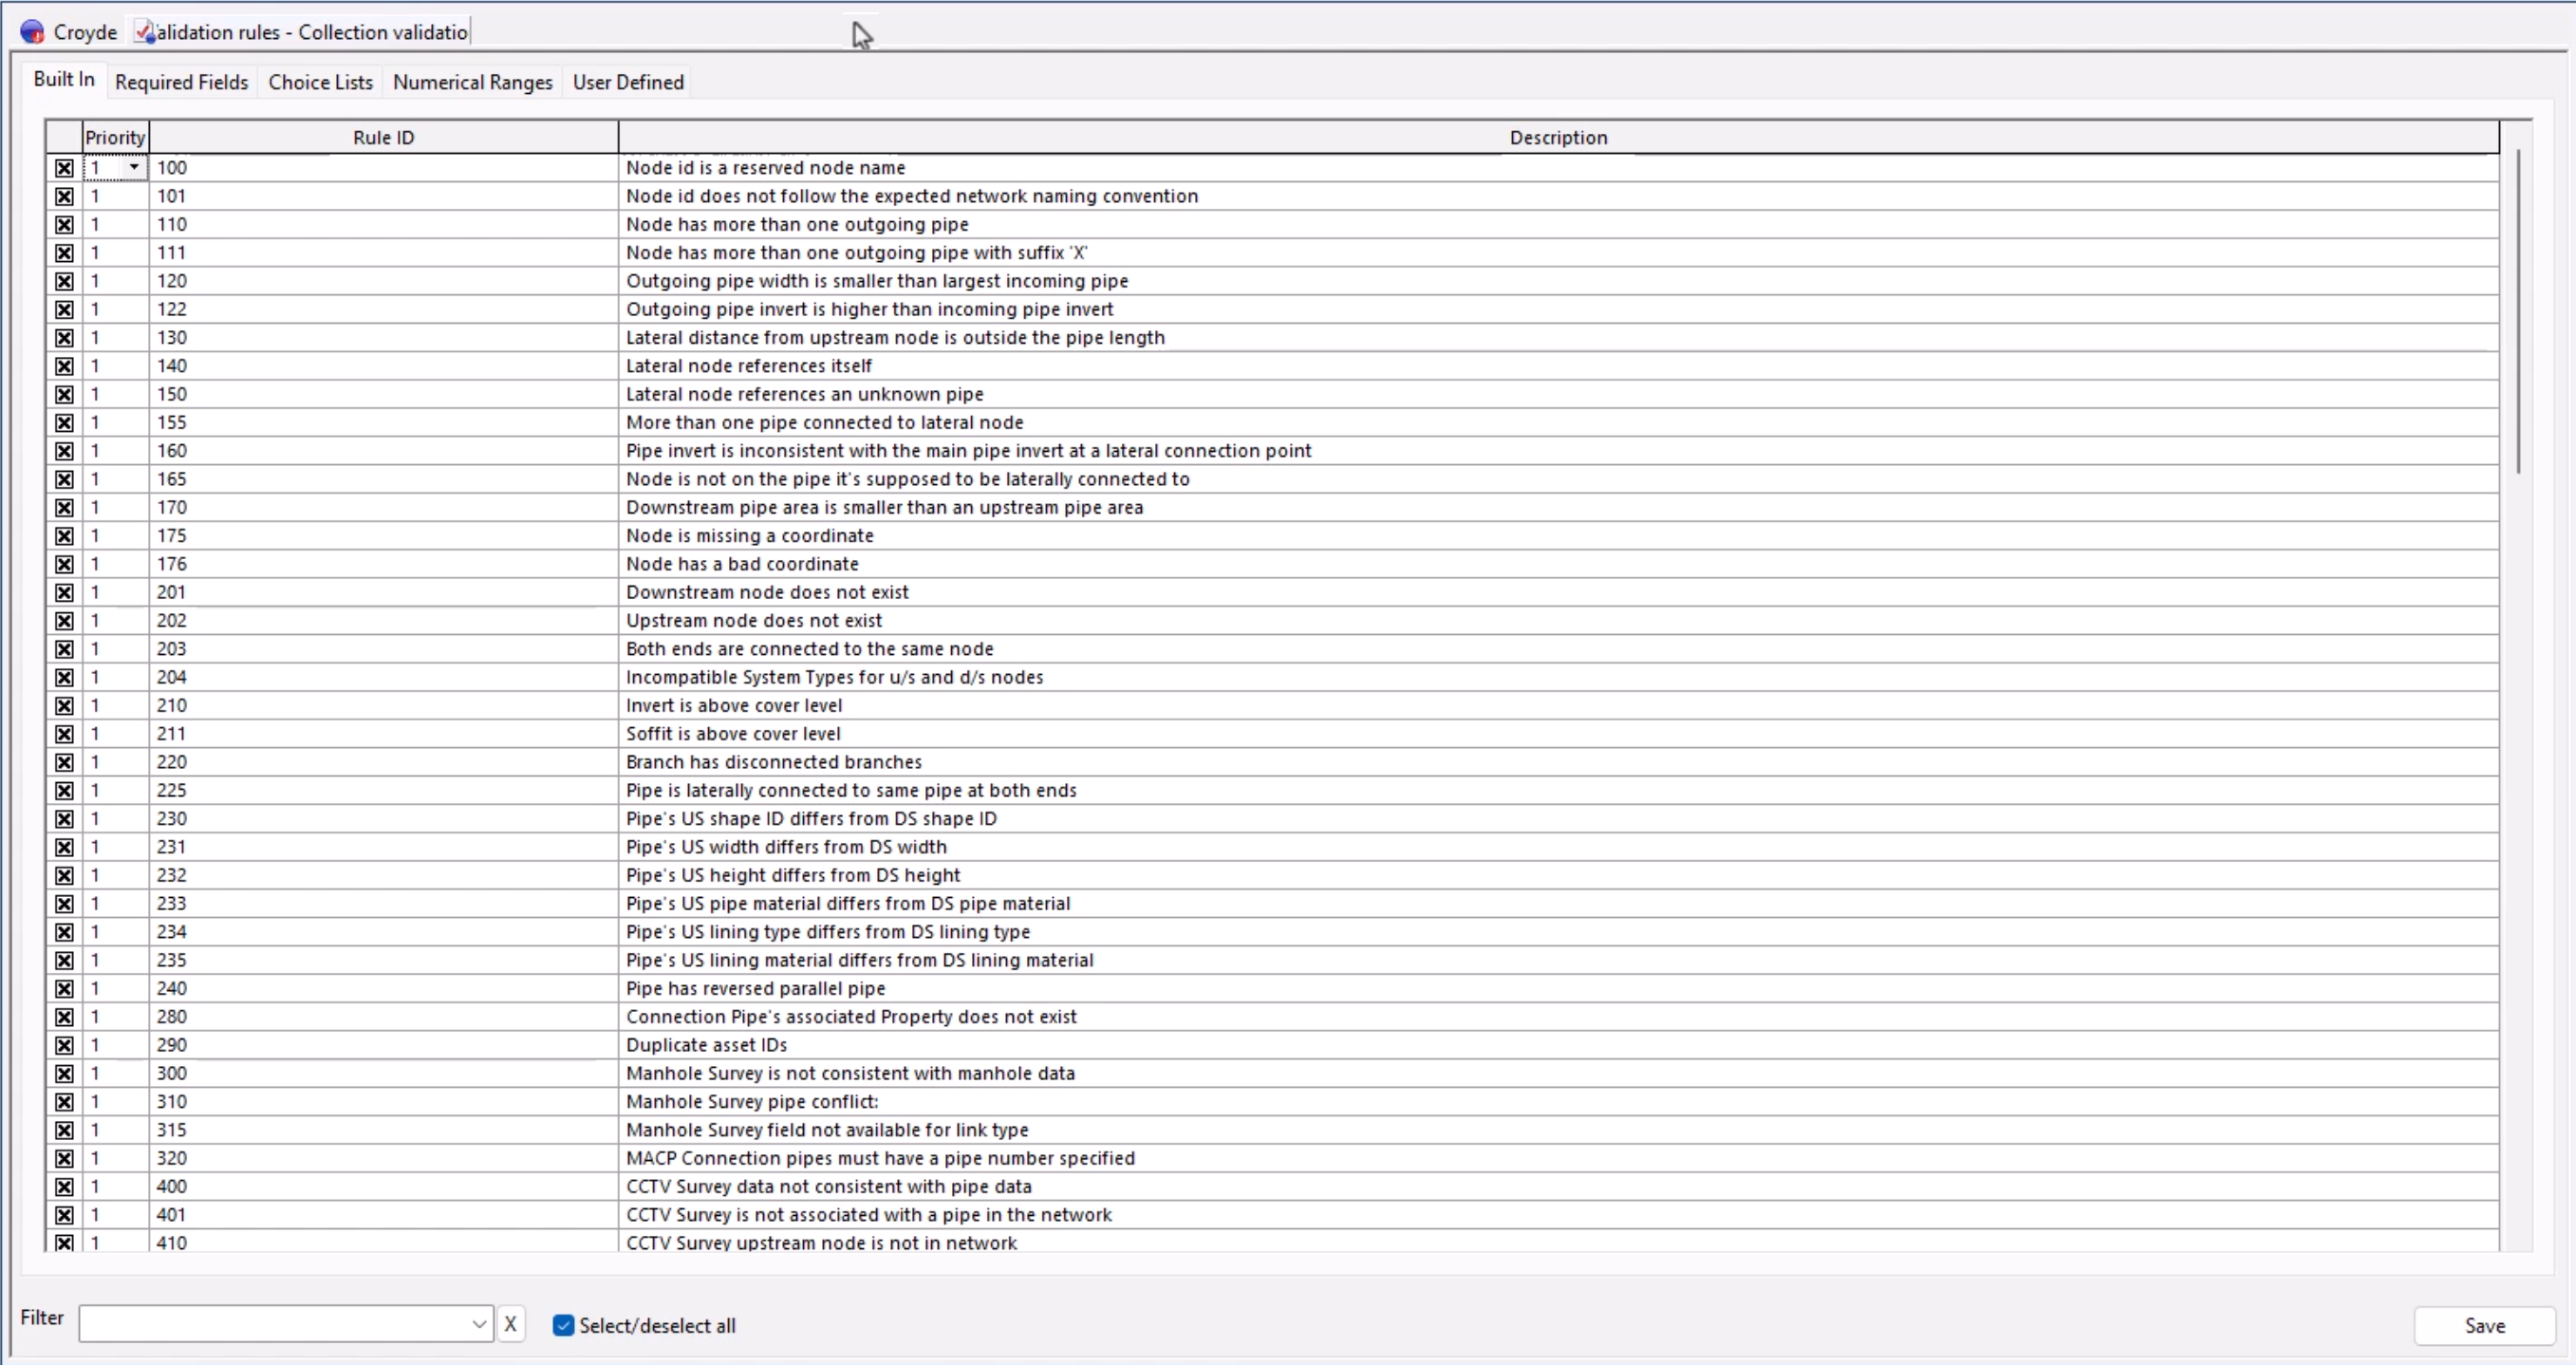
Any number of validation data items can be created, allowing different validation settings for different networks, or for different types of data checking.
In some cases, a Validation object is provided by a client, allowing validation of the network prior to submitting data back to the client.
- For this example, leave the default settings and click Save.
- To associate the new validation data object with the network, drag and drop it onto the GeoPlan.
- From the Network menu, click Validate network.
- Alternatively, on the Validation toolbar, click Validate.
- In the popup, choose the Data Source Type for the validation. In this case, select Network.
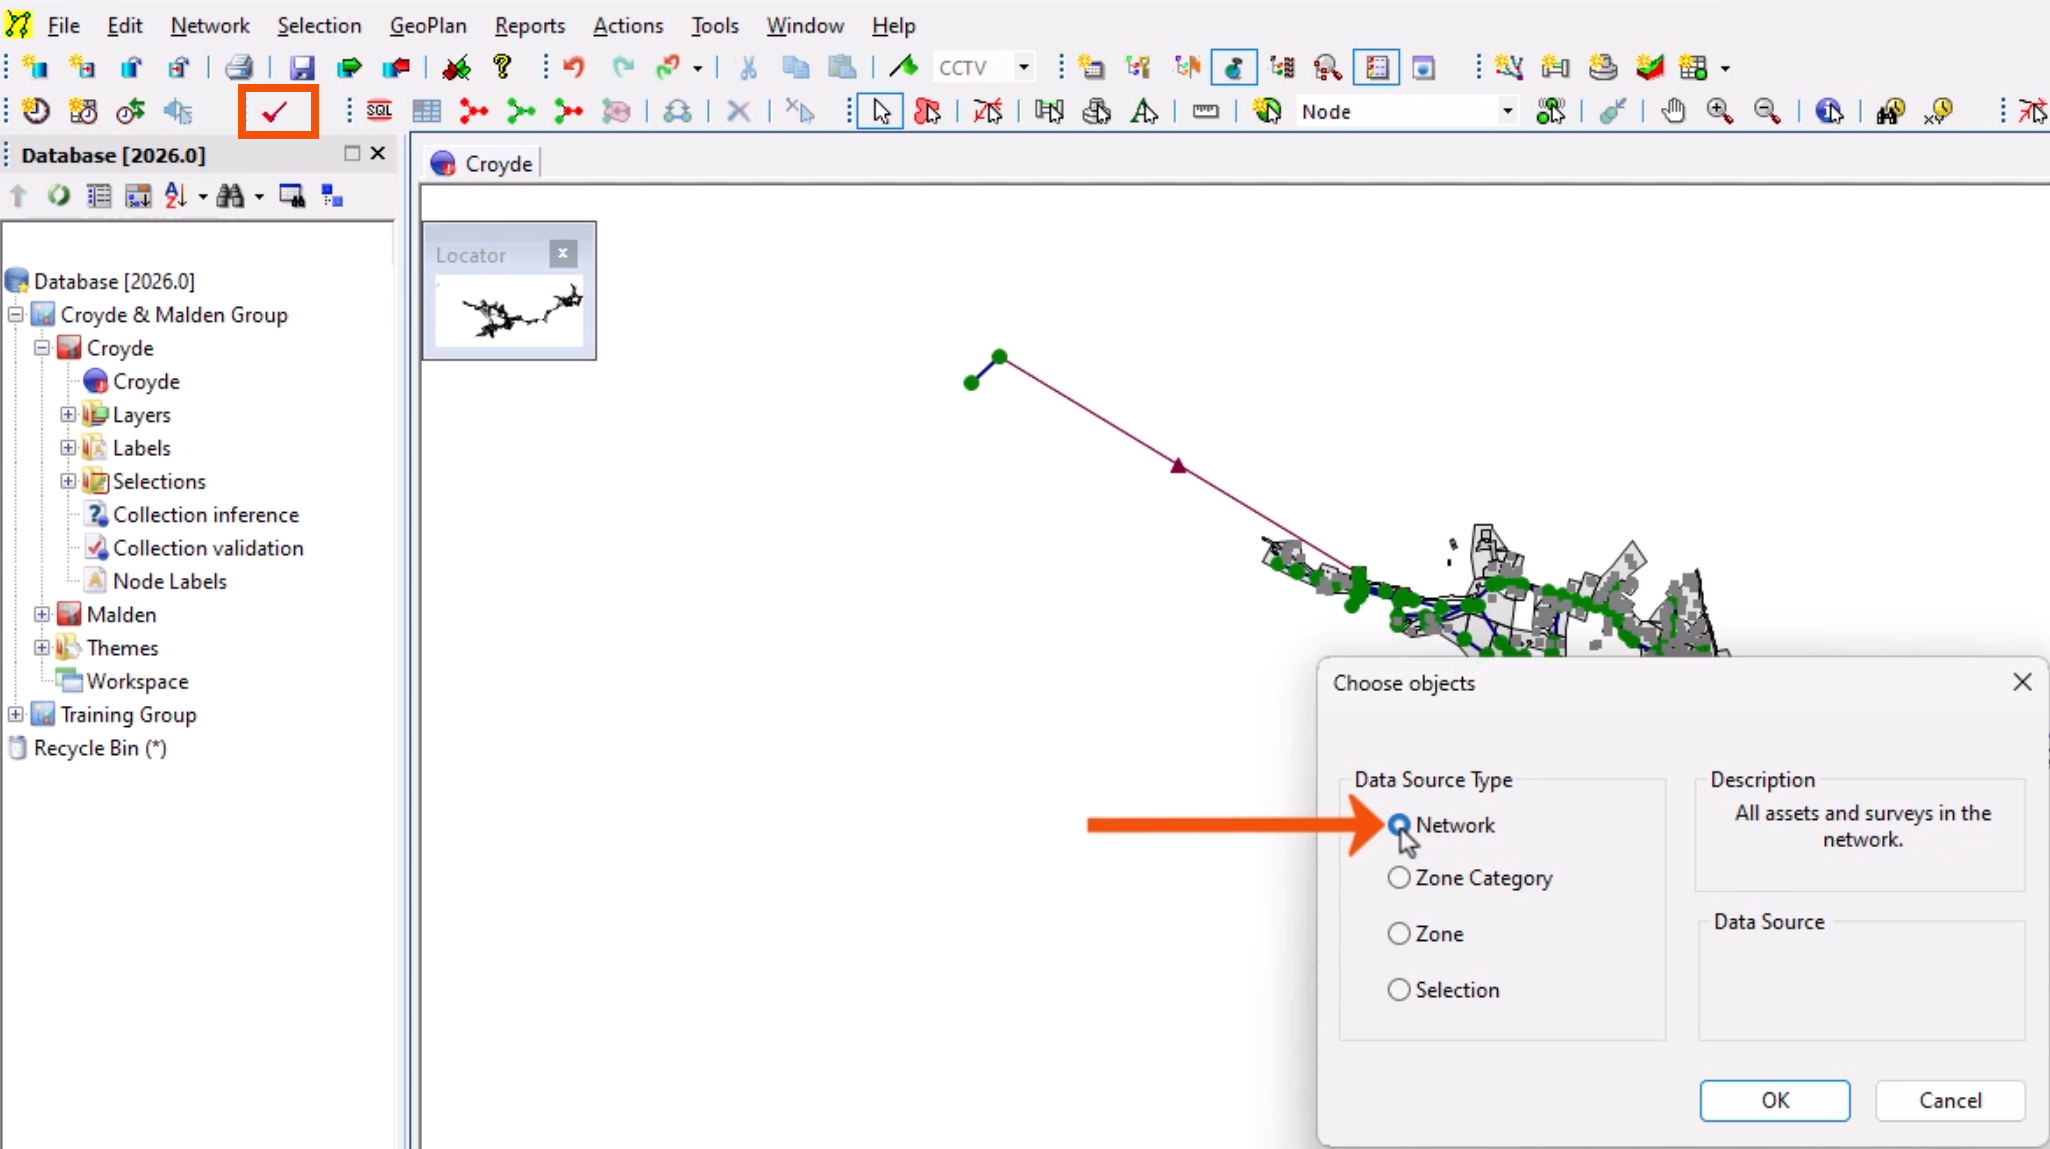
- Click OK.
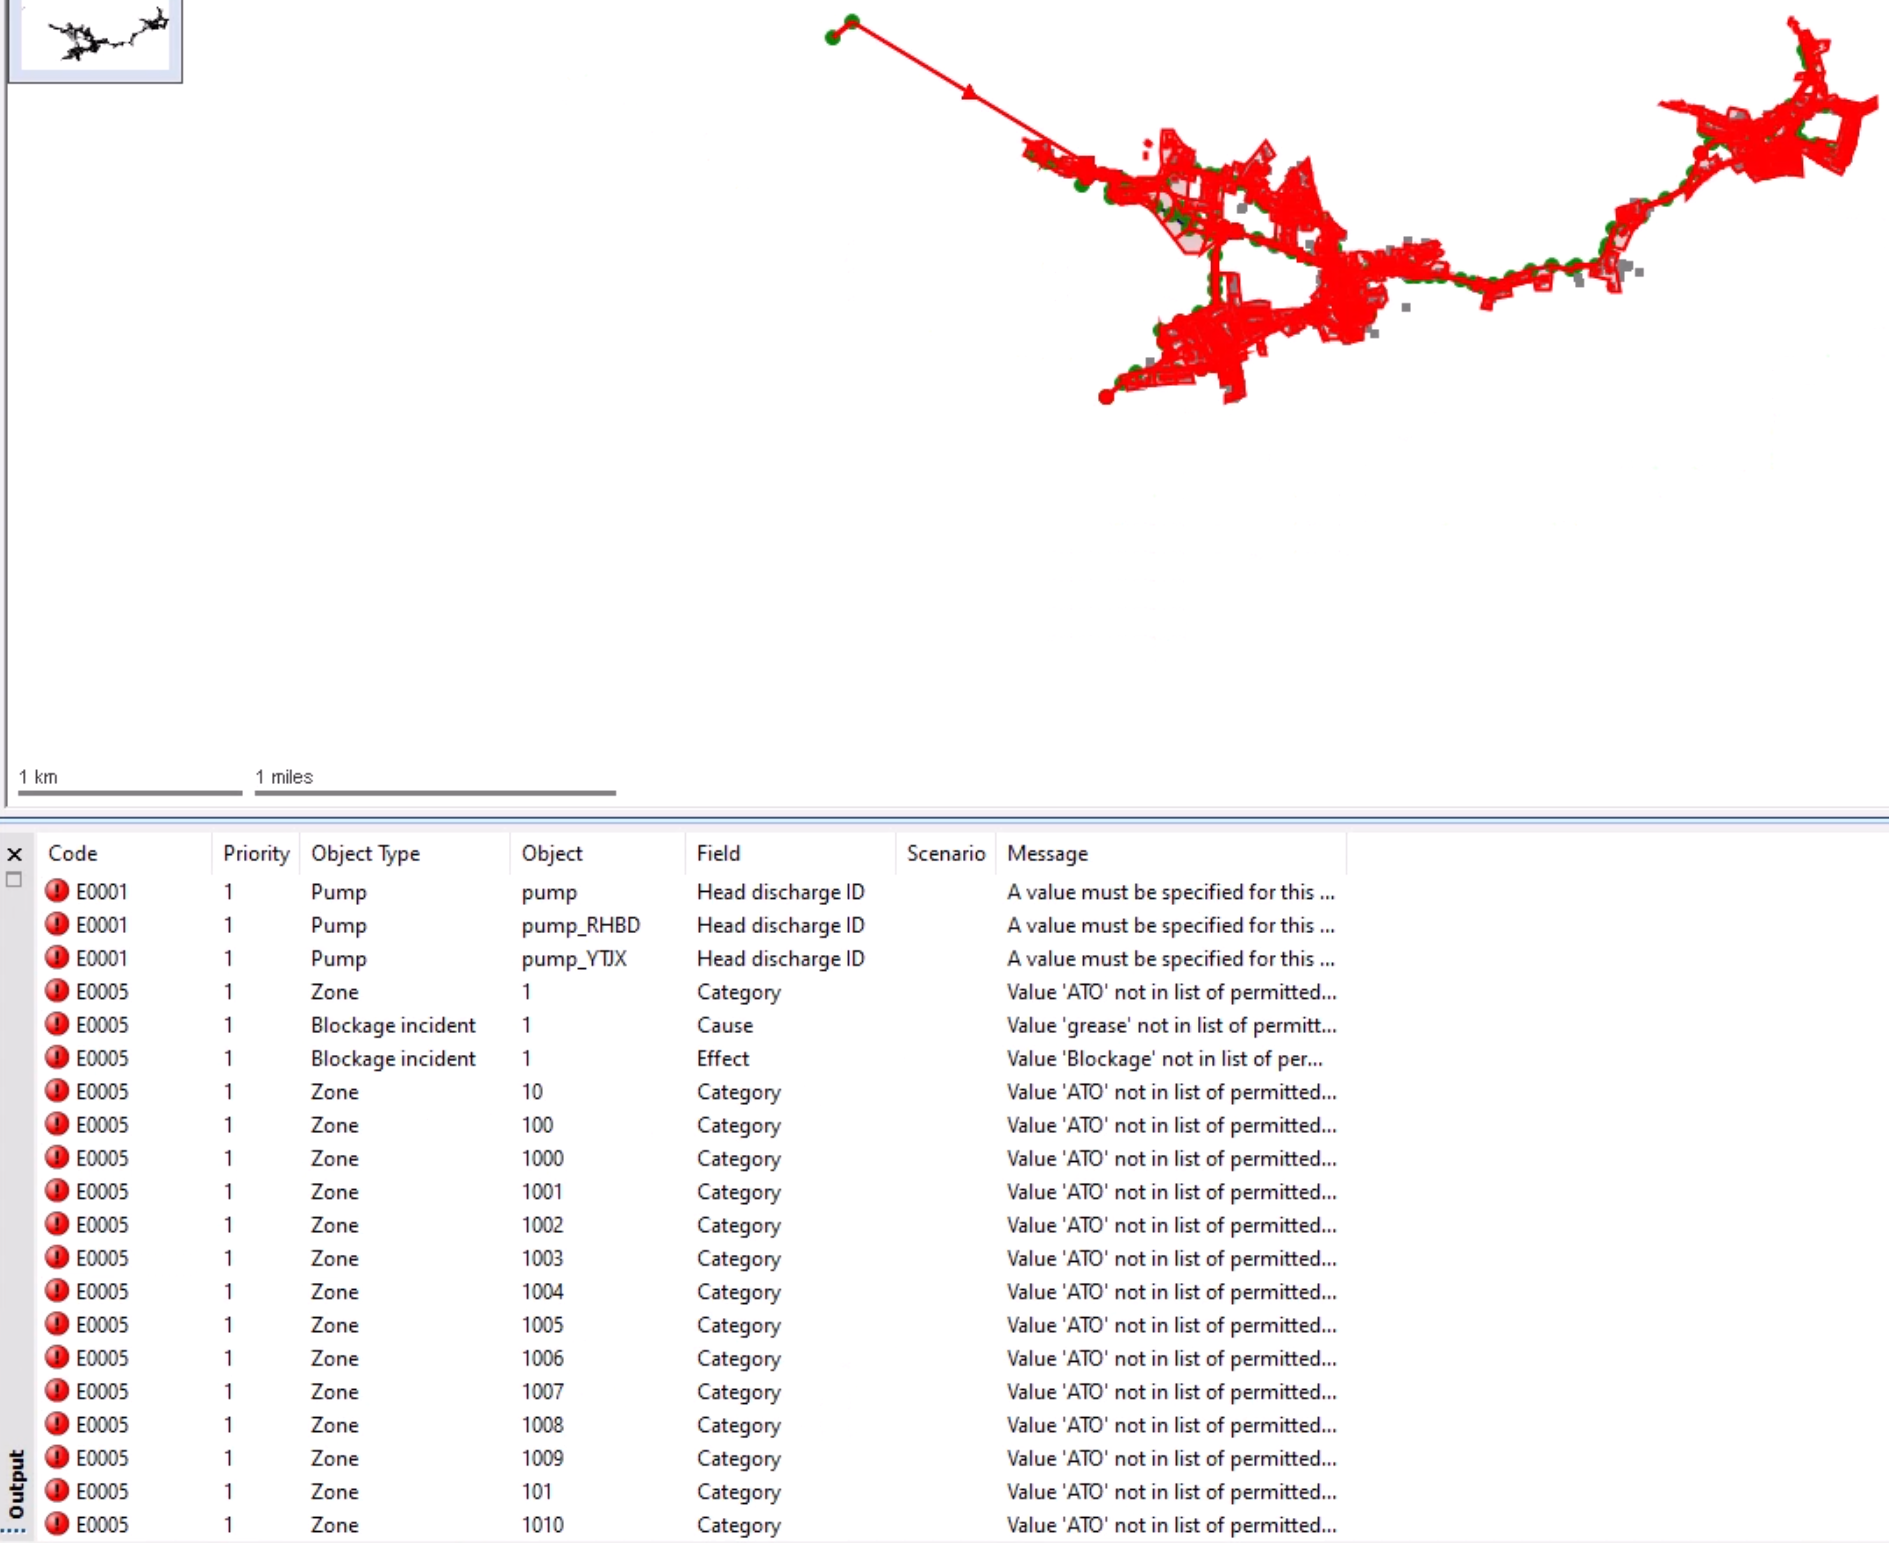
The results of the validation are displayed in the Output window. The output shows all validation failures, with an icon relevant to the priority level, the validation rule code, and details of the object with the failure.
- Double-click an output code row to open the survey window grid with the relevant field for the object in focus.
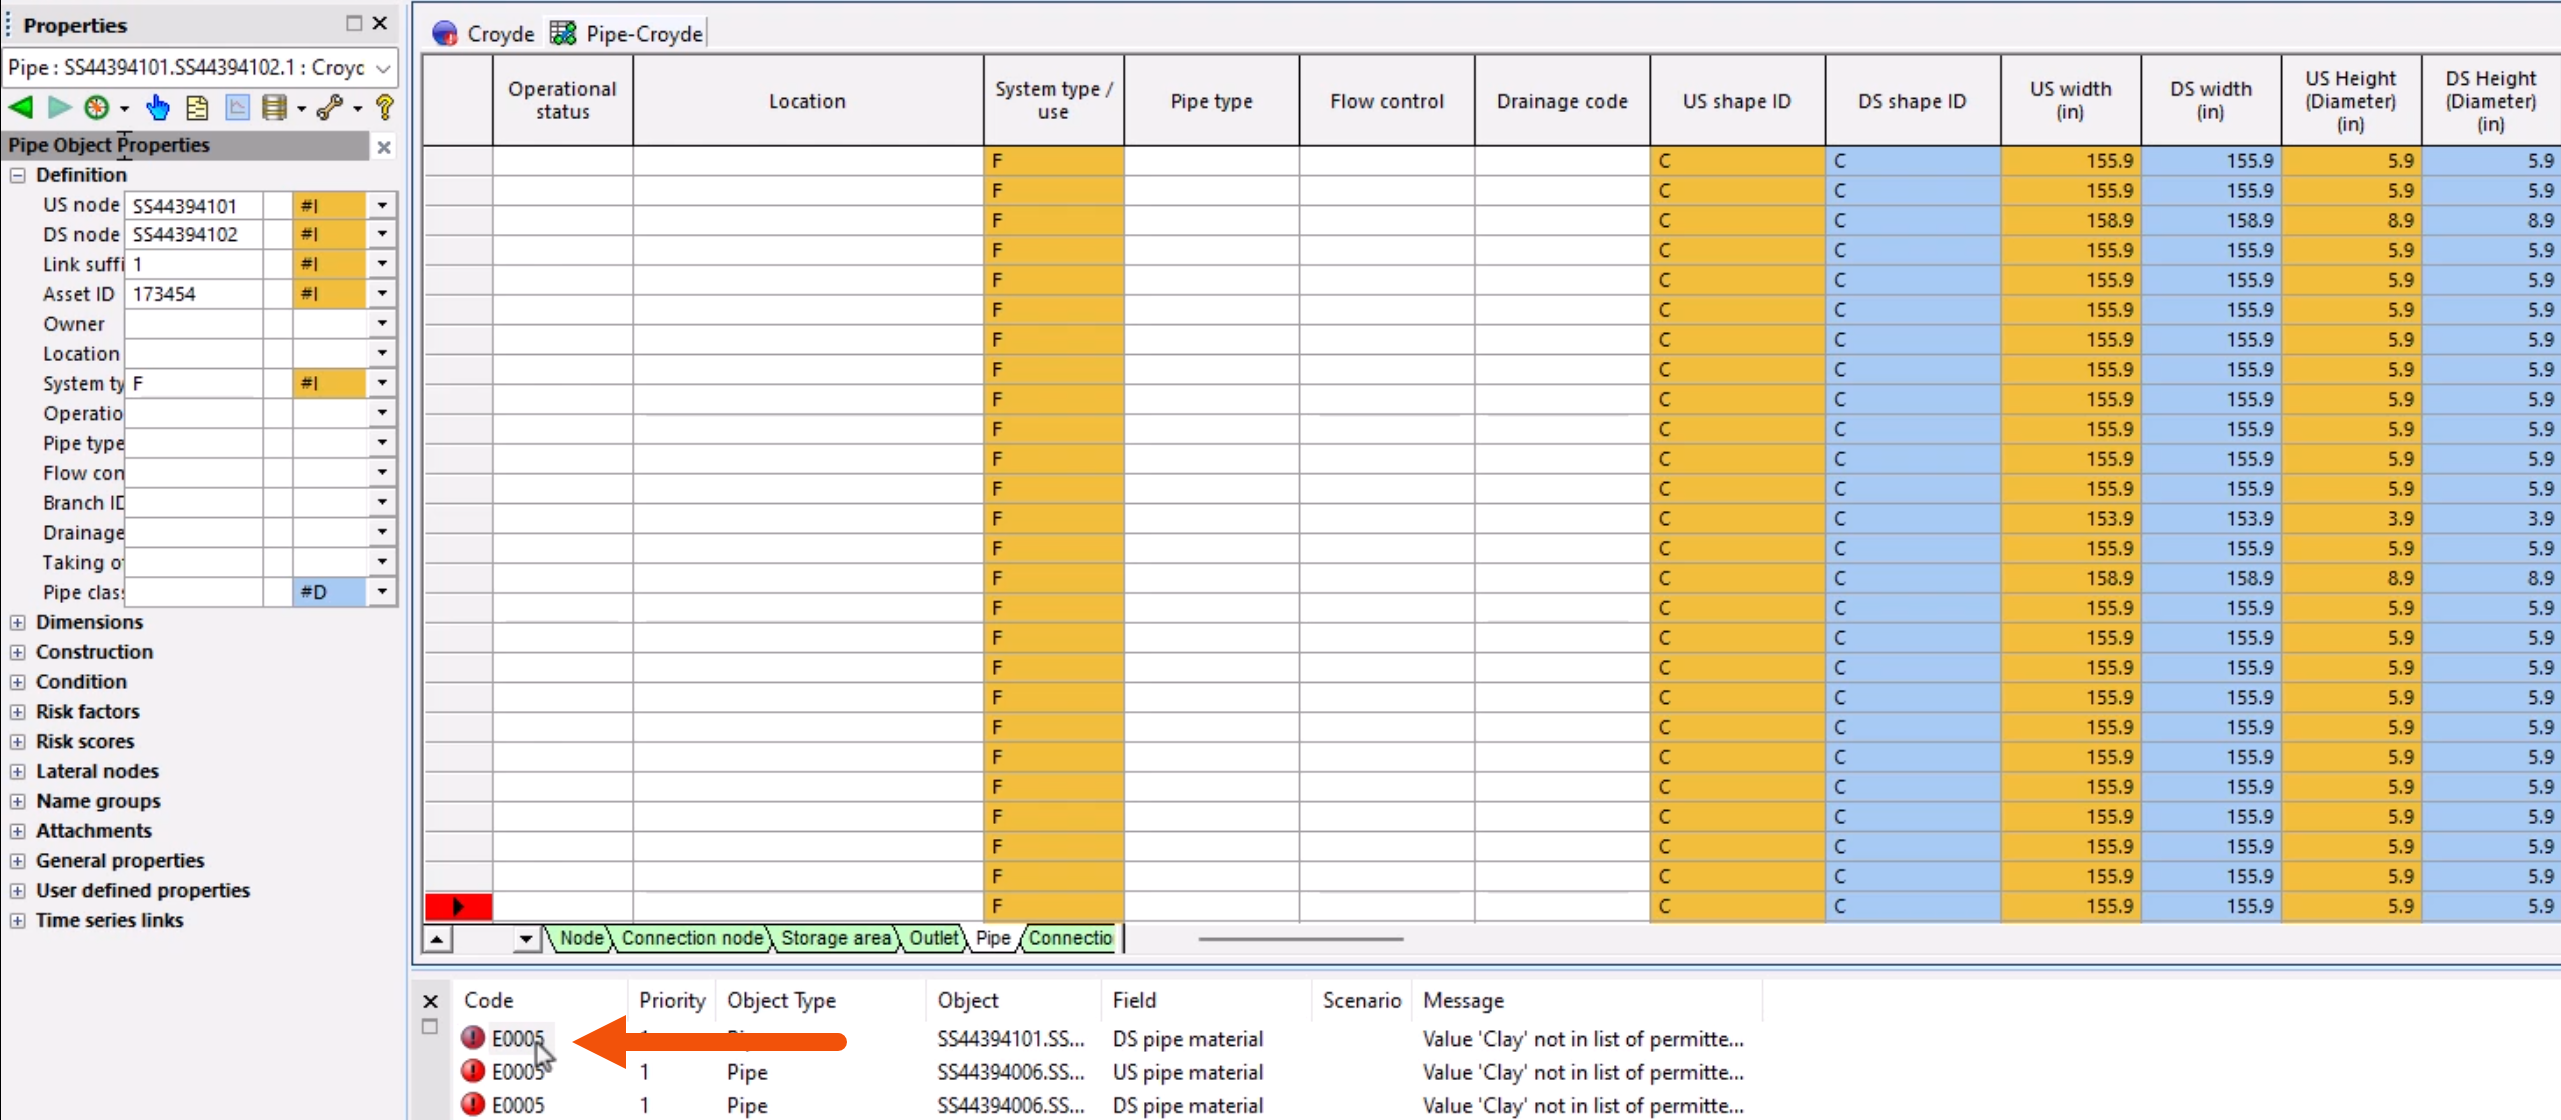
- Right-click an output code row and select Go to Property Page to open the property sheet.
On the property sheet, fields with validation issues are highlighted by a colored bar between the field name and the field cell, corresponding to the priority of the validation issue.
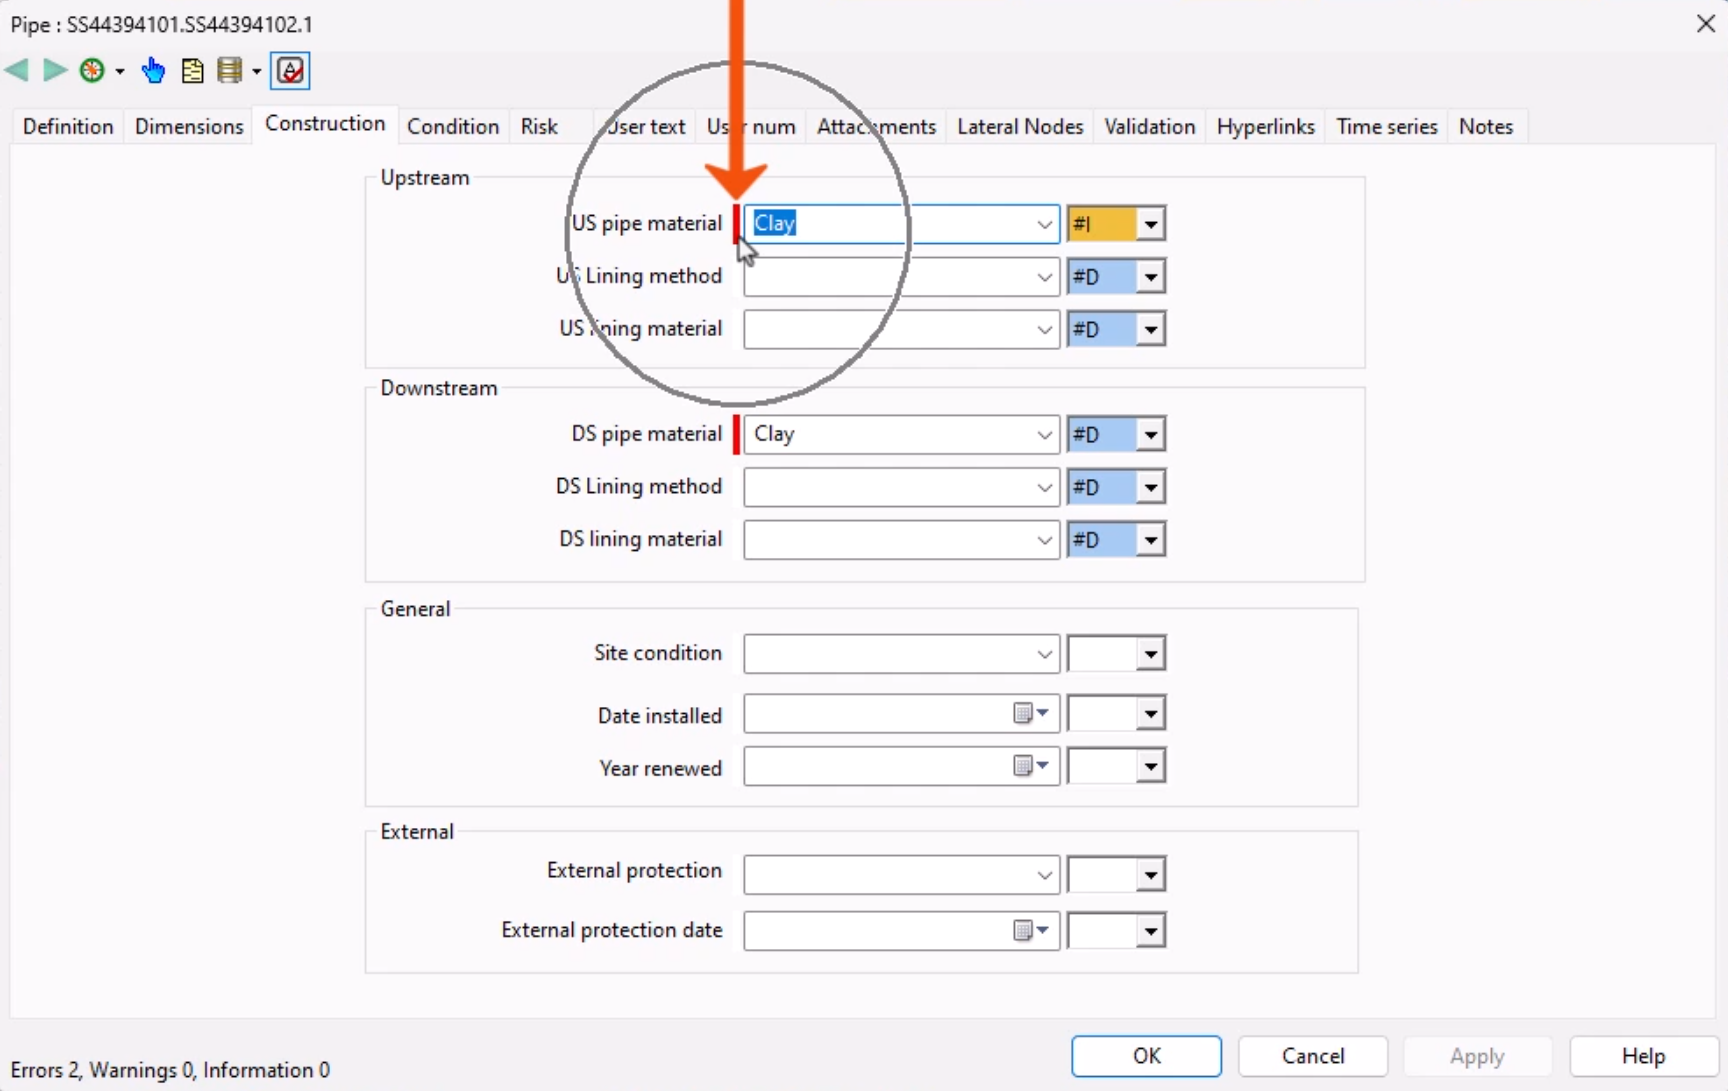
- From the property sheet toolbar, select Validate as you type to immediately display validation failures while a field value is being entered.
- Switch to the Validation tab to see all validation failures for that object.

- Click OK to close the property sheet.
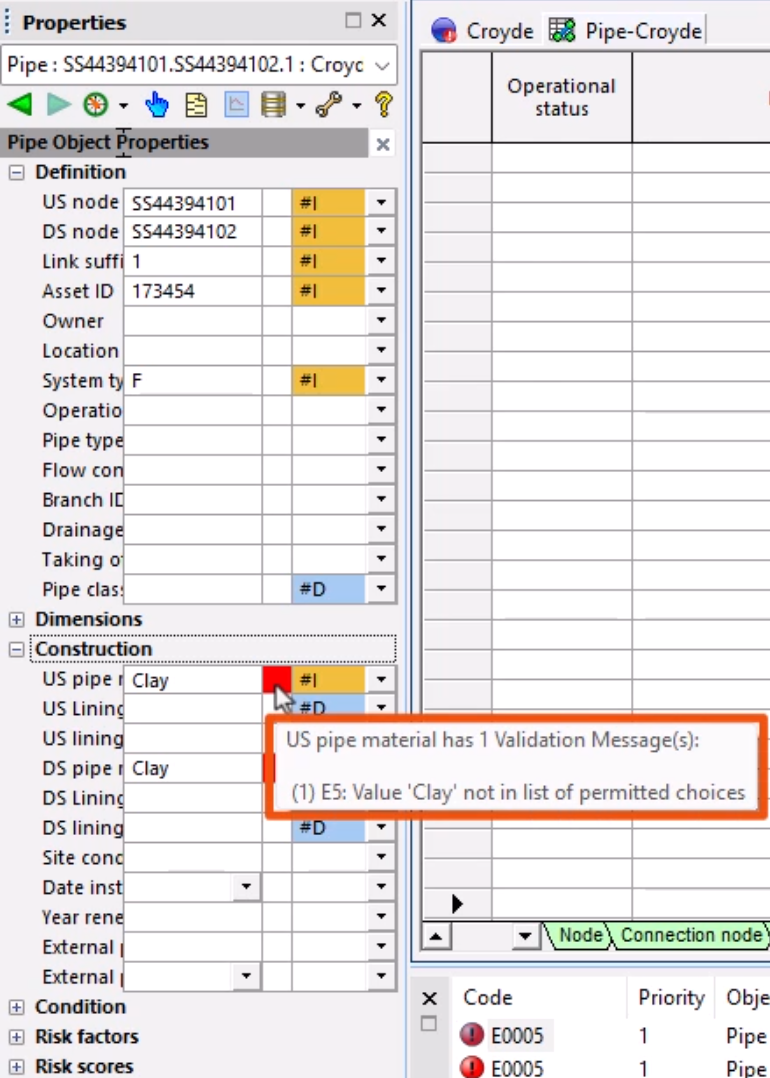
In the Object Properties window, validation errors are displayed against each field by default.
- Place the cursor over a validation icon to display a tooltip with details about the validation error, such as the name of the network object where the anomaly occurred, or the cause of the error.
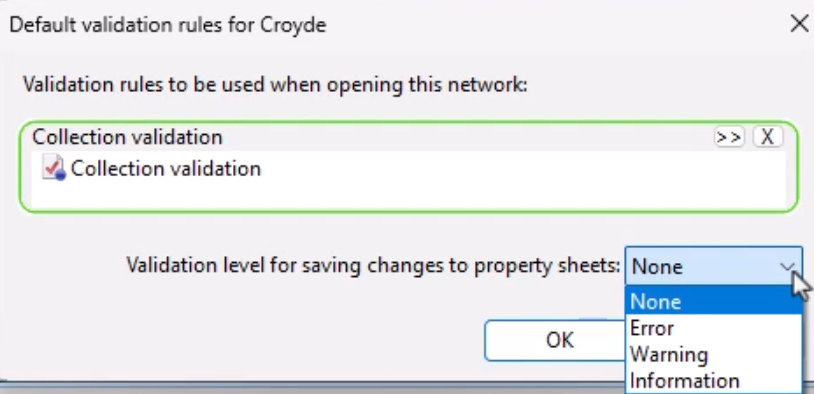
- To set Network Validation preferences, select Network > Default Validation Rules.
These rules apply to all network users, and do not require the validation object to be associated with a network manually. It is also possible to use the network defaults to restrict editing of objects via the property sheets when the validation has failed.
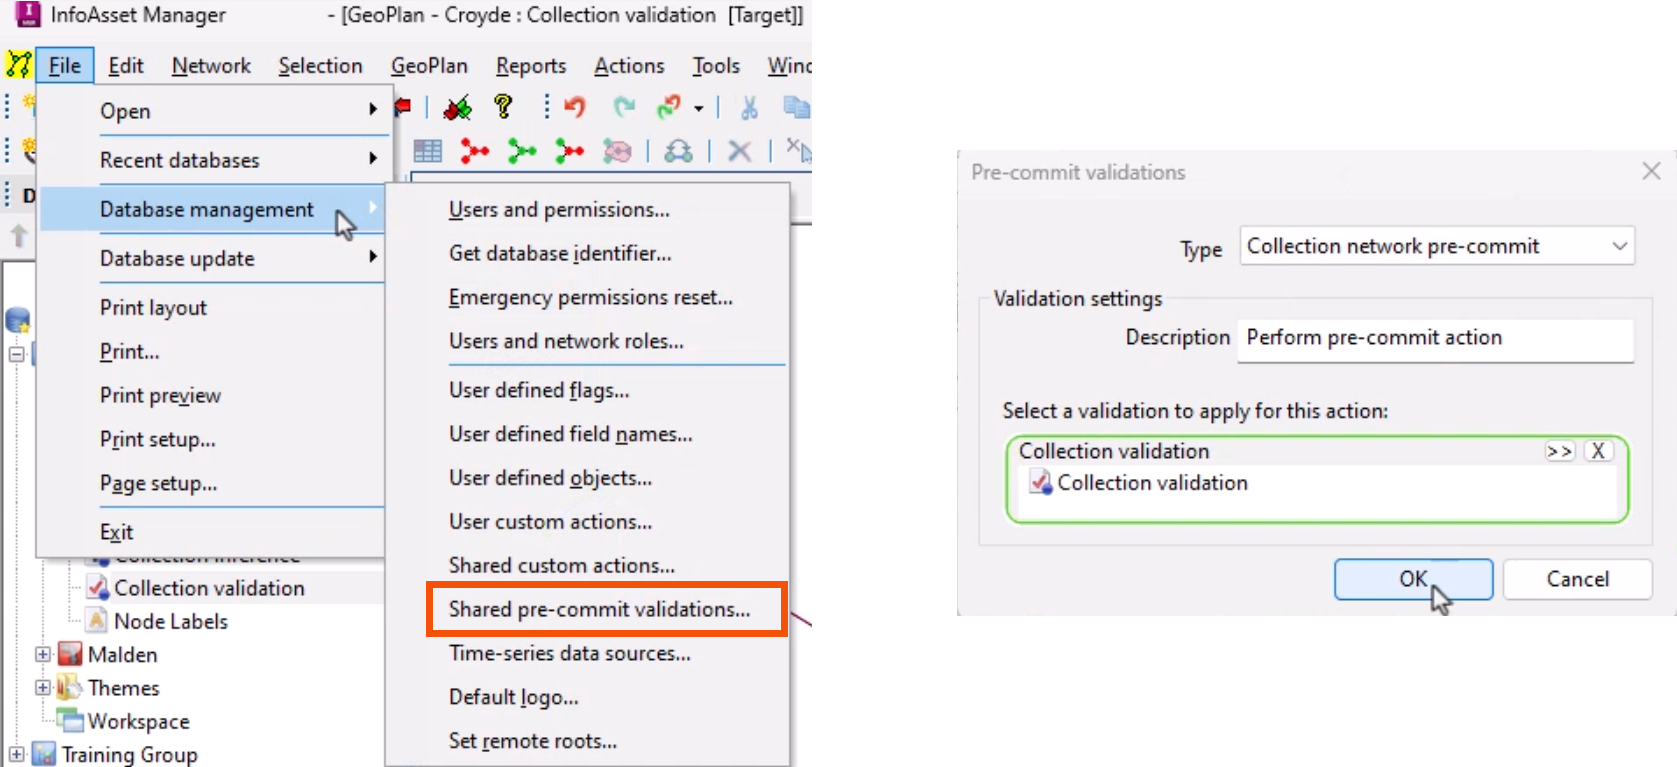
The network can also be set up so that validation occurs automatically as part of a commit operation, with the same validation rules applied to all applicable users across the same type of network.
- From the File menu, expand Database management and select Shared pre-commit validations.
- In the Pre-commit validations dialog, select the appropriate settings.
- Click OK.
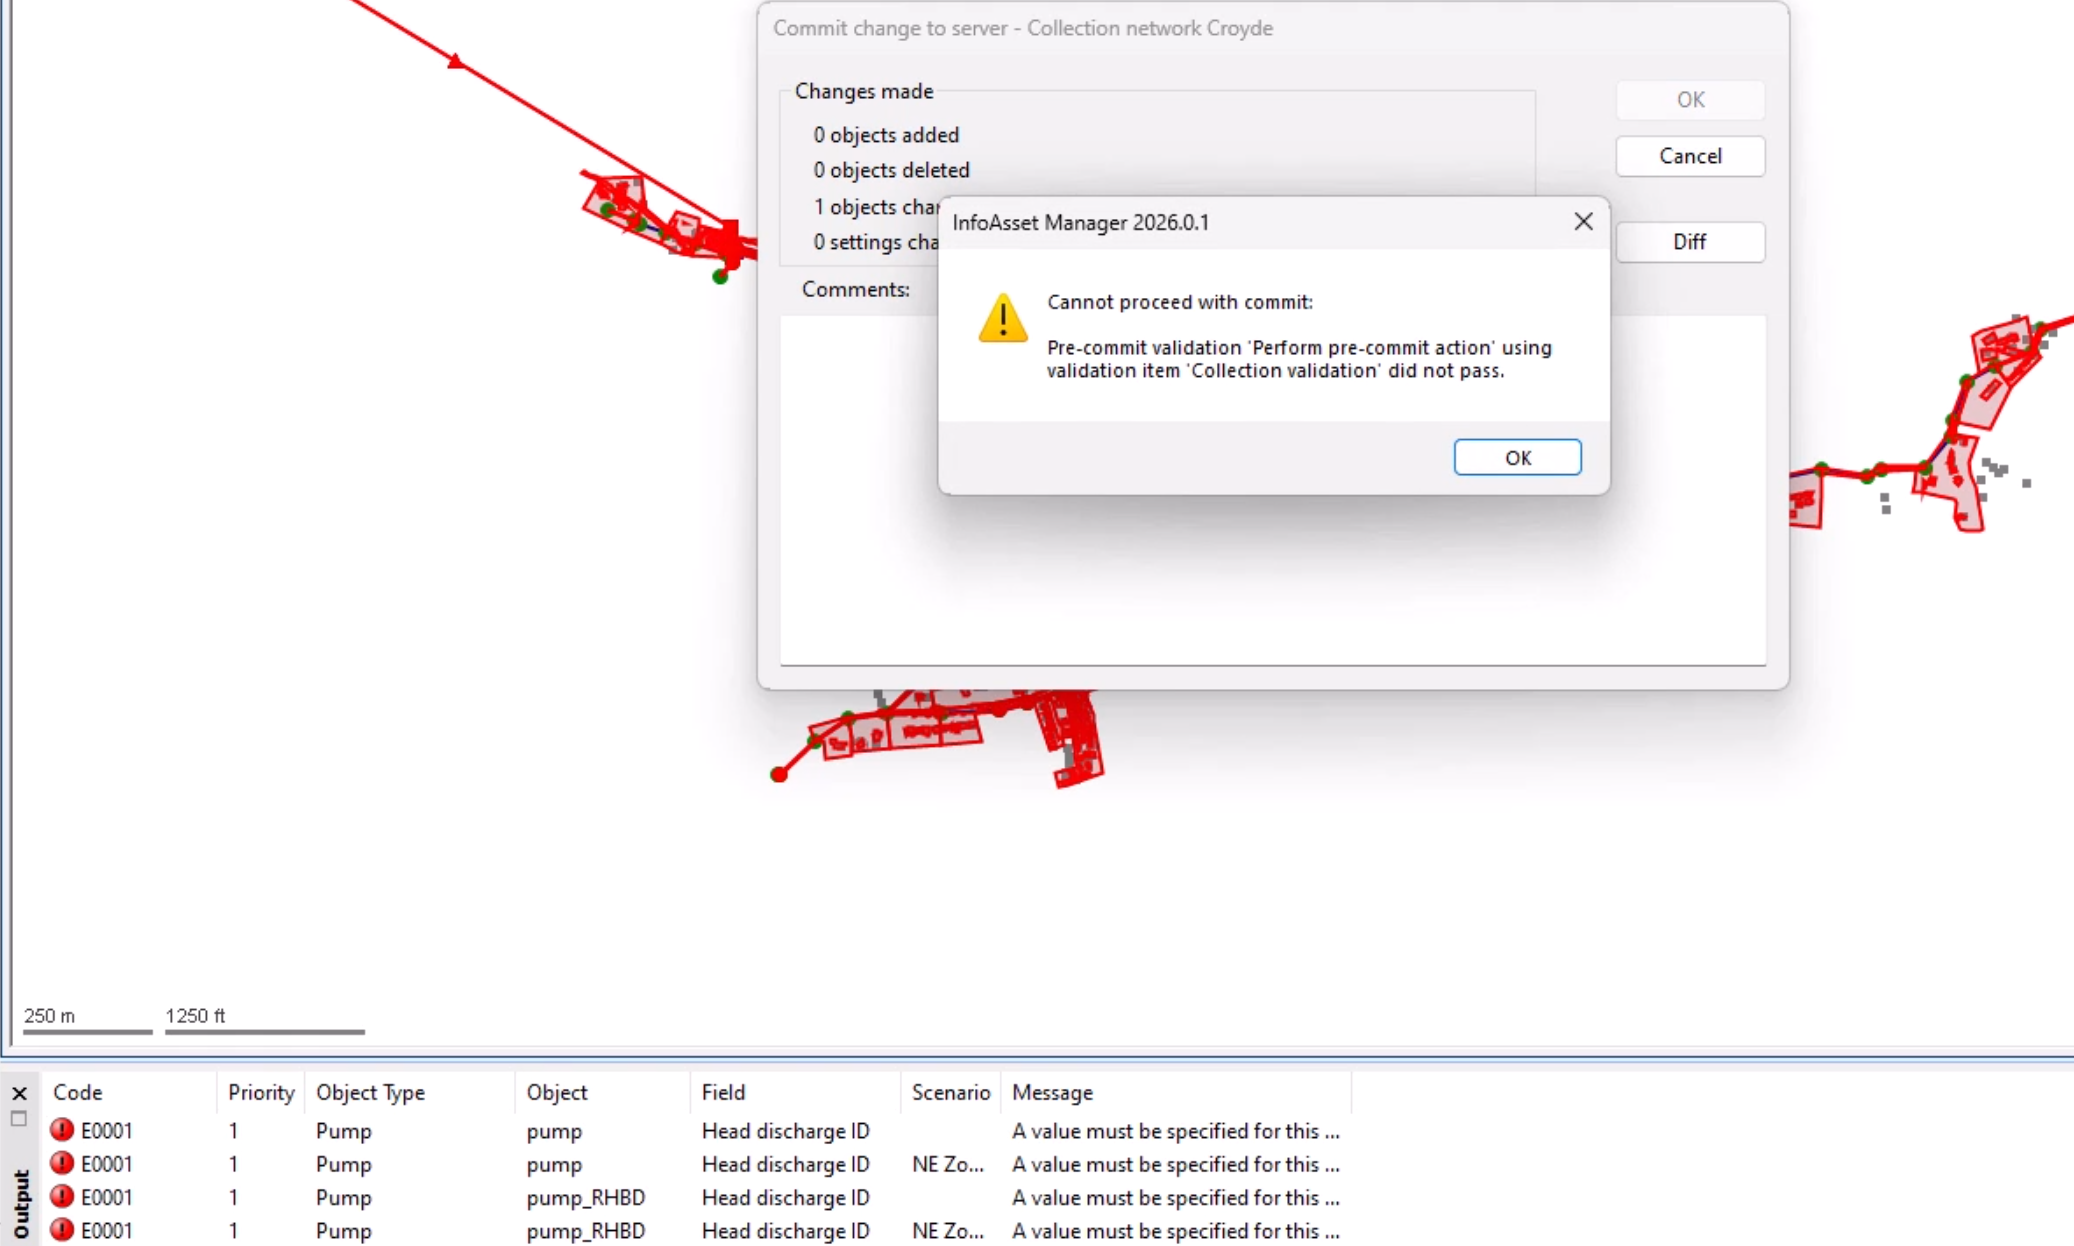
Now, performing a commit operation automatically runs the pre-commit validation. If the validation is successful, the commit operation proceeds as normal.
However, if the validation fails, a message appears, the Output window opens, and network changes are not committed to the database.