Create a GeoExplorer and add zones in InfoAsset Manager
Step-by-step guide
The GeoExplorer provides a geographic view of the models within the current database. Within the GeoExplorer, zone objects can be created to represent model areas. Zones can be digitized in the GeoExplorer window, or they can be created from network information. They can also be imported from an external data source.
To create a new GeoExplorer:
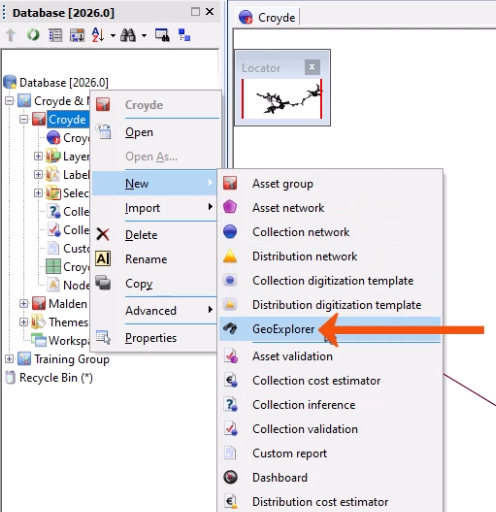
- From the Explorer window, right-click an Asset Group and select New > GeoExplorer.
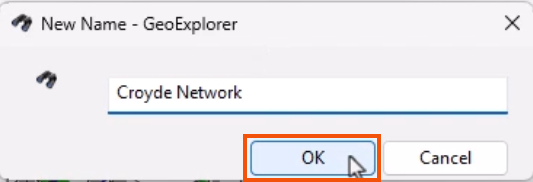
- In the New Name dialog, add a meaningful name, such as “Croyde Network”.
- Click OK.
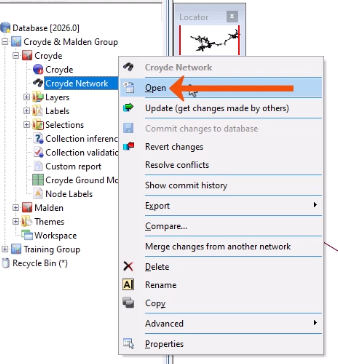
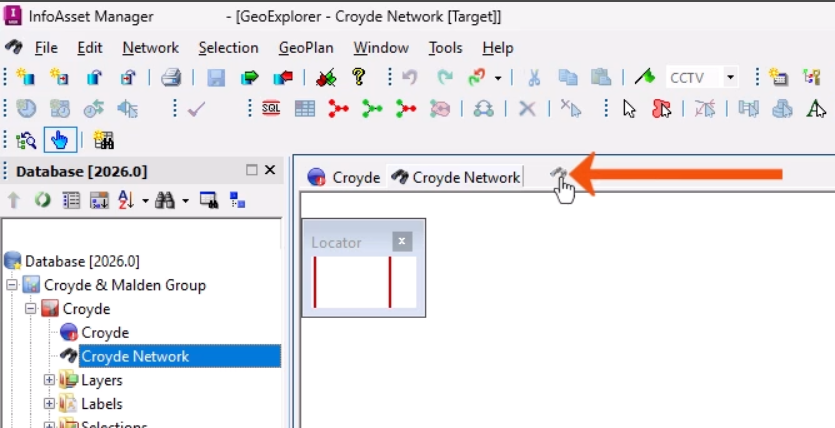
To display the blank GeoExplorer:
- Right-click it in the database tree and select Open.
- Select Open.
- Alternatively, drag the GeoExplorer icon and drop it onto the background area, outside of the Explorer window.
GeoExplorer zones enable the specification of geographical areas in the GeoExplorer window that correspond with asset areas. Asset groups, networks, and workspaces, including background layers and layer lists, can all be associated with zones.
To create a new zone based on network attributes:
- Click and drag the network onto the GeoExplorer window.
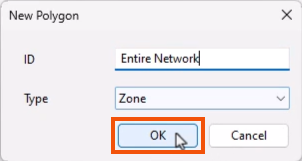
- In the New Polygon dialog, enter an ID for the zone, such as “Entire Network”.
- Click OK.
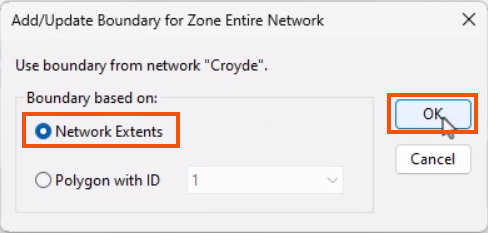
- In the Add/Update Boundary for Zone dialog, choose what to base the extent of the new zone on, such as Network Extents.
- Click OK.
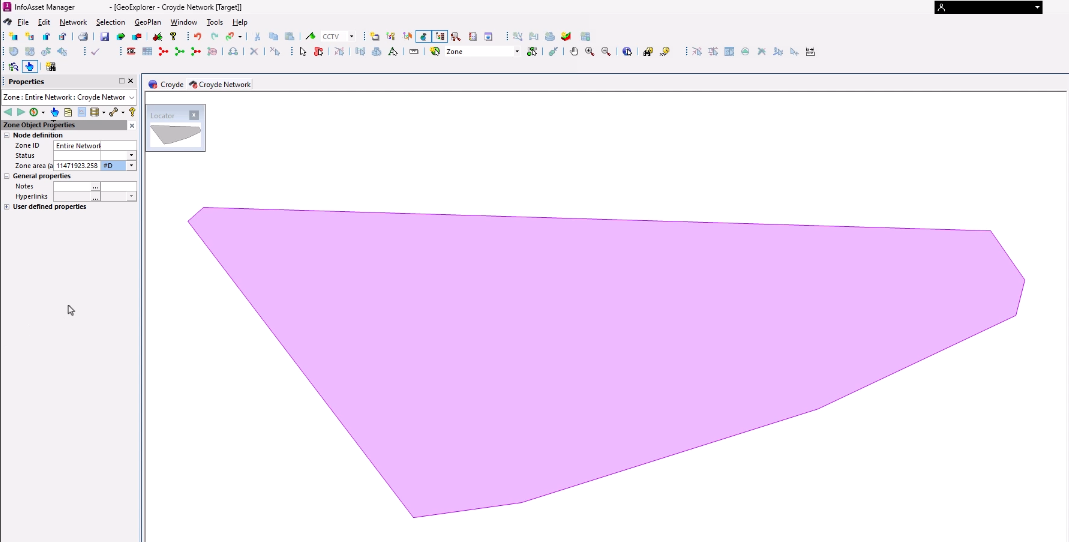
The new zone displays in the GeoExplorer window.
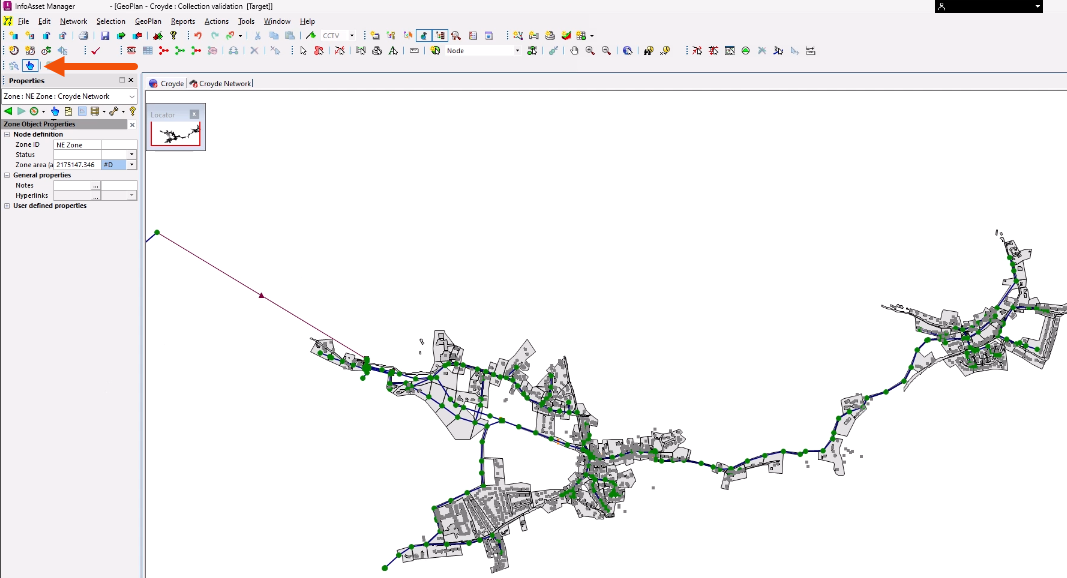
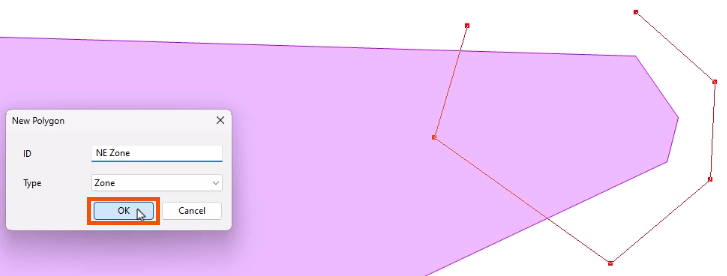
To create a zone manually:
- From the GeoPlan Tools toolbar, click New object.

- In the GeoExplorer window, click repeatedly to draw a polygon of the zone.
- Double-click to finish the polygon.
- In the New Polygon dialog, name the zone, such as “NE Zone”.
- Click OK.
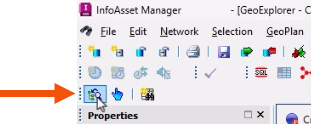
- To link the zone to a network, from the GeoExplorer toolbar, click Link GeoExplorer zone.
Once a zone has been created and linked to a network, the related network can be opened.
- On the toolbar, click Open associated item.
- In the GeoExplorer window, select the zone.
The related network for that zone displays.