Edit user defined fields in InfoAsset Manager
Step-by-step guide
When working in grid windows and property sheets for network objects, user fields can be defined in addition to those provided by default. User defined fields provide the flexibility of storing data that does not fit into the definitions of standard fields.
For each network object in Collection and Distribution networks, there are 40 numeric fields, 40 text fields, and 5 date fields available. By default, these fields are named User Number 1 through 40, User Text 1 through 40, and User Date 1 through 5.
To access user fields:
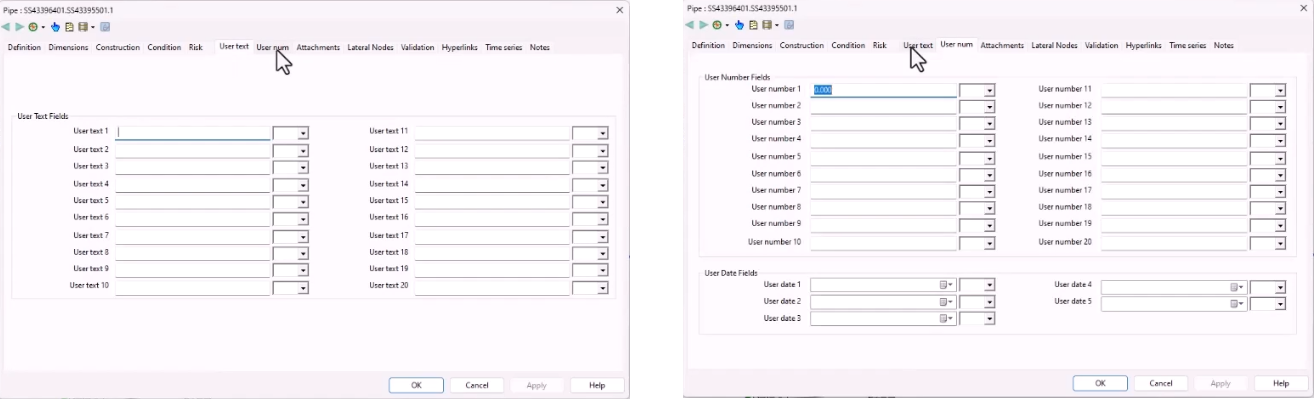
- With a pipe selected in the GeoPlan, open the Properties dialog.
- Select the User text and User num tabs.
To change the names of the user fields:
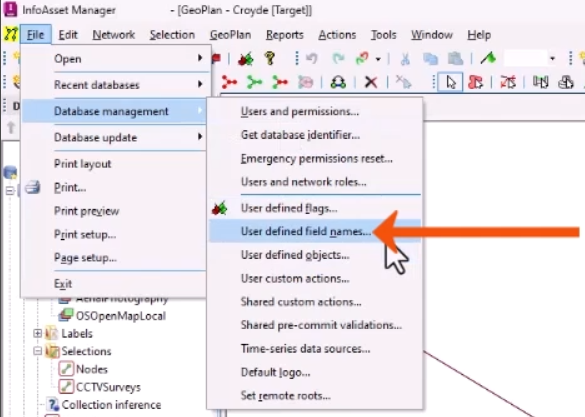
- Select File > Database management > User defined field names.
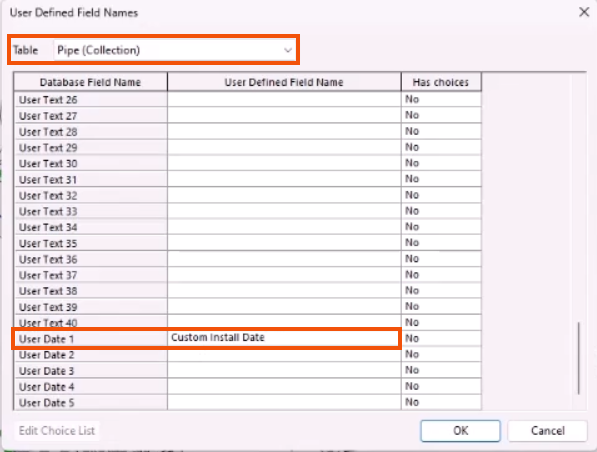
- In the User Defined Field Names dialog, expand the Table drop-down.
- Select the object type to be edited, such as Pipe (Collection).
- Enter a User Defined Field Name for the appropriate database entry, such as typing “Custom Install Date” for the name of User Date 1.
Keep in mind that longer names may not be fully visible on property sheets, so it is best practice to keep names to a reasonable length.
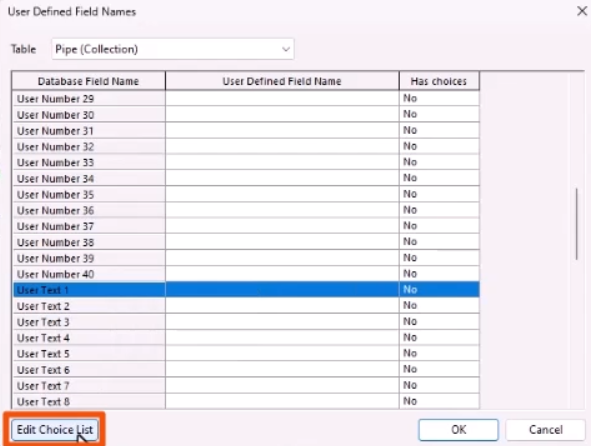
To edit the choice lists for User Text fields:
- Select a User Text row, such as User Text 1.
- Click Edit Choice List.
- In the Standards & Choice Lists dialog, make any necessary changes.
- Click OK.
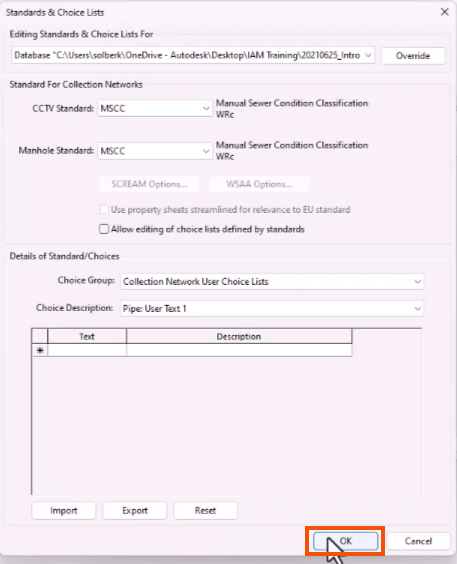
- Click OK again to close the User Defined Field Names dialog.
User field names can also be set via the Network grid windows. Field names edited in this manner are network specific and will override global default names.
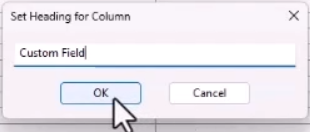
- From a grid window, right-click the column heading of a user field and select Set heading for this column.

- In the Set Heading for Column popup, enter a name, such as “Custom Field”.
- Click OK.
Every column is treated independently, so different names can be set for each column for each type of network object.


