View and edit object properties in InfoAsset Manager
Step-by-step guide
In InfoAsset Manager, with a network open in the GeoPlan, you can view and edit the properties of network objects using property sheets. Property sheets provide a way to view all data for a single network object in a structured way.

There are two ways to view property sheets: in the dockable Object Properties window or in a floating tabbed property sheet format.
To set the viewing method:
- Select Tools > Options.

- In the Options dialog, select the General tab.
- Select or deselect Use property editor for asset network objects.
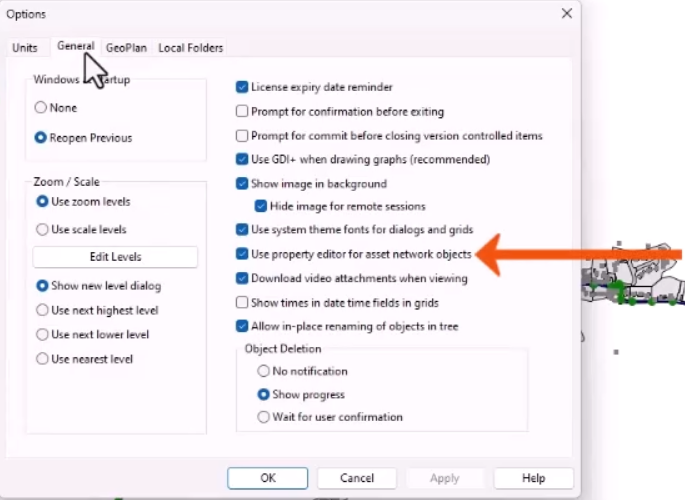
- Click OK.
- To open the alternate style, press CTRL while opening the properties of an object.
To open a property sheet:
- From the GeoPlan Tools toolbar, click the Properties tool.
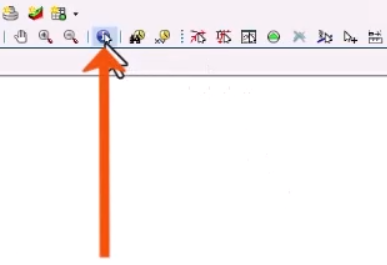
- Select the object in the GeoPlan.
The object properties display.
There are two alternate methods to open object properties:
- With the Select tool active, double-click an object in the GeoPlan.
- From a grid window open, double-click an object.
If a model view is zoomed out or multiple objects intersect when selected in the GeoPlan, a Multiple Selection dialog opens.
- In the dialog, select an object.
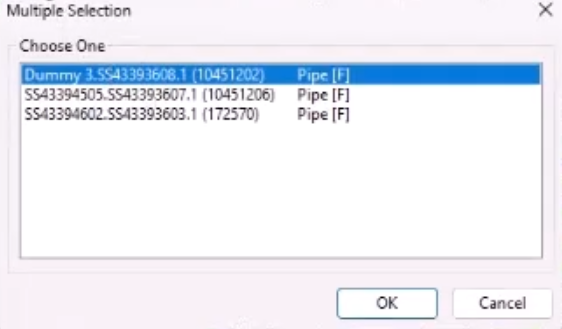
- Click OK to view its properties.
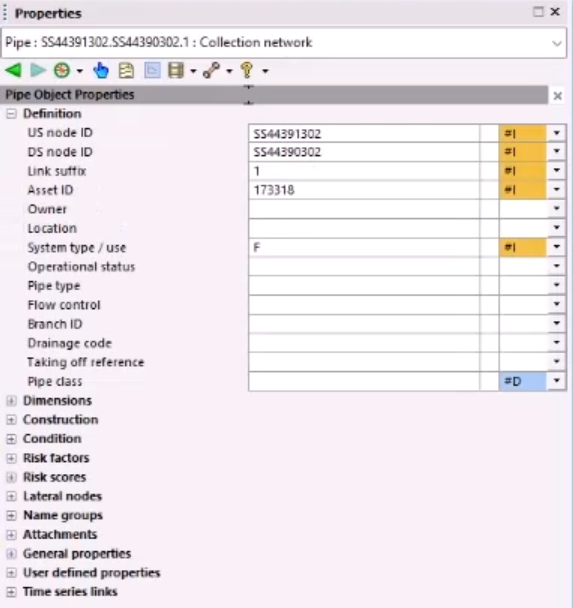
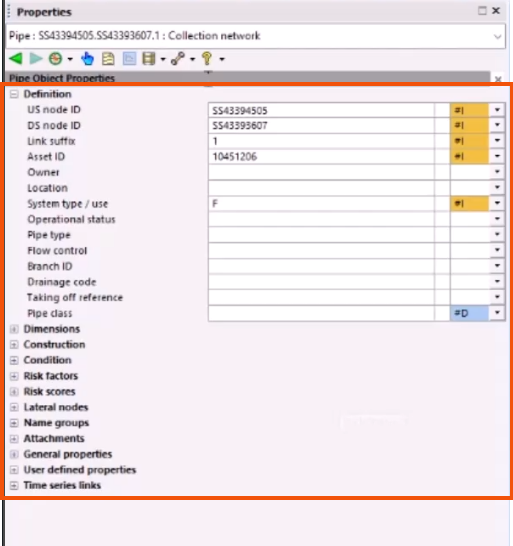
In this example, the Object Properties window opens to display data for a node, divided into several component areas.
- The DropTree is a list of available objects. When collapsed, it shows the currently selected object, including its type, ID, and network. Expand the DropTree to select from available objects, which are sorted by network name, object type, object sub-type, and object ID.

- The toolbar enables a variety of tasks, such as customizing layouts, editing object properties, or navigating to adjacent or associated objects.
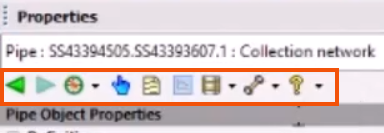
- The caption bar provides a brief description of the object and contains the Close (X) button, which closes the Object Properties window for the current object.
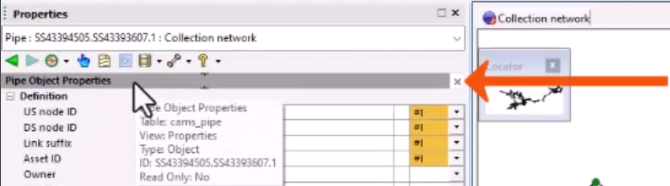
- Position the divider line to adjust the width of the field name display — for example, to display long data field names.
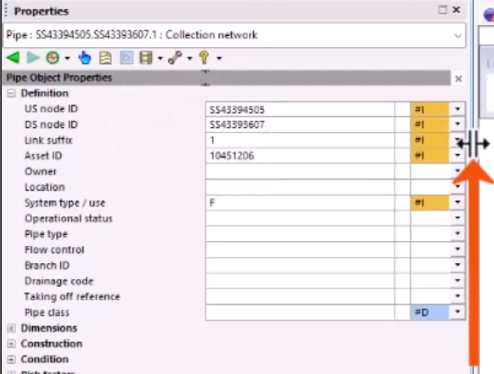
- The property editor is the area for viewing and editing information about the selected object, such as condition and location details. Each row has a value field, an inline validation box for highlighting errors, and a flag field for tracking data sources. Right-click to display a context menu with additional task options.
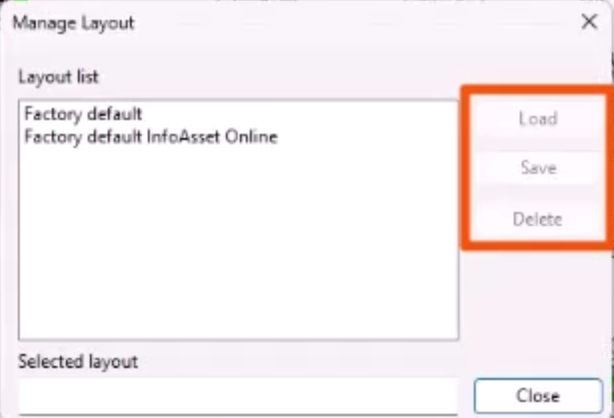
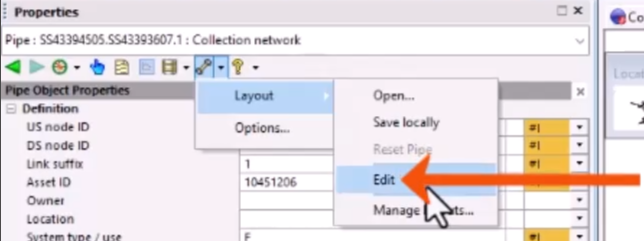
The layout of the Object Properties Window can be modified and saved.
- To edit the layout, from the toolbar, expand the Configuration tool and select Layout > Edit.
- To load, save or delete a layout, open this menu again and select Manage layouts to open
- In the Manage Layout dialog, choose an option for the selected layout.