Apply GeoPlan properties and themes in InfoAsset Manager
Step-by-step guide
In InfoAsset Manager, use a GeoPlan theme to control how objects are displayed on the GeoPlan. This collection of properties can be saved as the network default, or it can be saved to a database project, where it can be accessed by other users and applied to other networks.
- Right-click the GeoPlan and select Properties & Themes.
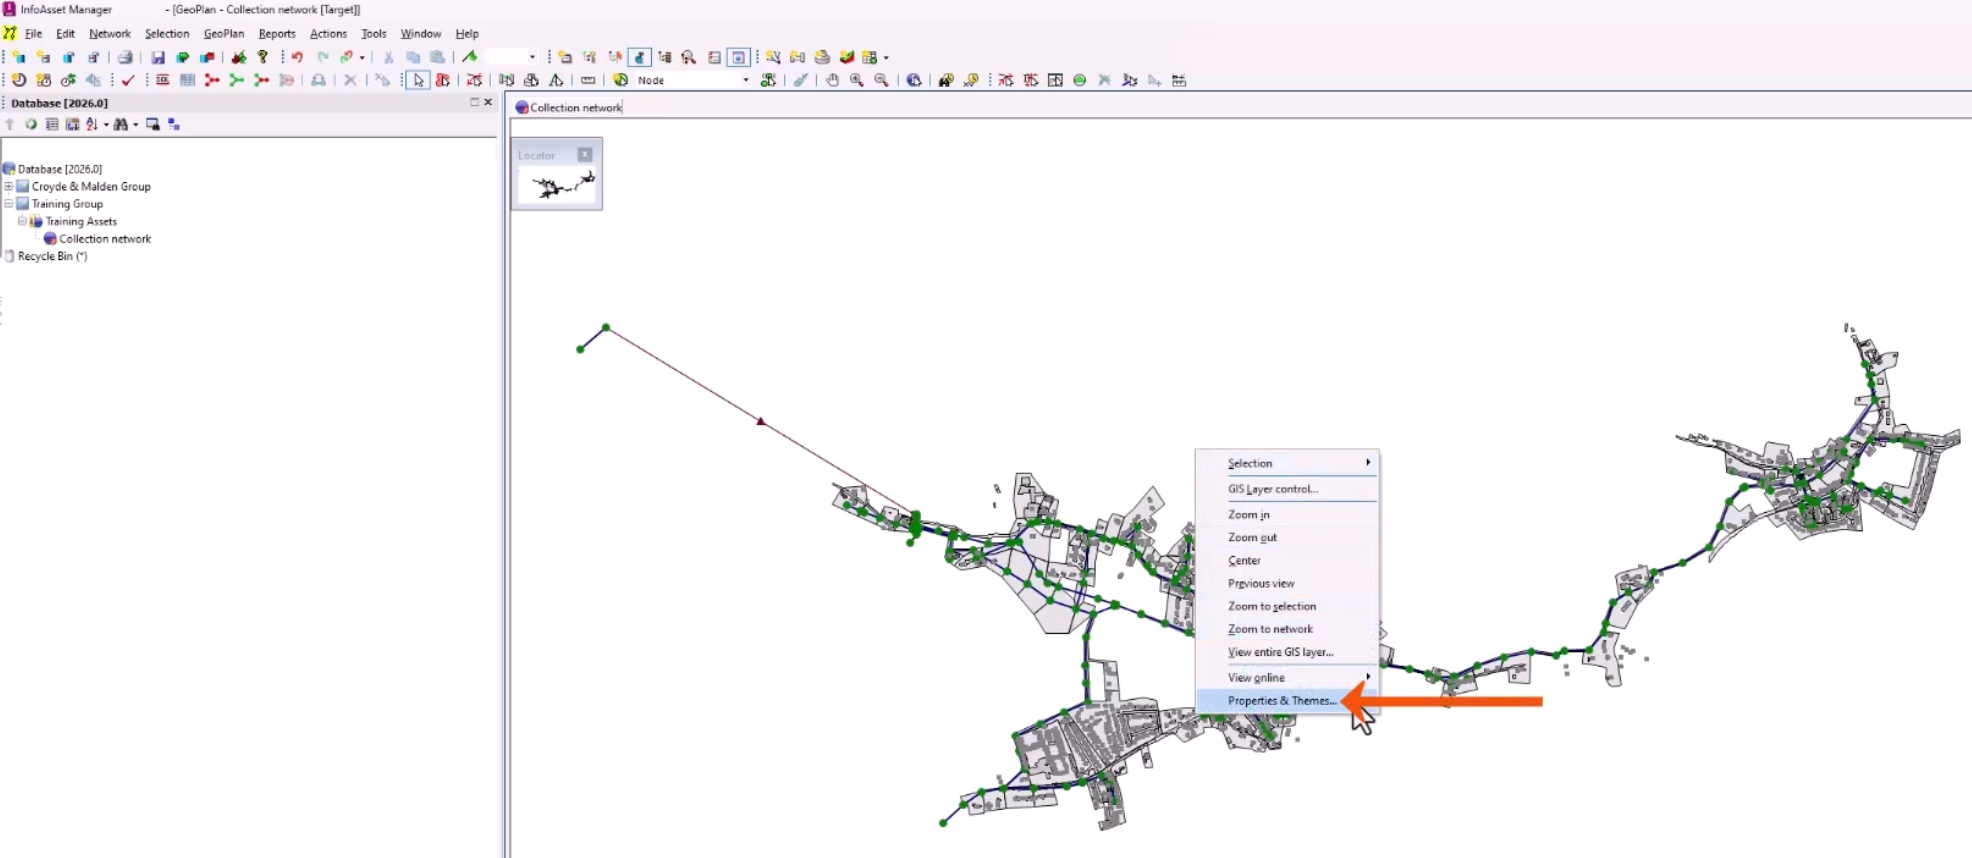
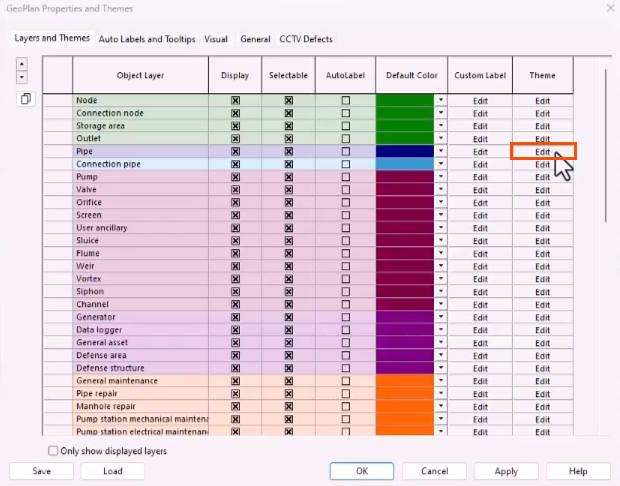
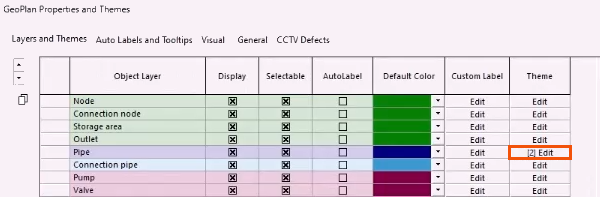
The GeoPlan Properties and Themes dialog opens. On the Layers and Themes tab, the network object display settings can be edited. Object themes can also be set up, edited, and saved.
For this example, start by editing the theme for pipes in the network.
- In the Pipe row, Theme column, click Edit.
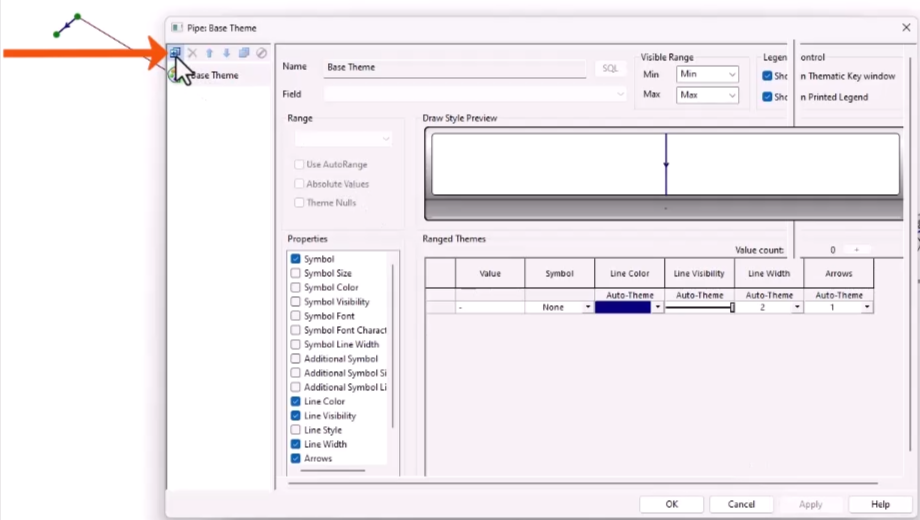
The Layer Theme Editor opens. Start by setting a link direction for pipes.
- Under Properties, select Arrows.
- In the Ranged Themes table, set the value under Arrows to 1 to set one arrow per pipe link.
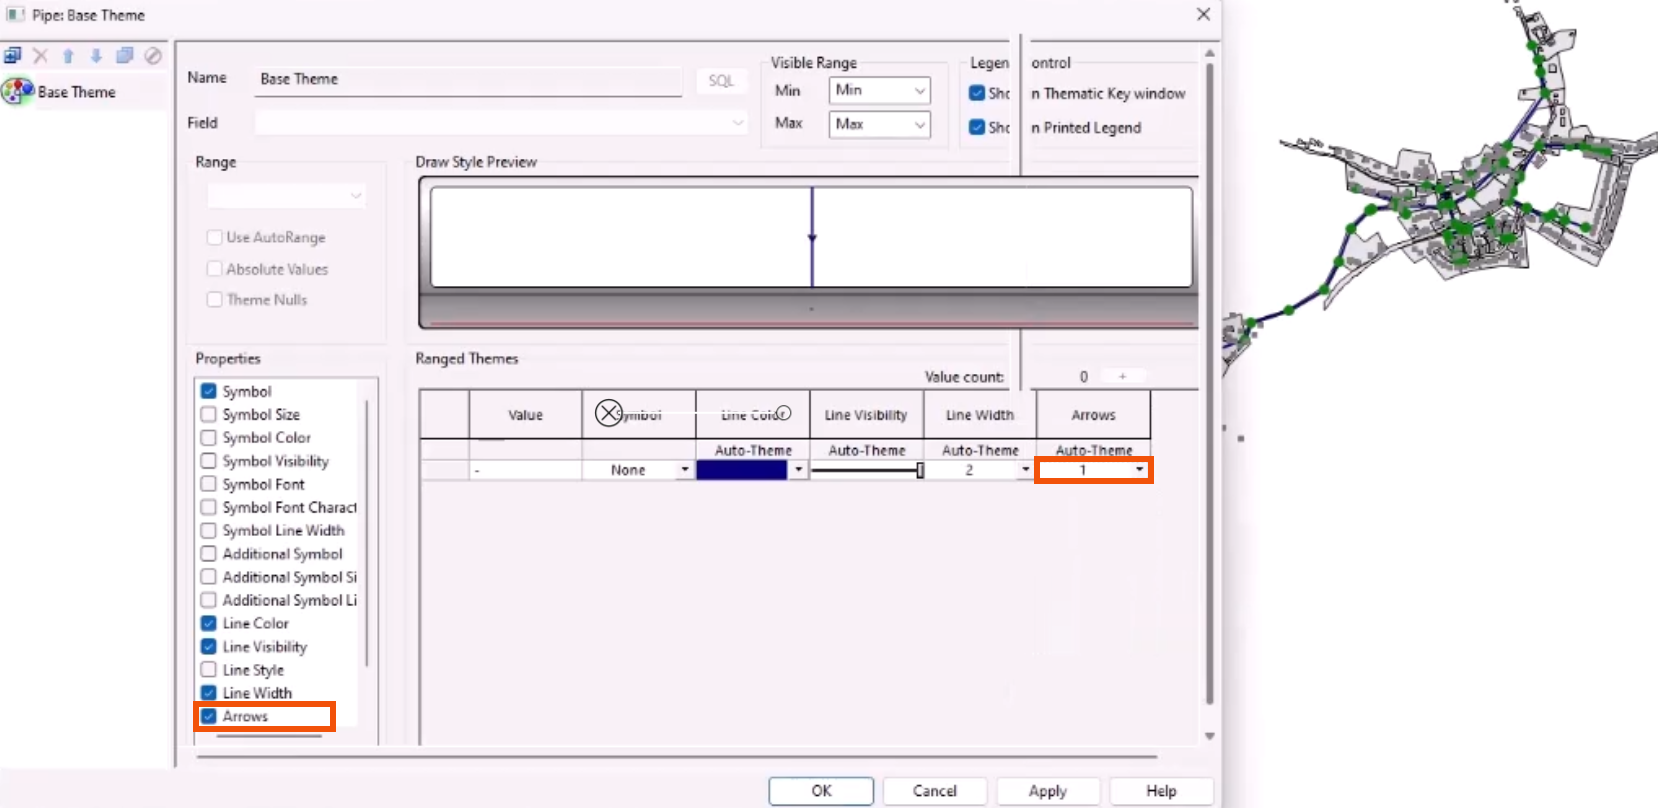
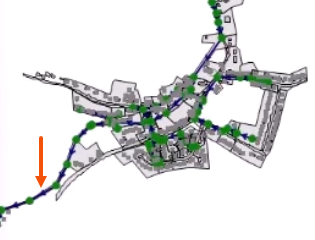
- Click Apply to see the result in the GeoPlan.
Sub themes can also be created to apply specific sets of display options to the object layer.
For this example, create a sub theme that distinguishes pipe width.
- In the Sub Theme Manager Pane, on the toolbar, click Add New.
- In the Sub Theme Editor Pane, in the Field drop-down, select width (US width).
- In the Ranged Themes table, for this example, set the Line Color for the narrowest pipes to yellow.
- Set the Line Color for the widest pipes to red.
- Click Auto-Theme to automatically grade the intermediate colors.
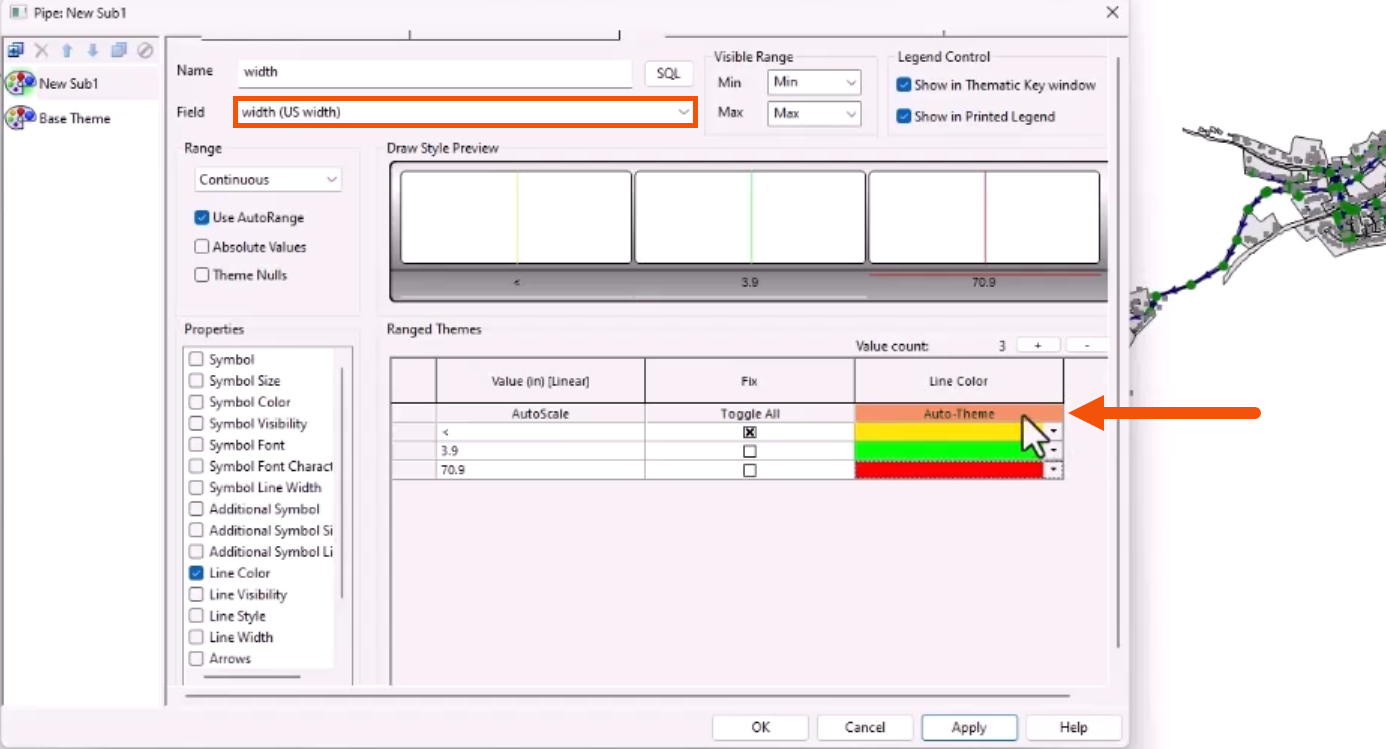
- Click Apply to view the results on the GeoPlan.
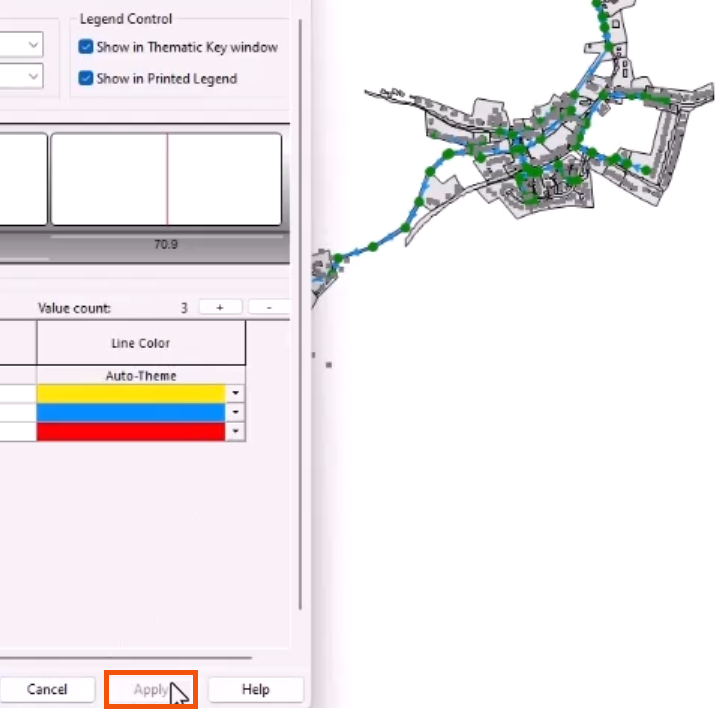
- Click OK.
Back in the Properties & Themes dialog, Pipe row, Theme column, the number next to Edit indicates that there are multiple themes for pipes.
To save the themes:
- Click Save and review the available options.
- Save to database object saves the current themes and GeoPlan properties as an object in the Explorer window.
- Save as default for this network makes the current themes and GeoPlan properties the default for the current network.
- In this case, select Save to database object.
- Click OK.

- Click OK again to close the GeoPlan Properties and Themes dialog.


