| |
| |
Completion Time: 30 Minutes
|
Completion of the Schematic Reports Lesson
| |
Objective: In this exercise, you create and save the following reports:
■ A Bill of Materials report, extracted from a single drawing, and placed in the drawing.
■ A wire From/To report, extracted from all the project drawings, and saved as an Excel file.
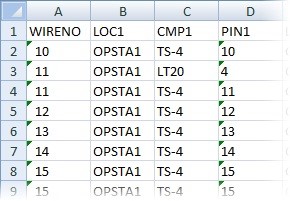
■ A Component Wire List report, extracted from all project drawings, modified to create a wire number list, and saved as an ASCII text file.
|
| |
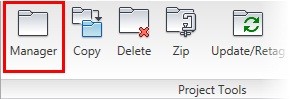
1: If the Project Manager is not displayed, on the Project tab, Project Tools panel, click Manager.
|
| |
2: If Schematic_Reports_NFPA is the active project, skip to step 6. If it is open but not active, in the Project Manager, do the following:
■ Right-click Schematic_Reports_NFPA.
■ Click Activate.
■ Skip to step 6.
|
| |
3: In the Project Manager, click Open Project.
|
| |
4: Browse to where you installed the exercise files. Select Schematic_Reports_NFPA.wdp. Click Open.
|
| |
5: From the Projects list, click the expansion node next to Schematic_Reports_NFPA to expand the drawing list.
|
| |
6: Right-click Schematic_Reports_NFPA_04.dwg. Click Open.
|
| |
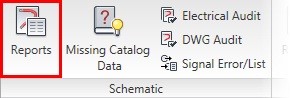
7: On the Reports tab, Schematic panel, click Reports.

|
| |
8: Create a Bill of Materials report, as follows:
■ In the Schematic Reports dialog box, from the Report Name list, select Bill of Material.
■ Click Active Drawing.
■ Under Include Options, click All the Above.
■ Click Normal Tallied Format.
■ Under Installation Codes to Extract, click All.
■ Under Location Codes to Extract, click All.
■ Click OK.
|
| |
9: If requested, in the Qsave dialog box, click OK.
|
| |
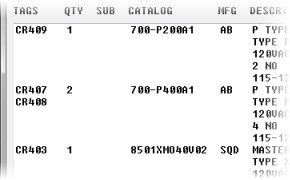
10: In the Report Generator dialog box, scroll through the list, comparing the information in the report with the components inserted on the drawing.
|
| |
11: Click Put On Drawing.
|
| |
12: In the Table Generation Setup dialog box, accept all default values. Click OK.
|
| |
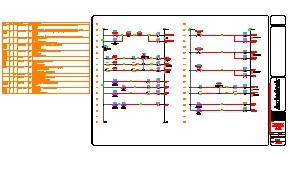
13: Pan to the left of the drawing and insert the table in the empty area outside of the title block.
|
| |
14: In the Report Generator dialog box, click Close.
|
| |
15: Zoom in on the bill of materials table. Compare the table to the report as displayed in the Report Generator.

|
| |
16: On the Report tab, Schematic panel, click Reports.
|
| |
17: Create a wire From/To report, as follows:
■ In the Schematic Reports dialog box, from the Report Name list, select From/To.
■ Click Project.
■ Click OK.
|
| |
18: If requested, in the Qsave dialog box, click OK.
|
| |
19: In the Select Drawings to Process dialog box, click Do All. Click OK.
|
| |
20: In the Location Code Selection dialog box, click All>>.
|
| |
21: Click <<All. Click OK.
|
| |
22: In the Report Generator dialog box, click Save to File.
|
| |
23: In the Save Report to File dialog box, click Excel Spreadsheet Format (.xls). Click OK.
|
| |
24: In the Select File for Report dialog box, accept the default folder, Documents, and default file name, WIREFRM2.XLS. Click Save.
|
| |
25: In the Optional Script File dialog box, click Close- No Script.
|
| |
26: In the Report Generator dialog box, click Close.
|
| |
27: In the Location Code Selection dialog box, click Cancel.
|
| |
28: Open Windows Explorer and browse to the Documents folder.
|
| |
29: In the Documents folder, double-click WIREFRM2.xls.
|
| |
30: Compare the Excel spreadsheet to the report as displayed in the Report Generator.
|
| |
32: Close the Documents folder.
|
| |
33: On the Reports tab, Schematic panel, click Reports.

|
| |
34: Create a Component Wire List report, as follows:
■ In the Schematic Reports dialog box, from the Report Name list, select Component Wire List.
■ Click Project.
■ Under Installation Codes to Extract, click All.
■ Under Location Codes to Extract, click All.
■ Click OK.
|
| |
35: In the Select Drawings to Process dialog box, click Do All. Click OK.
|
| |
36: In the Report Generator dialog box, click Change Report Format.
|
| |
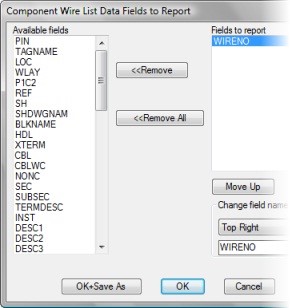
37: In the Component Wire List Data Fields to Report dialog box, click Remove All.
|
| |
38: From the Available Fields list, select WIRENO. Click OK.
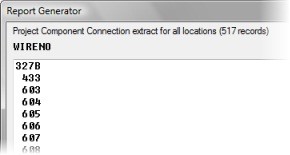
The Component Wire List report is generated and displays only wire numbers.
|
| |
39: In the Report Generator dialog box, click Save to File.
|
| |
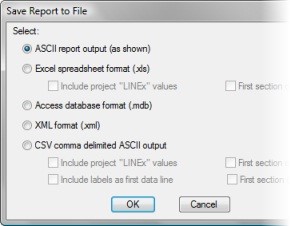
40: In the Save Report to File dialog box, click ASCII Report Output (as Shown). Click OK.
|
| |
41: In the Select File for Report dialog box, accept the default folder, Documents, and default file name, WIRECON.REP. Click Save.
|
| |
42: In the Optional Script File dialog box, click Close - No Script.
|
| |
43: In the Report Generator dialog box, click Close.
|
| |
44: Open Windows Explorer and browse to the Documents folder.
|
| |
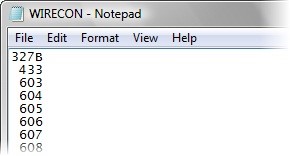
45: In the Documents folder, double-click WIRECON.REP. If requested, do the following:
■ In the Windows Cannot Open File dialog box, click Select the Program from a List.
■ Click OK.
■ In the Open With dialog box, select Notepad.
■ Click OK.
|
| |
47: Close the Documents folder.
|
|


