Additional information on sharing assemblies in Civil 3D
In the previous video, you learned about sharing Civil 3D Object Catalogs with your project team. Assemblies can also be shared with other project team members in the following three ways:
- Assemblies can be dragged from the drawing area to a Tool Palette. The Tool Palette can then be shared.
- The Content Browser can be used to add assemblies to a catalog. It can also be used to distribute the Tool Palette to other remote team members. (Using the Content Browser is also the preferred method for adding other project-related Civil 3D items, such as pipe and pressure pipe catalogs.)
- Assemblies can be placed in their own drawing file and shared by dragging the assembly drawing into the destination drawing file. If this method is used, the assembly drawing must only contain the assemblies that you want to share.
If adding assemblies to a Tool Palette, it is recommended that you make a separate palette for your assemblies. You do this in the Tool Palette simply by right-clicking on a palette tab and selecting New Palette. Give the palette a meaningful name.
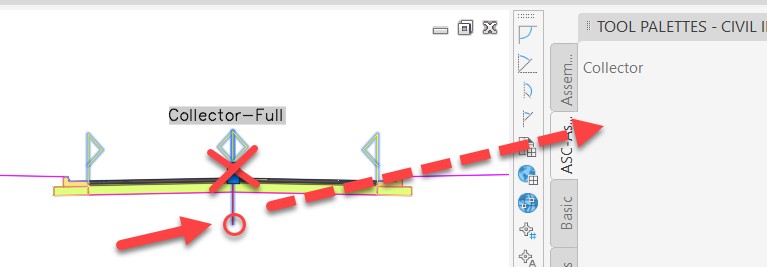
To add an assembly to the Tool Palette, select the assembly by picking the red vertical centerline, then click on the lower part of the red centerline and drag it into the Tool Palette, as shown below. Release it there. DO NOT SELECT THE GRIP when clicking and dragging.
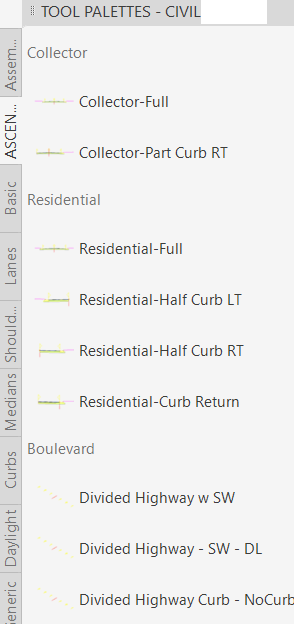
You may supplement the Tool Palette by adding description text headings to identify the types of assemblies. The image below shows an example of a completed palette.