Efficiently packing parts across multiple build platforms can be a challenge. In this article, we’ll explore a custom workflow in Autodesk Fusion to achieve even distribution of parts among multiple build platforms. This method ensures optimal utilization of each machine, saving you time and resources.
Elevate your design and manufacturing processes with Autodesk Fusion
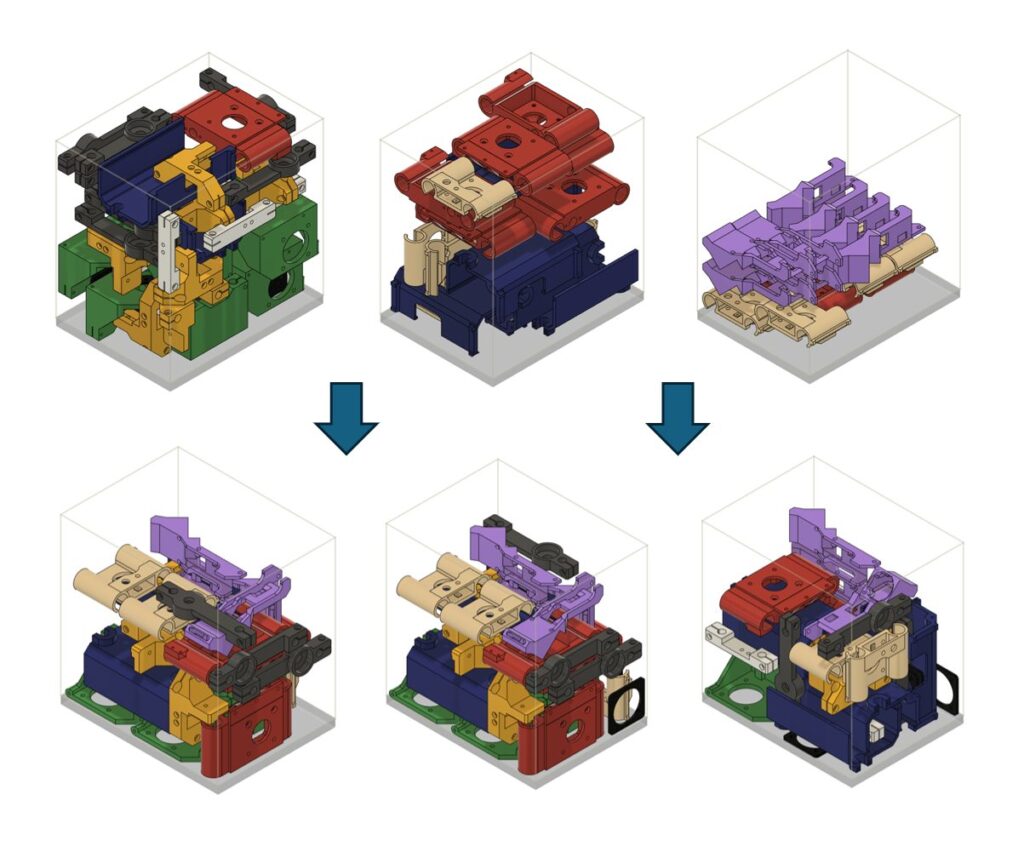
Currently, users can already pack parts across multiple build volumes using the MJF/SLS script in the 3D printing essentials add-in. However, users might find that the packing result can be uneven with the script fully packing all the build volumes, apart from the final one, which is packed with the remaining parts. Often, this leads to multiple fully packed build volumes and one half-packed or nearly empty, such as the example below.

However, this is still very useful as it tells us the minimum number of build volumes that the parts can be packed into. This is crucial as a pre-step in the workflow to distribute the parts evenly across multiple build volumes. Read on to find out more!
Step 1: Choose your 3D printer
The first step is to determine which printer you’ll be using for your 3D printing needs. For this example, we’ll use the HP Jet Fusion 5000 machine. This additive machine has specific dimensions we need to consider:
- X Dimension: 380 mm
- Y Dimension: 284 mm
- Z Dimension: 380 mm
Step 2: Create a multiple build volumes machine representation
Once you have the printer dimensions, you can use Fusion’s Configuration tool in the Design workspace to create a representation of multiple HP printers. The process involves creating custom dividers, which we can later use as no-build zones between the multiple build volumes.
For instance, assuming the divider we will build will have a width of 16 mm in the Y axis, the Y dimension of these custom machines will be:
- Two build volume machine: Y = 284 + 16 + 284 = 584 mm
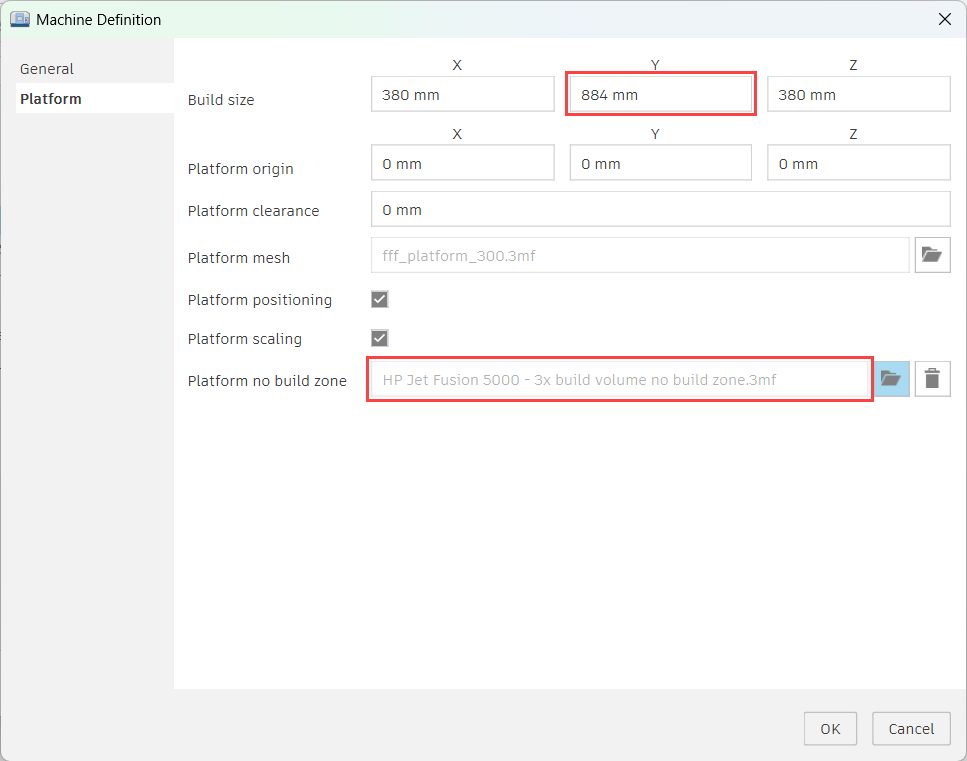
- Three build volume machine: Y = 584 + 16 + 284 = 884 mm
- Four build volume machine: Y = 884 + 16 + 284 = 1184 mm
The video below shows how Configurations in Fusion can be used to quickly create and choose between different designs—in this case, an HP printer with multiple build volumes.
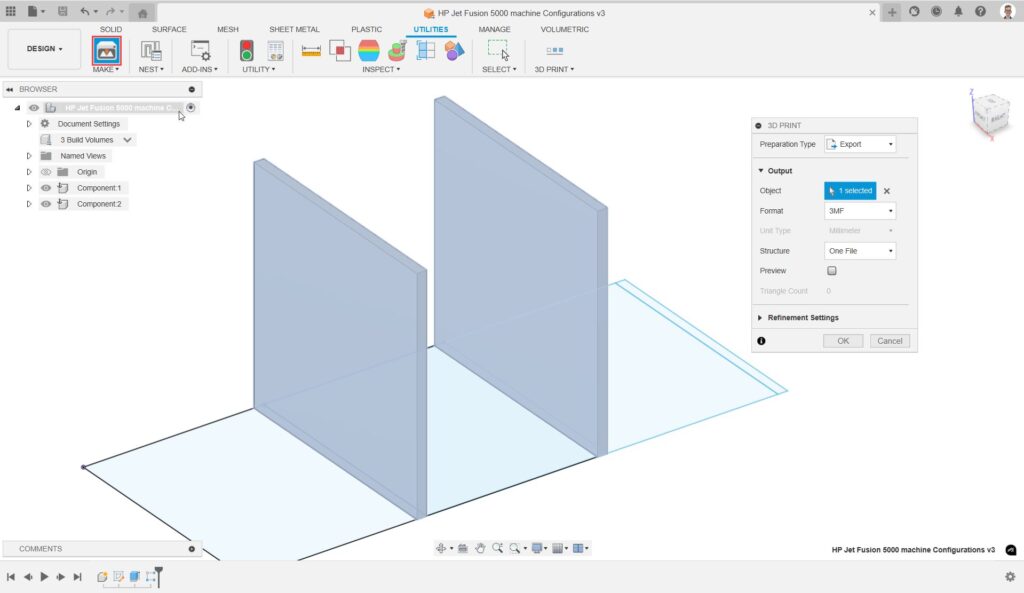
Remembering that the MJF/SLS script informed us that all the parts can fit within three build volumes, we will select the relevant configuration and export it as a 3MF file using the 3D print option in the utilities tab. This 3MF will then be used for our custom HP printer in the next step.
Step 3: Create your custom printer
Now knowing how many build volumes we need in order to pack all our parts, we can create our custom HP printer. Using the original printer as a template, edit it to extend the Y axis to equal 884mm to match the calculations in step 2. For the platform, no build zone, select the 3MF we exported to finish creating our custom HP printer.
Step 4: Pack parts in the custom printer
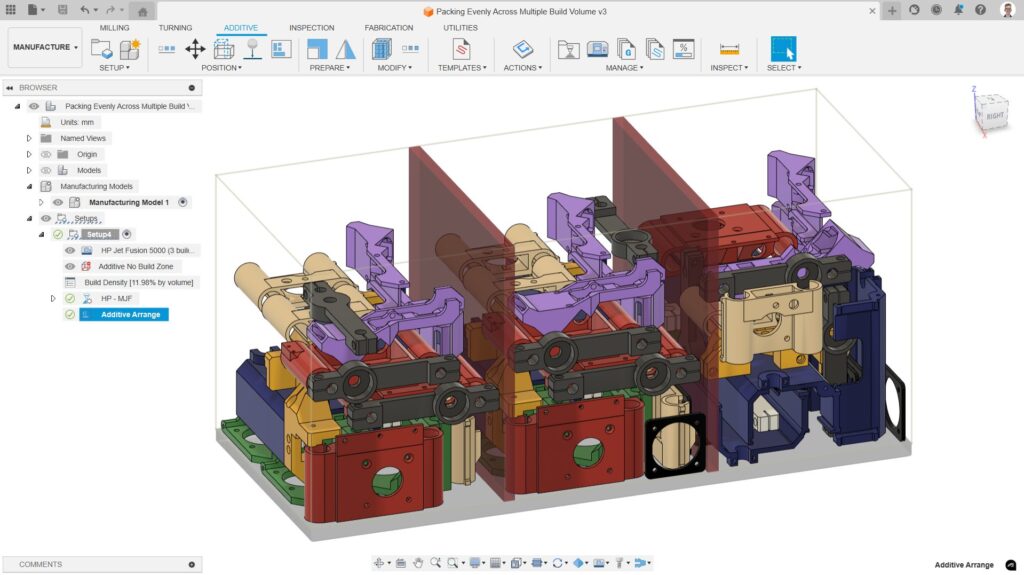
Create a new additive setup, selecting the custom HP printer created in step 3. Using the same packing template from the 3D printing essentials that we used earlier will now give a uniform distribution of packed parts across our multiple build volumes.
Note, the build volume density displayed in the browser and dialog is not accurate since it is only suitable for single build volume machines.
Step 5: Create the final packing jobs
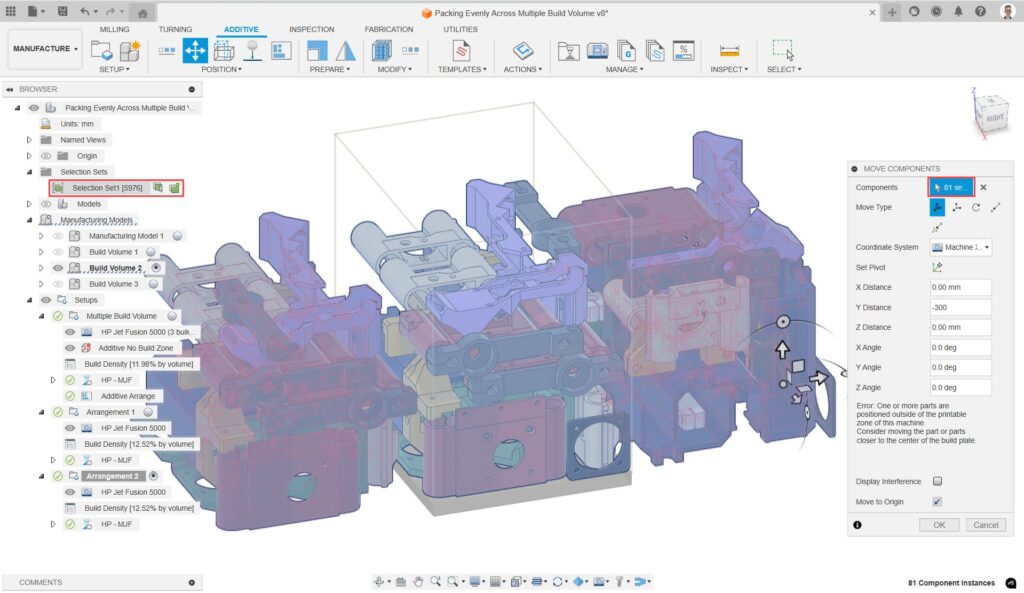
Now that there are three even distributions of parts, you can divide the parts into three setups with the original HP printer. Duplicate the manufacturing model for each of these setups and make sure to create a selection set for each setup to aid in moving all the components.
Repeat this process for each setup:
- Duplicate the initial Manufacturing Model.
- Create a new setup for each manufacturing model with the same HP machine.
- Create a selection set of the components.
- Select and move all components so that the next arrangement of components is placed within the build volume of the printer.
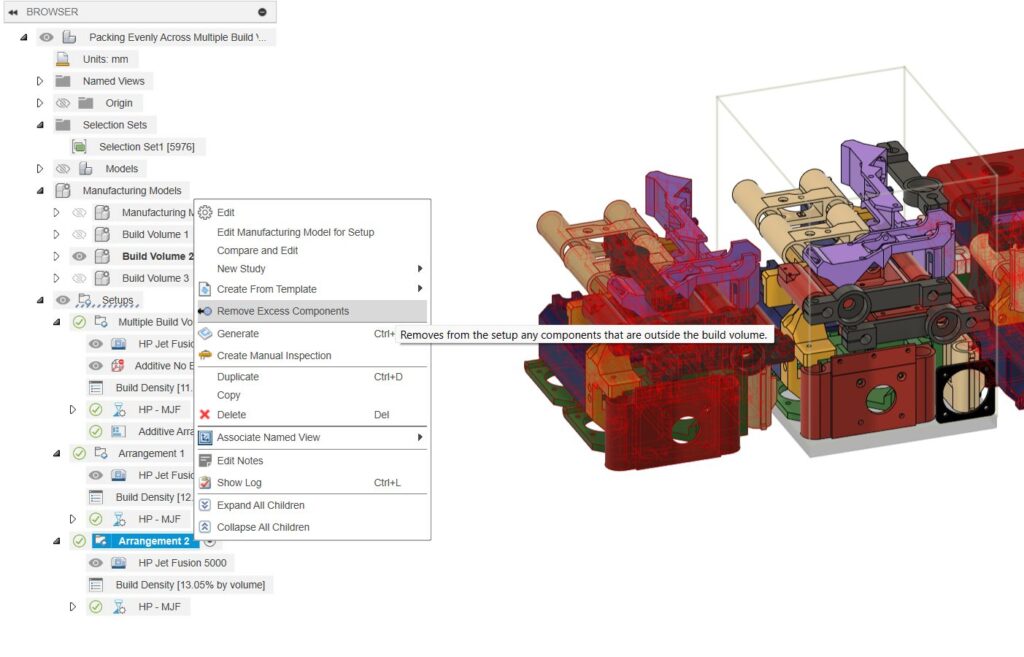
- Right-click on the setup and remove excess components to finalize each build.
Efficiently pack parts across multiple build platforms
By following this custom workflow, you can efficiently pack parts across multiple build platforms in Autodesk Fusion. The 3D packing calculation may take a long time due to the larger build volume of your custom multi-build volume machine. However, this workflow ensures a more balanced distribution of your parts across multiple machines.
While this workflow involves manual steps for the creation of manufacturing models, setups, moving parts, and removing excess parts, you can also create a custom automation script and streamline the process further.
Thank you for reading, and happy 3D printing!