Once you master this list of beginner Fusion commands, you’ll be well on your way to becoming an expert.
Did you know that it only takes mastering a few key concepts (and keyboard shortcuts!) to get started in Fusion? Think of it like learning a language — first, you learn a few basic phrases, then grammar conventions, and as time goes on, you add more complex vocabulary to the mix. Try approaching Fusion the same way, and you’ll be an expert in no time.
This article will break down the concepts and Fusion commands that will put you on the right path. As you become increasingly comfortable with the software, you can add more complex commands to your repertoire.
Elevate your design and manufacturing processes with Autodesk Fusion
Introduction to Fusion
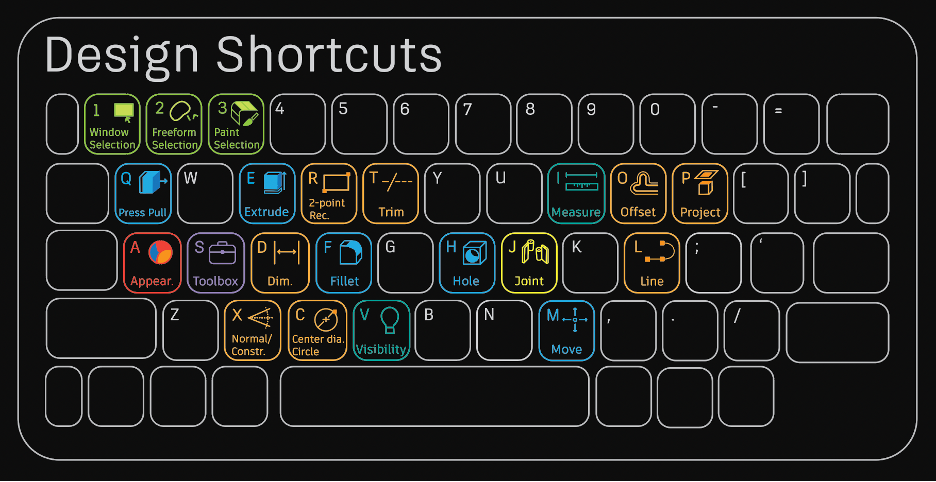
Fusion is a powerful 3D CAD software that enables designers, engineers, and makers to bring their concepts to life. Whether you’re designing mechanical parts, consumer products, or complex assemblies, Fusion provides a comprehensive set of tools for designing, simulating, and manufacturing with ease. One effective way to enhance your productivity in Fusion is by mastering keyboard shortcuts. These useful combinations allow you to access commands and tools instantly, letting you concentrate on your creative process rather than navigating through menus.
By learning and using Autodesk Fusion shortcuts, you’ll find yourself working more swiftly and efficiently. Fusion also lets you create custom keyboard shortcuts tailored to your workflow, making it simple to access your most-used commands with a single keystroke. Whether you’re new to the software or looking to optimize your process, getting comfortable with shortcuts is transformative for anyone striving to create and innovate in Fusion.
Navigation and View Control
Navigating your 3D workspace smoothly is essential for efficient modeling in Fusion. The middle mouse button is your best friend here: simply press and hold it to pan around your design, or combine it with the Shift key (Shift + Middle Mouse Button) to orbit your model and view it from any angle. Zooming in and out is as easy as rolling the middle mouse wheel.
Sketch Commands
Sketches in Fusion lay out a framework for a model from which you can build on and modify later down the line. They’re a great starting point for almost any project and often the most practical way to build more complex designs. Here’s what we think you should start with:
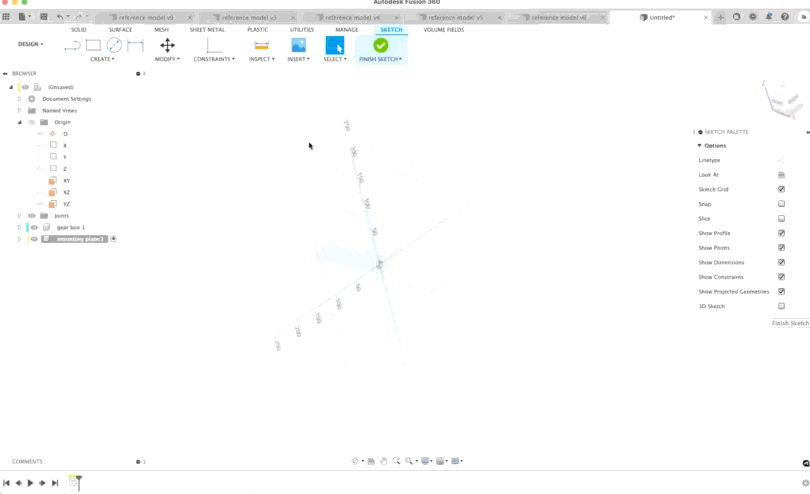
Create Sketch: Create a sketch by clicking the sketch icon on the very left side of the design toolbar, then select which plane you would like to create from. Once a plane is selected, this will take you into the sketch environment where you can lay the foundation for your design work.
Sketch Line (L): Lines are essential building blocks of most designs. To create a line, simply use the hotkey ‘L’ and click to specify a start point. Then click again to place a second point to define the first line segment. Continue clicking to place additional line segments, or click and drag to create connected arc segments.
Sketch Circle (C): Create a center point circle with the hotkey ‘C’ and then click the location where you would like the center of the circle to be located. Then click and drag to your preferred dimension.
Sketch Dimension (D): Make sure your model is to scale with Dimension. Dimension allows you to input your measurements in either metric or imperial or toggle between the two by specifying your units. It also has the capability to do calculations from the Dimension Value input box and can be modified later down the line with direct changes to any 3D model that the sketch was built on. To use the Dimension tool, use the hotkey ‘D’ and specify which area you would like to modify. This could be a line, a radius, a space between two points, etc.
Sketch Rectangle (R): Create a two-point rectangle with the hotkey ‘R.’ From here, you can specify the point where you’d like one corner to be located. Click and drag to the desired dimensions.
Sketch Project (P): The Project command allows you to project geometry from outside the active sketch onto the sketch plane so that you can reference surrounding features in a design as you define a sketch. You can filter the selection to set reference certain types of geometry such as faces, edges and points, or bodies. When you’re ready to project, hit the hotkey ‘P’ and select the geometry you’d like to reference. From there, you can create a new sketch.
Bonus! Learn how to copy and paste sketches here.
Create Fusion Commands
If you haven’t heard the 80/20 rule, this is it in a nutshell: When it comes to creating 3D geometry in Fusion, a fraction of the available tools do the majority of the work. There are just four commands you need to know as a beginner in this space: Extrude, Hole, Fillet, and Offset Plane.
Without mastering these basics, the complex Fusion commands in this space can be a fancy way to “model yourself into a corner.” Yes, they are more efficient, but with great power comes great responsibility. So, here’s what you need to know:
Extrude (E): Extrude is a jack of all trades. Use extrude to add depth to open or closed sketch profiles or faces in Fusion, add to an existing geometry using Join, remove an area from an existing body using Cut, create a body at the intersection of an existing body and the new body using Intersect, create a new body in the active component by selecting New Body, or creates a new body in a new component using New Component.
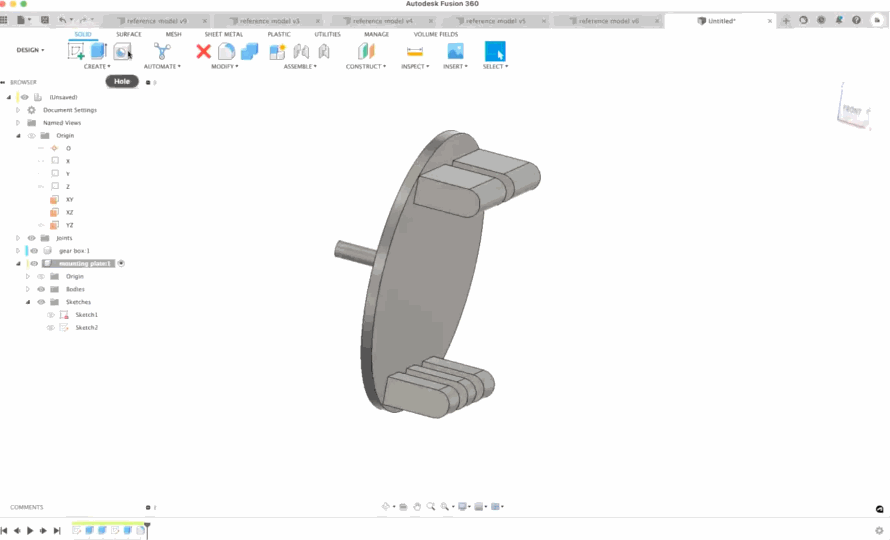
Hole (H): Need to add a hole to a solid body? That’s where the hole command comes in. To create a hole, hit the hotkey ‘H’, then select a face, plane, or sketch point to place the center of the Hole. Once you select a precise location for the hole, modify the hole type, hole tap type, and drill point based on your needs. To extend or retract the area the hole cuts, drag the arrow coming from the cut projection. Once everything looks perfect, select “OK”.
Fillet (F): Want to smooth down those sharp corners? Try fillets! Fillets round the edges of a solid body by removing material from exterior edges or by adding material to interior edges. To create a fillet, use the hotkey ‘F’ and select the geometry you would like to modify. From there, you can either drag down to your preferred fillet radius or type in your desired dimension.
Offset Plane: The Offset Plane command creates a construction plane at a specified distance from an existing face or plane to allow you to sketch on a plane that you define — usually because there is no model geometry where you need to sketch. To use Offset Plane, select the icon located above ‘Construct’ in the design toolbar. Then select the geometry you’d like the plane to be offset from. After you’re finished, either drag the manipulator handle in canvas to where you’d like the offset plane to be positioned or enter a distance from your starting point. If you’d like the offset plane to be associated with a model object, change the Extent to Object and select a sketch point or vertex as the Object to offset to.
Form Environment
The Form Environment in Fusion is where creativity meets flexibility. Perfect for designing organic, freeform, and ergonomic shapes, this workspace uses T-Splines technology to let you push, pull, and sculpt your geometry with ease. To enter the Form Environment, press Shift + F and select the Form tab.
Assembly Fusion Commands
Assemblies are an important aspect of many design workflows. Assemblies are made from multiple parts called components. Each of these components has motion and part numbers, and you can use them in exploded diagrams. Here are a few Fusion commands to help you master assemblies:
Create Component: Creating a component automatically activates it, which means that every new object you create is owned by that component.
Copy/Paste Component (CTRL+C to copy | CTRL+V to paste): You can reuse components in a design by either creating a copy that remains linked to the original or that diverges from it. You can also reference external designs as components in the current design.
To copy and paste a component, simply select the component you would like to copy and copy it by using the shortcut CTRL + C. Then select the parent component that you would like to nest the copied component within and paste using the shortcut CTRL + V. Then use the manipulator handles or adjust the settings in the Move/Copy dialog to position the component and click “OK.”
Use the Paste command to create an identical copy of a component. All copies maintain a linked association with each other. When you change one copy, all of the copies created using Paste update reflect the same changes.
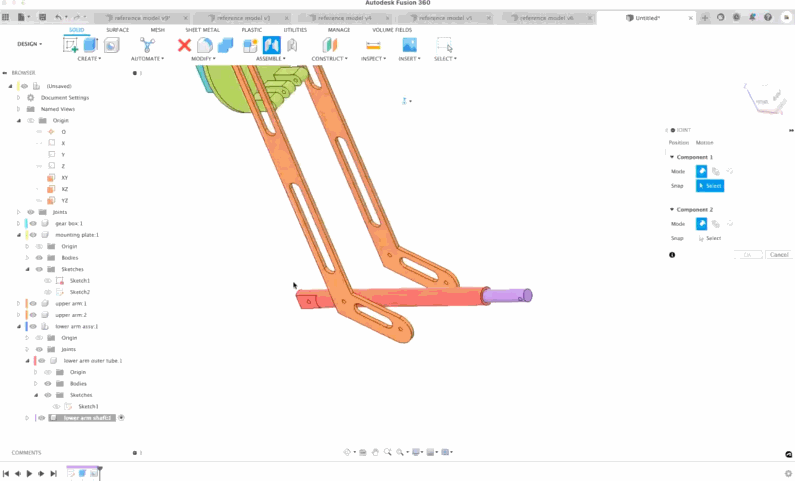
Joint (J): The Joint command lets you position components relative to one another, then define the relative motion between them. Use this command when the components are not yet positioned relative to each other in an assembly. The Joint command typically moves the first component you select to the second component. If necessary, Fusion 360 relaxes existing relationships or grounded component status to allow the first component to move. To use the Joint command, hit the hotkey ‘J’ and then select the component you would like to move relative to the second component. Then, select the joint type to define the relative motion. Once finished, the Joint will preview its selected movement in canvas. If everything looks correct, select “OK”.
As-Built Joint (Shift + J): The As-Built Joint command lets you define the relative motion between components in Fusion. Use this Fusion command when the components are already positioned relative to each other in an assembly. As-built joints are particularly useful if you’re using imported components or if you’re taking a top-down design approach to assembly modeling since the component don’t need to be moved. Unlike the Joint command, since the As-Built Joint command doesn’t reposition the components, either of the components you select can be grounded. To use the As-Built Joint command, press Shift + J, then select two components and the joint type. Once you’re finished, place the joint origin and define the relative motion. The joint motion will preview once in the canvas.
Customization
One of the standout features of Fusion is its ability to adapt to your unique workflow through custom keyboard shortcuts. By opening the Command Line (simply start typing in the search bar at the top of the interface) and entering “shortcut,” you can access the customization menu. Here, you can assign new shortcuts or modify existing ones to suit your preferences.
Customizing your shortcuts allows you to streamline repetitive tasks and keep your most-used commands at your fingertips. For example, you might create a shortcut to toggle visibility of certain components, or to quickly apply structural constraints during your design process. This level of personalization not only saves time but also helps you stay focused on the creative aspects of your project.
With this flexible shortcut system, you can build a workflow that’s as unique as your designs—making every project smoother and more enjoyable.
Shortcut management
Keeping your shortcuts organized is key to maintaining an efficient workflow in Fusion. By pressing Ctrl + Shift, you can open the Shortcut Management dialog box, where you can easily create, edit, or remove shortcuts to fit your needs. The built-in Search function lets you quickly find any command or shortcut, so you never have to waste time hunting through menus.
For even greater productivity, Fusion supports scripts and add-ins that can automate repetitive tasks or add new functionality to your design environment. By combining these tools with your personalized design shortcuts, you can take your modeling efficiency to the next level.
Mastering shortcut management not only helps you work faster but also reduces the chance of errors and keeps your creative process flowing. With a well-organized set of shortcuts and the power of automation, you’ll be able to tackle even the most complex projects with confidence in Fusion.
Other Useful Fusion Commands
Toolbox (S): The toolbox command brings up a search bar for you to locate your favorite Fusion commands and keep them all in one convenient location! How cool Is that? Simply click the hotkey ‘S’ to use this handy tool.
Appearance (A): What will your model look like in real life? Add different materials, colors, and textures to different geometry with the Appearance command in Fusion.
Toggle Between Tabs (CTRL + Tab): Hate having to click back and forth between tabs? This one’s for you. Use CTRL + Tab to cycle through your tabs with ease.
What are you waiting for? Get staretd with Fusion today.