Learn how to create custom texture patterns on mesh bodies in Fusion using the new Texture Extrude feature.
Textures have a wide range of applications. They can enhance the grip of surfaces, improve aesthetics, incorporate logos, aid in manufacturing, and much more. With the Fusion July update, a new feature has been added which allows users to create custom texture patterns for mesh bodies. This blog will guide you through the workflow and explore the possibilities of this new feature.

Step 1 – Custom texture patterns
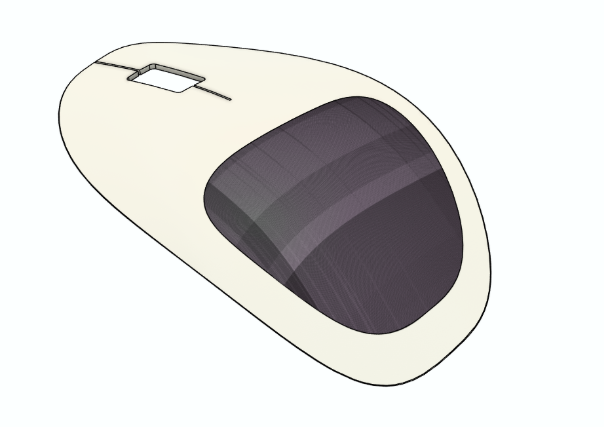
The first step is to choose your model and the area you wish to add a texture to. If the area that you wish to texturize is not a mesh, then you will need to convert this geometry to a mesh. This can be done easily in Fusion using the Tesselate command in the Mesh tab of the Design workspace.

Step 2 – Custom texture patterns
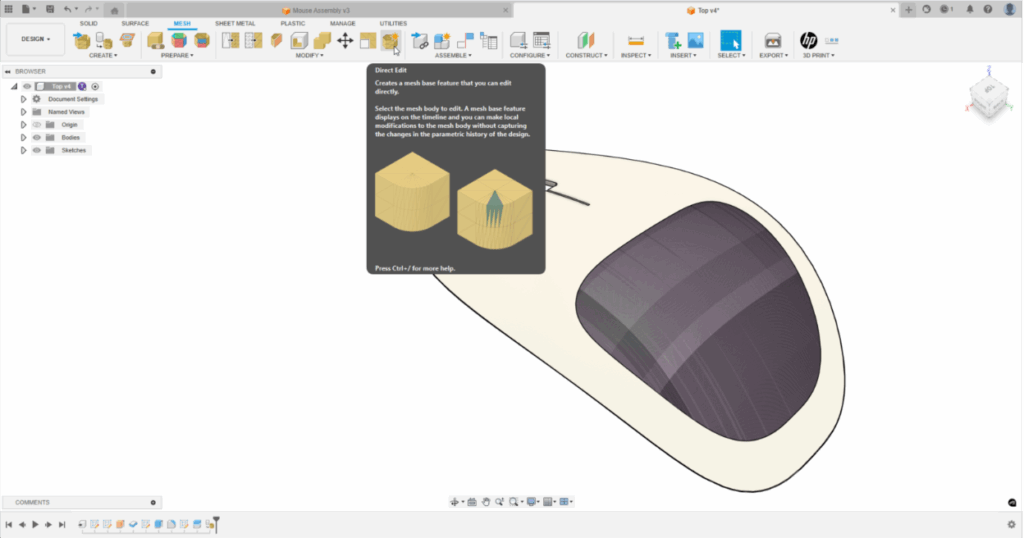
The next step is the enter the direct editing mode, which can be done by selecting Direct Edit from the Modify tab. This is required since the Texture Extrude command is a direct modelling function, and hence only available when direct editing a mesh.
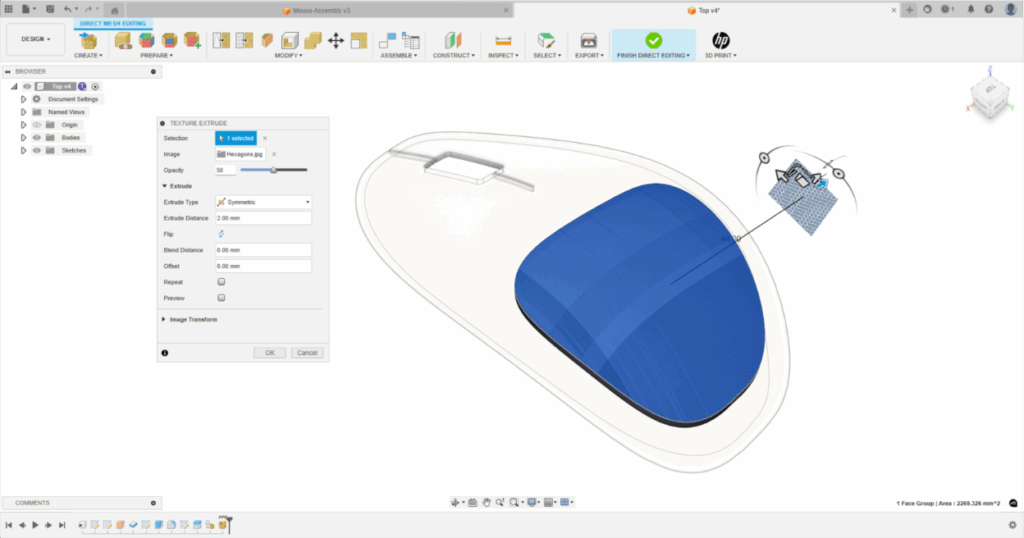
Step 3 – Custom texture patterns
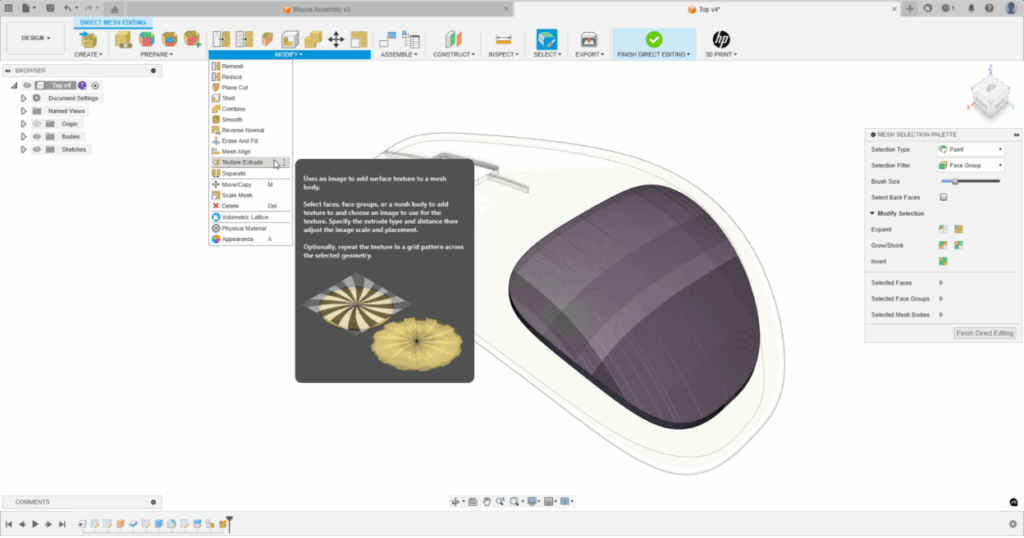
Now to the exciting part – using the Texture Extrude command! Again, navigate to the Modify tab and select Texture Extrude.
Step 4 – Custom texture patterns
You will then be prompted to select an image and an area to apply to the texture to. Note, any image can be selected and the feature will automatically convert it to a grayscale image.
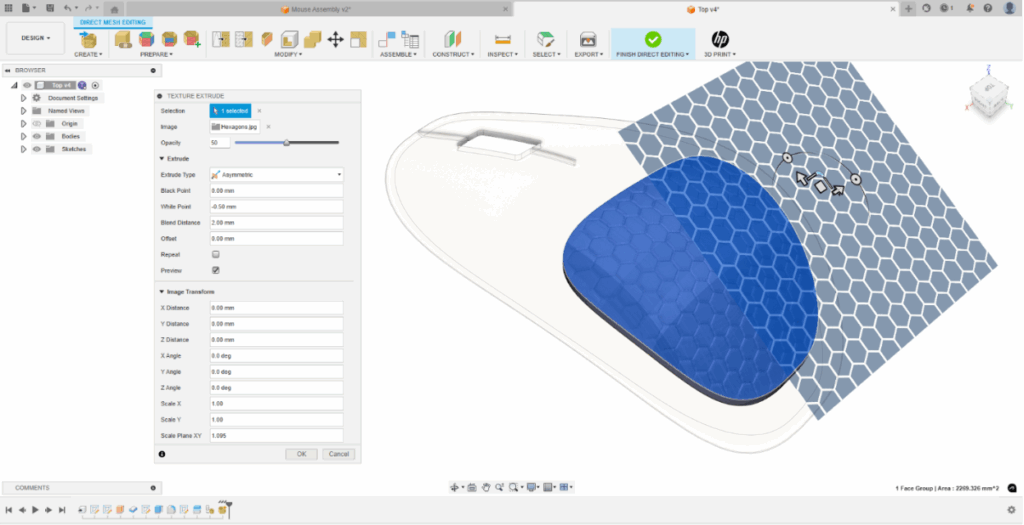
Step 5
Use the settings in the dialog to customize your texture extrusion by choosing the extrusion type, clearance from edges, blend distances and more in this new dialog. You can preview the outcome and easily generate the textured mesh model you desire.
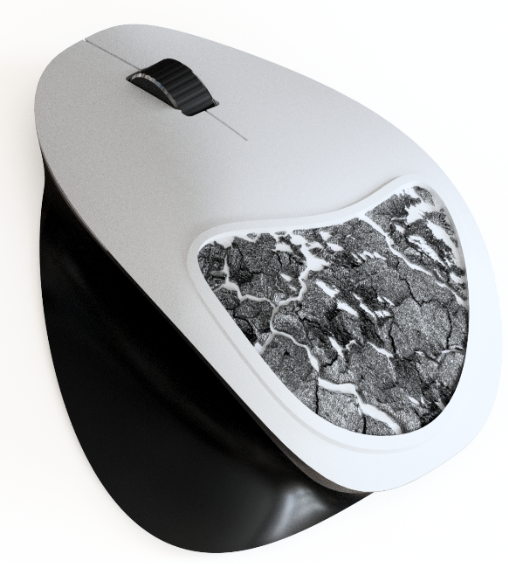
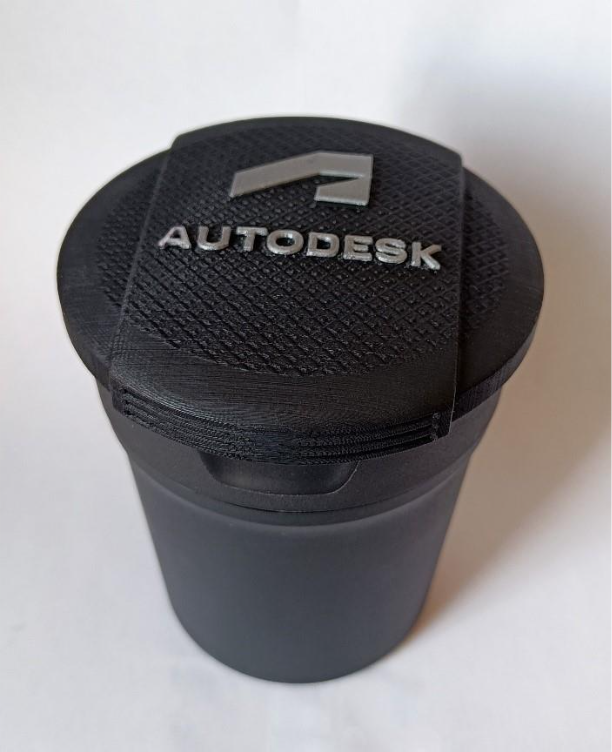
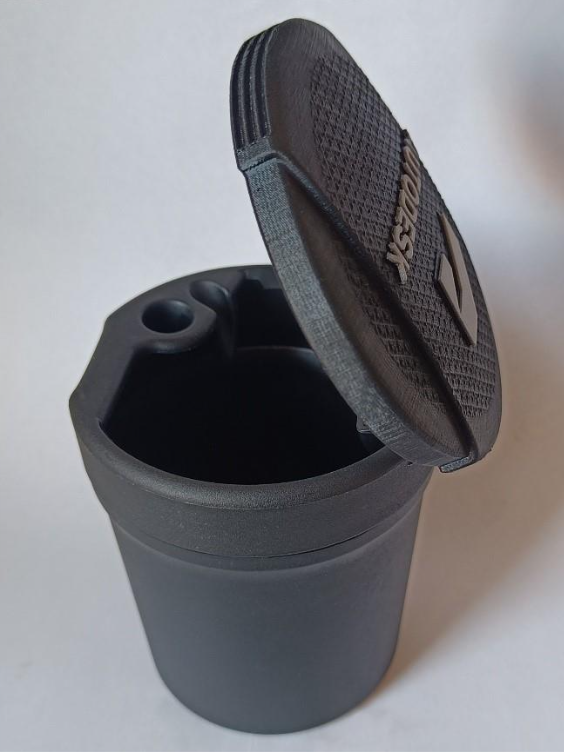
Great, that’s it! I hope this blog has been informative in demonstrating how to utilize the Texture Extrude command to add textures to mesh bodies. Users have already designed and manufactured some impressive parts using this tool. For example, see this cup lid below, designed and printed by Steve Cox, a 3D Technologies Consultant and Trainer.

Make sure to look out for some exciting updates to this feature in the future!
Custom Texture Patterns in Autodesk Fusion – frequently asked questions (FAQs)
Custom texture patterns in Autodesk Fusion allow you to apply image‑based textures to mesh bodies using the texture extrude feature. These textures are converted to grayscale and extruded directly onto a surface to create physical geometry, not just visual appearances. See how custom texture patterns work with a free 30-day trial of Fusion.
Texture extrude is a direct modeling tool in Autodesk Fusion that extrudes a texture from an image onto a mesh surface. It enables designers to add grips, surface details, logos, or functional patterns to complex or curved geometry. Try it free for 30-days today.
Custom texture patterns in Fusion work on mesh bodies. If your model is not already a mesh, it can be converted using Fusion’s mesh tools before applying texture extrude.
Any image file can be used for texture extrude in Autodesk Fusion. Fusion automatically converts the image to grayscale, using light and dark values to define the depth of the texture extrusion. Try it out, free for 30-days.
Yes. Texture extrude in Fusion supports projecting textures onto both flat and curved mesh surfaces, making it suitable for ergonomic designs and complex organic shapes. Get started today with a 30-day free trial.
Yes. Custom texture patterns are commonly used in additive manufacturing to add grip, surface detail, or branding directly into printed parts without secondary operations.
Textured mesh models can be exported for manufacturing or additive workflows. Because the texture is real geometry—not just an appearance—it becomes part of the final physical part.
No. Texture extrude is a direct modeling operation in Fusion applied to mesh bodies. It does not create a parametric timeline feature, which is why it is accessed in direct edit workflows