Additive manufacturing is a rapidly evolving industry which continues to grow year on year. With this, comes new technologies and a whole host of new machines. With new printers being unveiled seemingly every week, it can be difficult to keep up. While we do support a whole range of 3D printers in Autodesk Fusion, some users will find that their printer is not yet supported. Thankfully, for those whose printer requires a generic file format, users can use the following workflow detailed in this blog to support their printer.
Before getting started, users will need to check the following blog to see if their printer can be supported via the generic additive file types that Fusion supports: Autodesk Fusion Additive Manufacturing File Export Types.
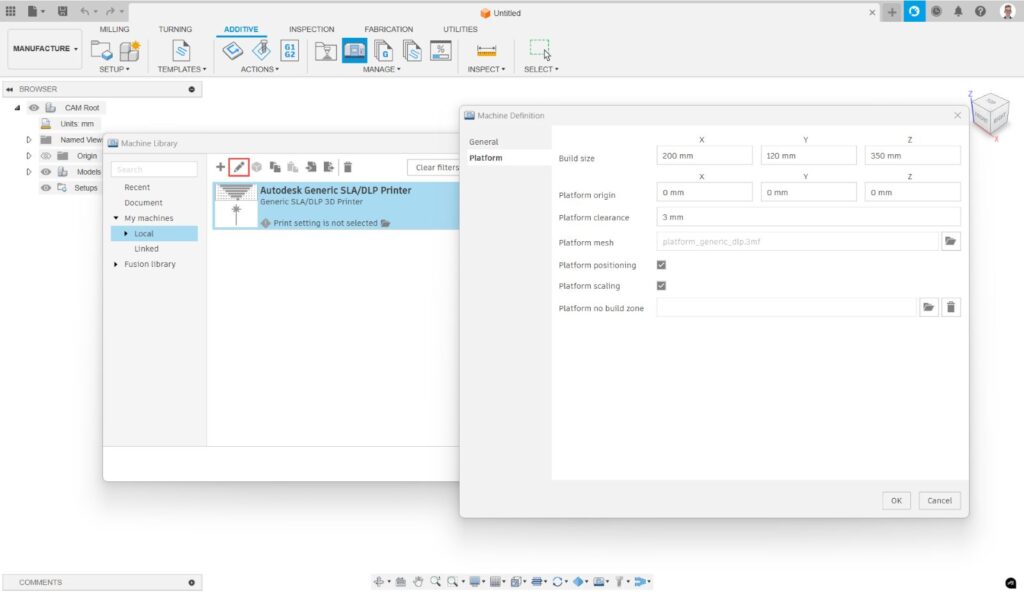
Creating your printer in Fusion
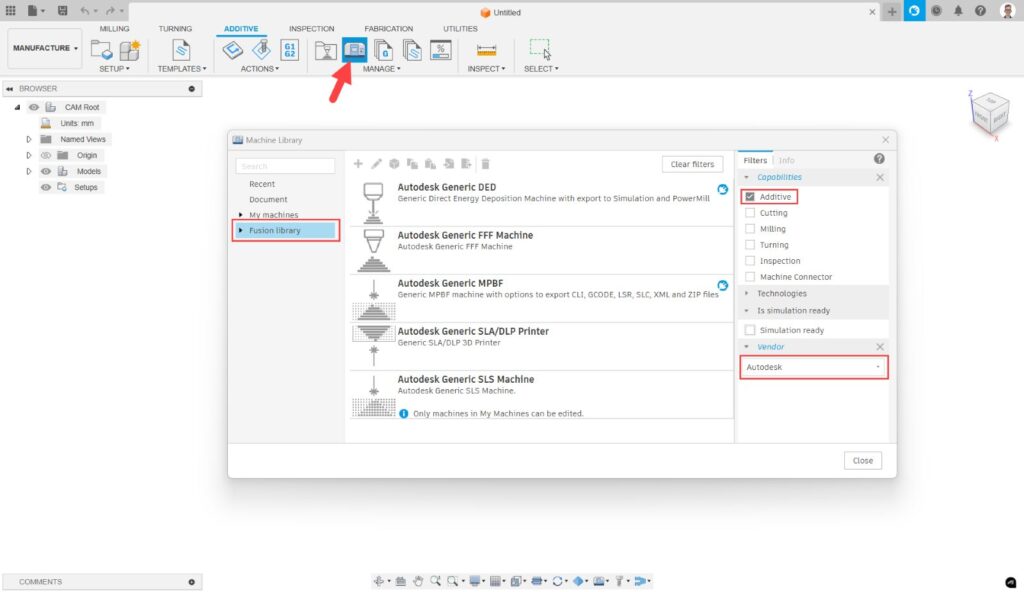
The first step will be to create your machine configuration file in Fusion. From the Manufacture workspace, navigate to the Machine Library, filter for “Additive” on the right, and set the vendor to “Autodesk”. This shows you some generic additive machines that can be used as a template to create your machine configuration file. Copy and paste the type of additive machine you wish to use to your local folder.
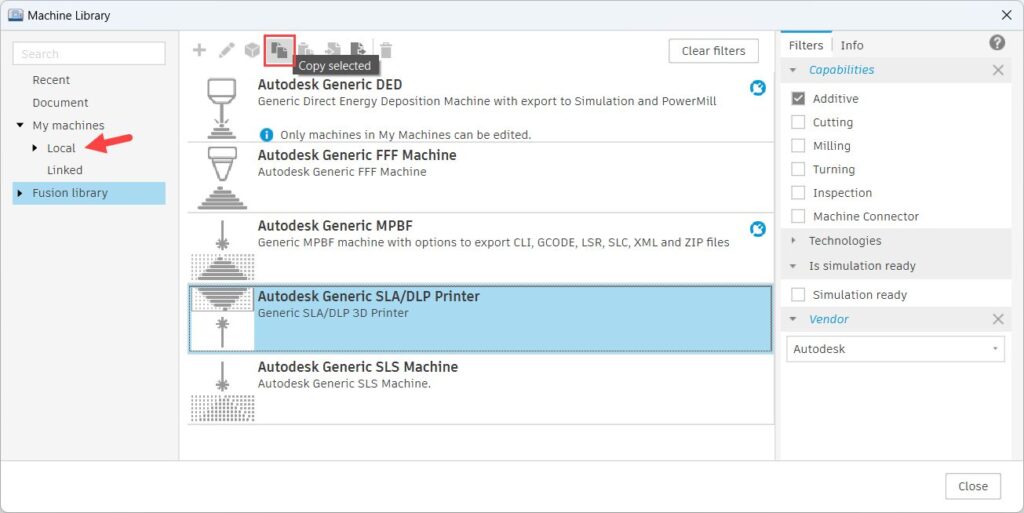
You can now rename and edit this machine to customize the machine specifications such as build size, and platform clearance. You can also upload a platform and no-build zone geometries to more accurately represent your custom printer.
Generating the print file
Now that your machine is created, the final step is to prepare a build and generate the print file. To do this, we will need to create a setup. In Fusion, a setup defines the manufacturing process and specifies the machine to be used. In the setup dialog, select the customized machine you have just created.
Note, the setup will require a part to also be selected, so make sure you have a part opened before selecting “Setup”.

During the Additive setup creation, you will also be prompted to select a print setting. Simply select the most relevant one available from the provided options. For example, if your custom 3D printer is a resin printer (DLP or SLA) you can select the Generic DLP or Generic SLA print setting, which will allow you to export PNG / TIFF or SLC / SVG files respectively.

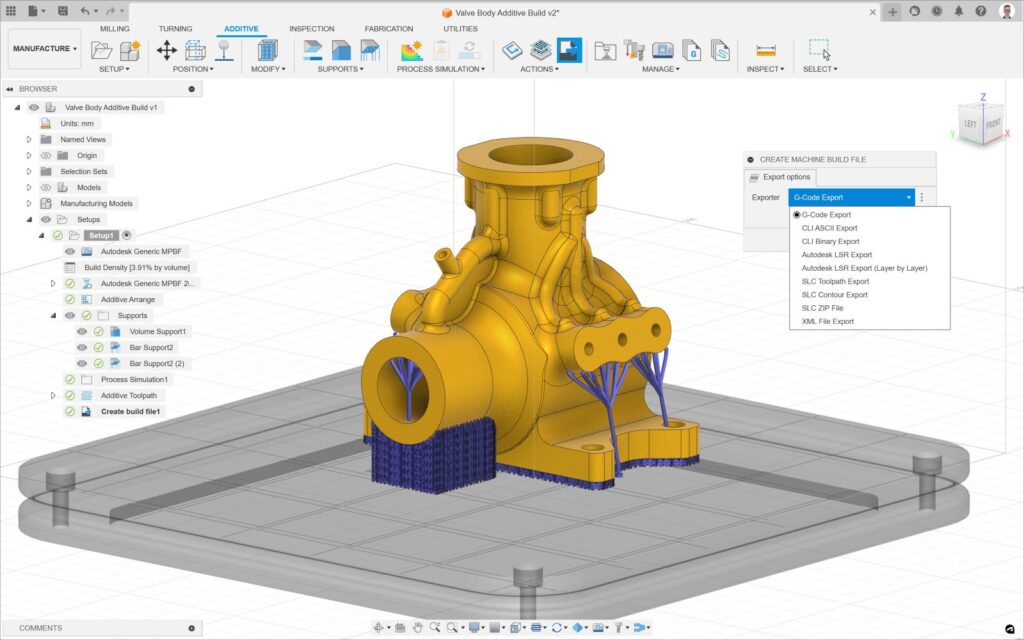
After orienting, arranging and supporting your parts as usual, the final step is to select “Create Machine Build File” and select the export type you require. Note, the available exporter options depend on the type of machine and print setting selected in the additive setup.

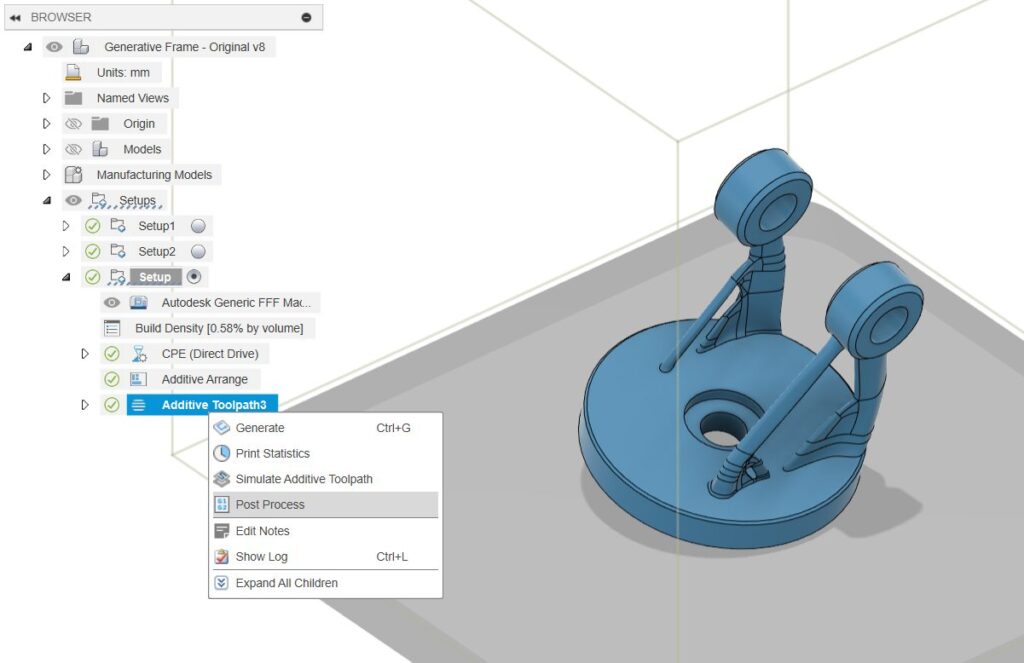
Note, the “Create Machine Build File” option is not available for some workflows, so instead users will need to generate their toolpath and then postprocess to create their print file.