When do animations come in handy for designers? How do you animate a design in Fusion? Look no further than this comprehensive tutorial.
When you think of animation, you probably envision the timeless classics of Dreamworks or Pixar; but, as we all know, animation can encapsulate a variety of different genres. As such, animation has more applications than just entertainment. For product designers and engineers, animation can help communicate how a design assembles, moves, and functions before a physical prototype is produced. It serves as a digital representation of a potential real-life scenario or object.
In Fusion, animation can refer to different workflows depending on your goal. The Animation workspace is commonly used to create exploded views and product animations that communicate assembly steps, repair operations, and design functionality. Motion studies, on the other hand, are used to analyze joint-driven movement in an assembly.
A motion study allows you to simulate how components and joints move over time, helping you visualize the assembly process or the function of a mechanism. When setting up joints, you may need to select specific components or options from menus to define how each part should move.
Elevate your design and manufacturing processes with Autodesk Fusion
Introduction to animation
Animation in Fusion offers much more than basic exploded views. In the Animation workspace, you can create storyboards that show how parts and assemblies move over time, making it easier to communicate design intent to collaborators, stakeholders, and customers. A motion study allows you to simulate the movement of components and joints over time, giving you valuable insights into the functionality and assembly of your model.
To start, navigate to the Assemble menu within the Model Workspace to create a motion study. Here, you can add and configure joints between components, specifying how each part should move relative to the others.
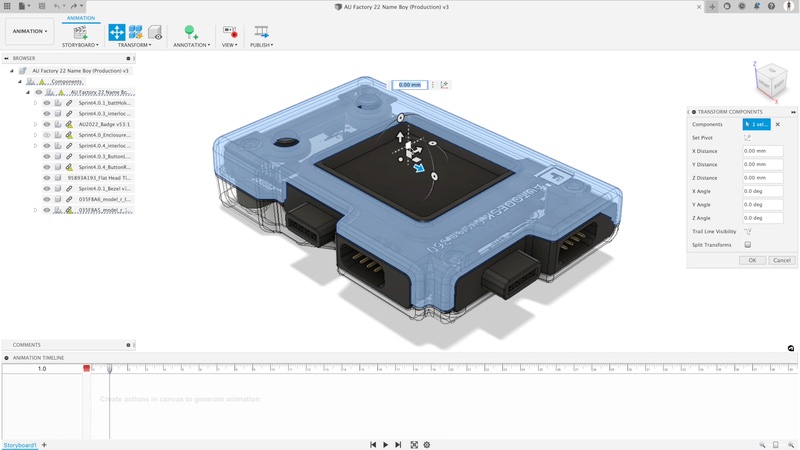
The animation timeline is your primary tool for controlling movement. By dragging and setting keyframes along the timeline, you can animate the positions and rotations of joints, resulting in smooth, realistic motion. Fusion provides a range of joint types and parameters, allowing you to animate everything from simple sliding parts to intricate mechanical assemblies. Adjusting these parameters over time allows you to visualize how your design will function in the real world.
After configuring your joints and components, you can refine your animation by adjusting the camera view and configuring the render workspace. This ensures that your final animation not only demonstrates the intended motion but also appears polished and professional. Whether you’re animating a character rig or a mechanical device, mastering the motion study and timeline tools in Fusion allow you to create compelling, functional animations that effectively communicate your design intent.
Motion study in design
Animation is an important part of the industrial design process because it can make an assembly easier to understand. A well-built animation can show how parts relate to each other, how components move into position, and how a product may be assembled, repaired, or reviewed.
Motion studies are useful when a design includes moving parts connected by joints. In Fusion, the Joint tool positions components and defines their motion relative to one another. Joint types include rigid, revolute, slider, cylindrical, pin-slot, planar, and ball joints, giving designers several ways to represent real mechanical movement.
For example, if a product includes sliding, rotating, or interlocking components, a motion study can help evaluate how those components move through a defined range. This is different from an exploded-view animation, which is primarily used to communicate how an assembly comes apart or goes together visually.
The key difference is intent: use motion studies for joint-driven movement analysis; use Animation workspace storyboards for visual communication, exploded views, and assembly presentations.
Animating with Fusion
Fusion provides several options when animating a product design. You can create exploded views, edit an already completed animation, add trail lines, add annotations, publish, and share the animations by downloading a video file or viewing them in a web browser.
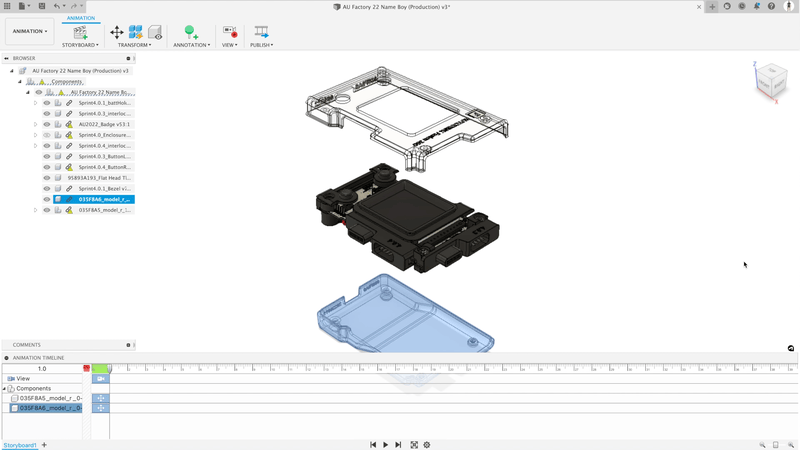
To get you started, here are simplified steps on how to create an exploded view animation using Fusion. For this example, envision a 3D box with a sphere in the middle.
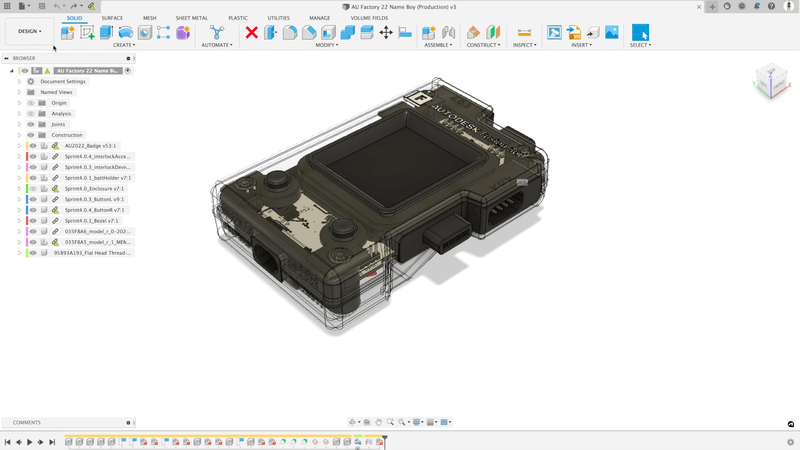
1. Design the components of the product you wish to animate. In this case, we have the AU Factory 2022 device.
2. With your design file open, make sure the Workspace is Animation.
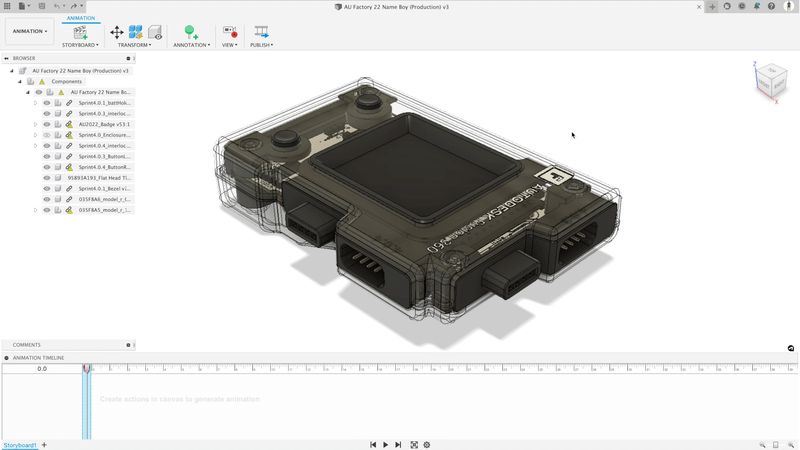
3. Rotate, pan, and zoom the model into a clear starting position.
4. Move the playhead into the Scratch Zone if you need to adjust the setup without recording actions to the animation timeline. The Scratch Zone is the small space to the left of the beginning of the animation timeline.
5. Click the ViewCube in the faces of the design.
6. Pan / zoom to center the design.
7. Move the playhead forward on the timeline (1 second in the gif below)
8. Click on the desired component, then click the Transform command.
9. Move components to a position where they’re not hidden by other components, then zoom / pan to center the design.
10. Play the animation and review the timeline. Make adjustments accordingly.
Note: These steps are basic and serve as an example of where to start your product animation.
Rendering and output
After you’ve completed your motion study and are satisfied with the animation, it’s time to bring your work to life with the powerful rendering tools in Fusion. Head over to the Render Workspace, where you can prepare your animation for output. Here, you’ll set up your camera angles, adjust lighting, and fine-tune render settings to ensure your animation looks its best.
To render your animation, locate the Cloud Render button. You may need to perform an initial low-quality render to activate the full rendering options. Fusion allows you to render your animation as a high-quality video file (such as .mp4) or as an image sequence, giving you flexibility depending on your needs. The rendering process can take anywhere from a few minutes to over an hour, depending on the complexity of your animation and the quality settings you choose.
Once rendering is complete, you can download the rendered video and use it directly in presentations, share it with collaborators, or even convert it to a GIF for quick sharing online. If you want to add titles, music, or further edits, simply import the video into your preferred video editing software. This processmakes it easy to create professional-grade animations that showcase your designs in motion.
For more in depth information on how to create an explosion animation for your product, refer to Activity 1: Create an Animation of the Fusion 360 Animation Tutorials.
Not sure where to go from here? No problem. Fusion comes with additional tutorials and step-by-step articles to help you animate any product design.
Autodesk Fusion Frequently asked questions (FAQs)
In Autodesk Fusion, animation is best understood as a communication tool for showing how a product assembles, disassembles, moves, or functions before you build a physical prototype. It is especially useful for product walkthroughs, assembly instructions, service documentation, stakeholder reviews, and design presentations where a static model does not tell the full story.
If your goal is to create exploded views, assembly sequences, or presentation-ready product motion, work in the Animation workspace. If your goal is to evaluate how joints and linked mechanisms behave over time, use a Motion Study instead.
The Animation workspace and Motion Studies both deal with movement, but they operate with different goals in mind. The Animation workspace—part of the Autodesk Fusion—is designed for visual storytelling. It allows you to manually sequence movements, create exploded views, and build presentation-ready animations that clearly explain how a design comes together.
Motion Studies, by contrast, are based on the mechanical structure of your design. They use joints, motion constraints, and relationships defined during modeling to simulate actual movement. This makes them better suited for evaluating how mechanisms behave, rather than simply visualizing them.
A good rule of thumb is that Animation helps you communicate design intent, while Motion Studies help you understand and validate it.
Animating a design in Autodesk Fusion is a sequential process that builds motion over time. After switching to the Animation workspace, you start by positioning your model and defining a clear starting state.
From there, the timeline becomes your primary control system. As you move the playhead and apply transformations—such as translating or rotating components—each action is recorded and sequenced. This allows you to construct a complete animation progressively rather than all at once.
As the animation evolves, you can refine it further by incorporating tools from the Fusion Animation tutorial, including camera movement, annotations, and trail lines. These additions help guide the viewer’s attention and make the sequence easier to follow.
Once finalized, the animation can be published as a video or shared via the web client for easy collaboration.
Yes, it is entirely possible to animate a product design in Autodesk Fusion, and it is one of the core ways to communicate how a design behaves beyond static modeling. Within the Animation workspace in Autodesk Fusion, you can create sequences that show how components assemble, move, or interact over time.
What makes Fusion particularly effective is that animation does not require starting from scratch—it builds directly on your existing design data. This means that once a model has been created using proper components, you can begin applying transformations, capturing actions on the timeline, and structuring motion into coherent sequences. As a result, animation becomes a natural extension of the design process rather than a separate discipline.
In practice, product animations are commonly used to illustrate assembly logic, demonstrate functionality, and create presentation-ready visualizations for stakeholders. Even relatively simple transformations—such as rotating components into place or separating parts in an exploded view—can significantly improve how a design is understood. When combined with features like storyboards and camera motion, Fusion allows you to create animations that are both informative and highly engaging.
While nearly any design can be animated, certain types of models are especially well-suited for animation workflows. In general, designs that involve multiple components, moving parts, or assembly sequences benefit the most from animation.
Assemblies are the most natural candidates, particularly those that require clear visualization of part relationships. For example, mechanical assemblies such as gear systems, hinges, or enclosures become much easier to understand when animated. These designs often rely on relationships defined through joints, which can later be explored using workflows like realistic motion in assemblies.
Products that involve step-by-step construction or disassembly—such as consumer electronics, industrial equipment, or mechanical tools—also translate well into animation. In these cases, exploded views created in the Animation workspace help communicate how parts fit together and in what order they should be assembled.
On the other hand, highly conceptual or single-body designs with no interaction between parts tend to benefit less from animation. While they can still be animated using camera motion or simple transformations, they typically do not gain the same level of clarity as multi-component assemblies. In essence, the more interaction a design has between parts, the more value animation adds.
Preparation plays a critical role in how effective your animation will be. The most important step is structuring your design using components instead of bodies. Components enable independent control of each part, which is essential for sequencing movements and creating clean exploded views.
In addition, defining assembly relationships using tools such as joints—explored in this realistic motion in assemblies tutorial—provides a foundation for both animation and motion analysis. Even if those relationships aren’t directly animated, they help ensure that your animation remains consistent with the intended mechanical behavior of the design.
A well-prepared model ultimately makes the animation process more intuitive, scalable, and accurate.
Storyboards are individual animation sequences that exist within a single design. Each storyboard has its own timeline and set of actions, allowing you to create multiple variations without affecting the core model.
For example, you might use one storyboard for an exploded disassembly, another for a reverse assembly sequence, and a third for a presentation walkthrough. This approach makes it easier to tailor your animation to different audiences and use cases.
Autodesk Fusion also allows you to create storyboards that build on previous ones, inheriting the final state of an earlier sequence. This makes it easier to construct complex workflows without duplicating work. For more detail, see how to create a storyboard in Autodesk Fusion.
Exploded view animations are created in the Animation workspace by separating components to reveal how an assembly fits together. This can be done manually using Transform tools or automatically using features such as Auto Explode.
While generating the initial explosion is straightforward, achieving clarity requires refinement. Adjusting the spacing between components, sequencing their movement, and enabling trail lines all help make the animation easier to understand.
For more complex assemblies, staggering the motion instead of moving all parts at once significantly improves readability.
You can follow a guided example in this exploded view tutorial.
Both Auto Explode and Manual Explode have their place in Fusion, and choosing between them depends on the level of control required and the complexity of the assembly.
Auto Explode is ideal when you need to quickly generate an exploded view based on the structure of the assembly. With options like “One Level” or “All Levels,” Fusion distributes components automatically, making it a fast way to visualize overall assembly relationships. This approach works well for early-stage exploration or when dealing with straightforward assemblies where precise control is not critical.
Manual Explode, on the other hand, provides significantly greater control. By individually selecting components and defining their direction and distance of movement, you can tailor the animation to match real-world assembly logic more closely. This is particularly important for complex products where components must move in specific directions, or where overlapping geometry would otherwise reduce clarity.
In most professional workflows, a hybrid approach is often the most effective. Designers may begin with Auto Explode to establish a baseline and then refine the animation manually for improved readability and accuracy. This combination allows you to balance efficiency with precision, ensuring that the final animation communicates the design as clearly as possible.
For a hands-on example of exploded workflows, see creating an exploded view in Fusion.
Autodesk Fusion does support animating moving parts, but the level of realism depends on the approach used. In the Animation workspace, movement is typically applied manually, which works well for presentation purposes.
For mechanically accurate motion, workflows such as Motion Study rely on properly defined joints—like revolute or slider joints—to simulate behavior over time. These relationships are critical when working with assemblies that involve linked movement, such as gears or hinges.
It’s important to note that joint constraints are not automatically applied in presentation animations. As a result, when accuracy matters, motion simulation tools provide a more reliable foundation.
For reference, see how to animate joints in Fusion.
The timeline is the backbone of Fusion animation, capturing every change applied to the model over time. Each movement, rotation, or visibility change is recorded as an action, which appears on the timeline at a specific point.
By positioning the playhead and applying transformations, you define key moments in the animation. Fusion then interpolates between these states, creating smooth transitions without requiring manual input for every step.
This setup allows you to refine pacing, overlap actions, and adjust sequencing with precision, ensuring that even complex animations remain clear and controlled.
Yes, these features play a major role in enhancing animation clarity. Camera movement allows you to control how the viewer experiences the design, whether that’s zooming into a critical area or rotating around the product.
Annotations and callouts provide additional context by highlighting important components or explaining actions. Trail lines further improve readability by showing the path of moving parts.
Together, these tools transform an animation from a simple sequence of movements into a clear, guided narrative that communicates design intent effectively.
Autodesk Fusion provides a straightforward way to export animations using the Publish Video feature in the Animation workspace. This allows you to define the output resolution, select specific storyboards, and generate a video file for sharing or presentation.
Animations can also be shared through the web client, making them accessible in a browser without requiring installation of the software.
For more details, refer to Publish animation videos in Fusion and Share animations using the Fusion web client.