This post is also available in:
Learn how to create your first hard surface model in Autodesk Fusion! Surface models provide flexibility and complexity that solid tools might lack. Here we explain what the difference between a surface model and solid body and highlight four different methods to convert surface models into solid bodies.
Elevate your design and manufacturing processes with Autodesk Fusion
What is a surface model?
A surface model is a computer-aided design (CAD) method that creates a 3D representation of an object’s outer surfaces without defining its internal volume. It allows for the precise shaping of curves and smooth surfaces, ideal for designing complex, organic shapes like car bodies and aircraft, emphasizing aesthetics and aerodynamics.
What is a solid body?
A solid body is a three-dimensional (3D) object in computer-aided design (CAD) that has a fully enclosed geometry and defined volume. Unlike surface models, solid bodies represent both the interior and exterior, allowing precise simulations, analyses, and manufacturing preparations with accurate physical properties like mass and volume.
Surface model vs. solid body
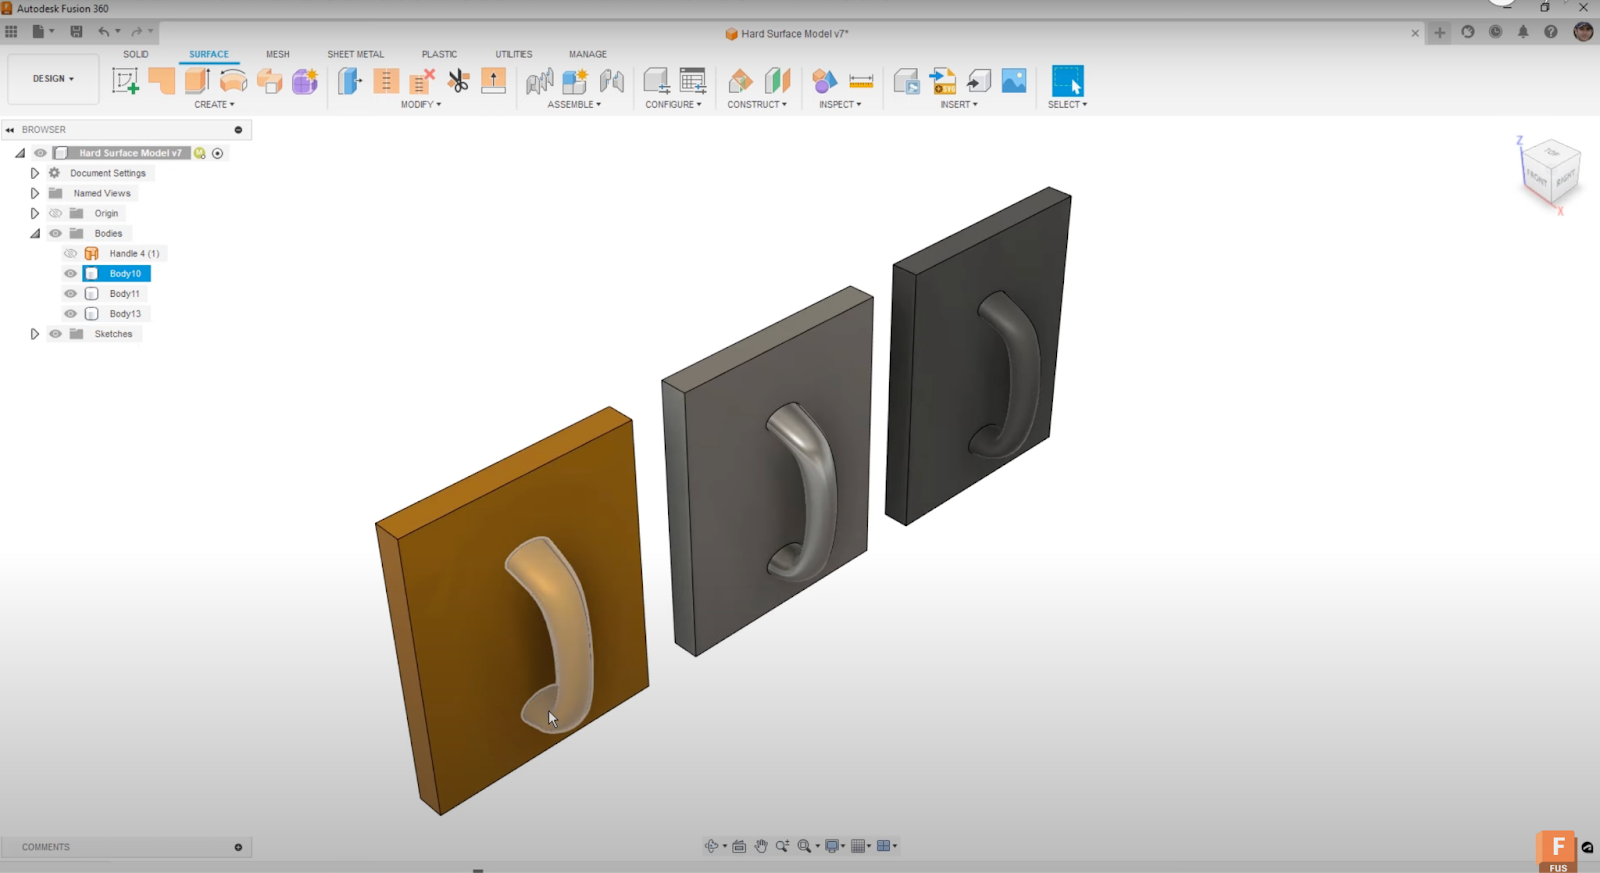
Surface models offer flexibility, allowing us to design individual faces or add complexity where solid tools may fall short. For instance, consider a set of surface handles overlapping a solid body. Our goal is to transform them into a single solid body. So, how do we do this?
How to turn surface models into solid bodies
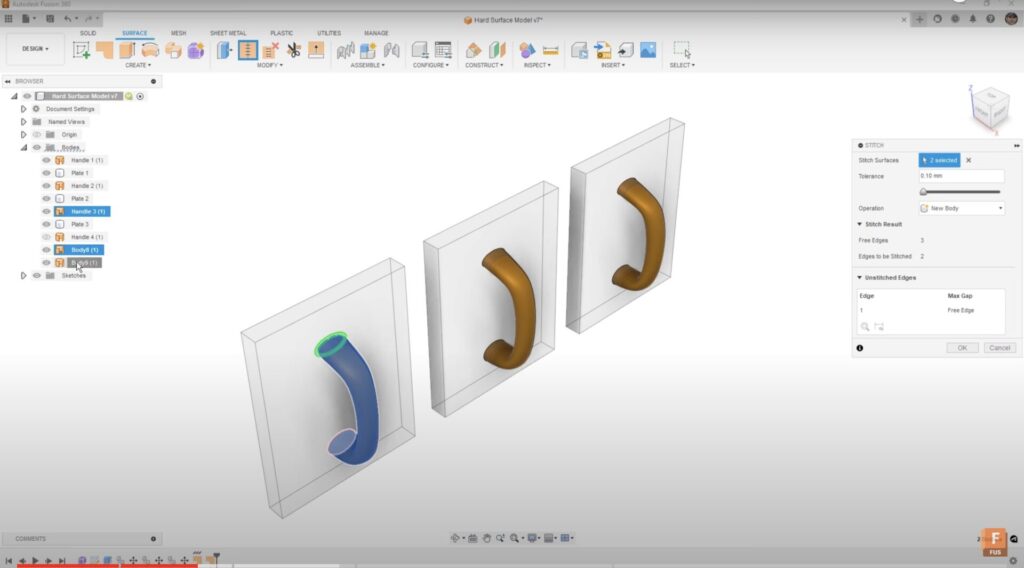
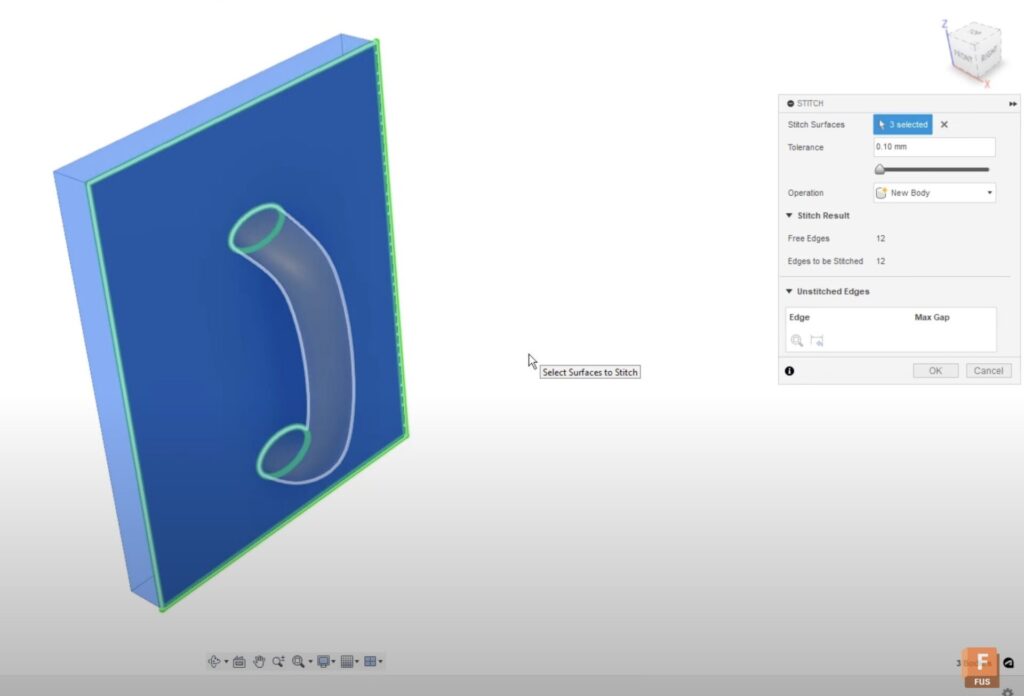
Method 1: Patch and stitch
The first and most common method involves using surface tools such as ‘Patch’ to fill in the end of the surface. Following this, we ‘Stitch’ the patched surfaces together to create a closed, watertight volume. Autodesk Fusion automatically converts a closed volume into a solid body when using the stitch tool. Finally, by using the ‘Boolean Combine’ tool you can merge them into a single solid body.
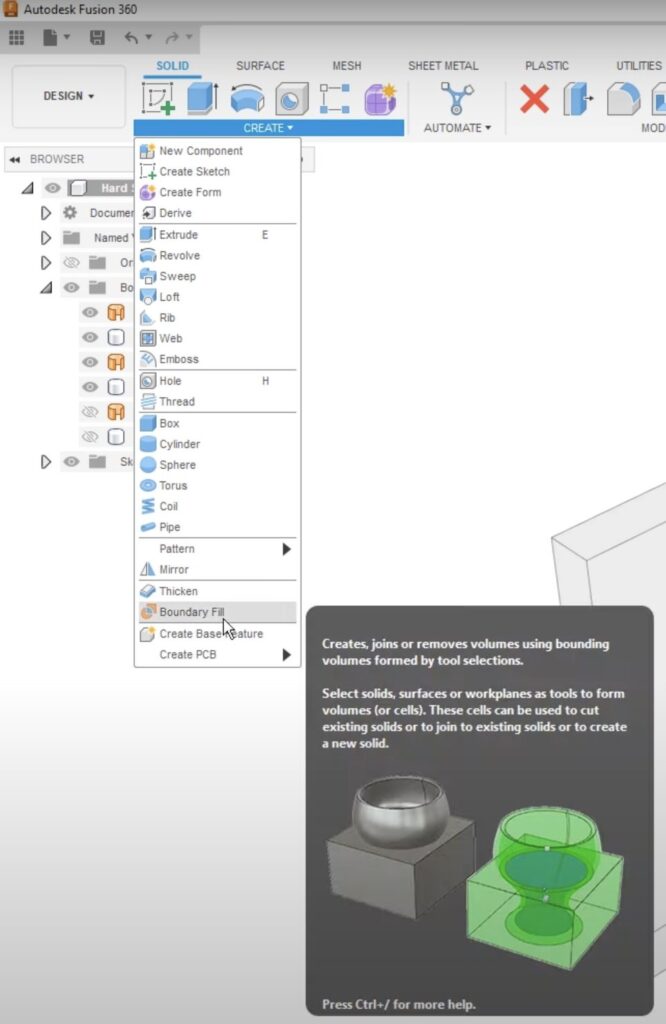
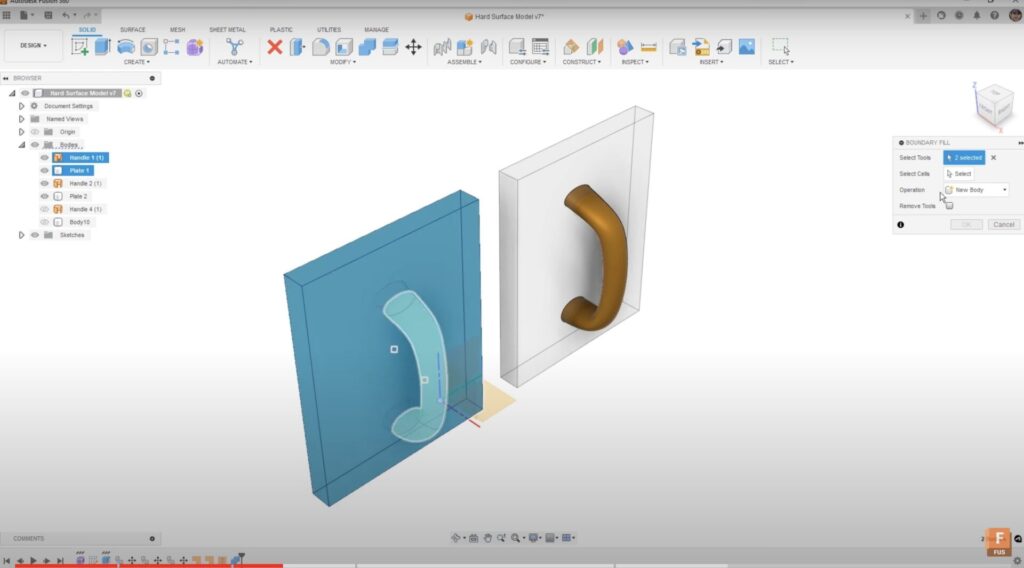
Method 2: Boundary fill
The second method, arguably easier, uses the ‘Boundary Fill‘ tool under the ‘Create’ menu. This tool allows the use of solid bodies, surfaces, and even planes, select the cells you want to keep or remove and convert them into solid bodies. It’s particularly useful for complex modeling tasks like mold cavities. With a single tool, you can eliminate the need for patching, stitching or combining.
Method 3: Unstitch
The third method, the most complex, involves using the ‘Unstitch’ tool under surface tools. Unstitch a face on the solid body, converting it into a set of surfaces. Then use the ‘Trim’ tool to remove the inside areas of the plate and the overlapping sections of the handle. Finally, use the ‘Stitch’ tool to combine the faces and the handle into a closed volume, which Fusion converts into a solid body.

Method 4: Thicken
The final method involves the ‘Thicken’ tool. However, it’s important to note that this tool may not always be the best choice, especially when the curvature going into the end is not tangent or normal to the plane used to create that end section. While ‘Thicken’ is excellent for maintaining consistent wall thickness in injection molded parts, it can create problems on the ends of those parts. It’s crucial to use tools like ‘Trim’ or extend them up to a cutting plane or parting surface when using the ‘Thicken’ tool.
Each of these approaches has advantages and disadvantages. Patching and stitching are straightforward, while boundary fill can be tricky for complex designs but is a great option. Unstitching and trimming is the most complex but also the most flexible. The ‘Thicken’ tool is beneficial for maintaining consistent wall thickness but can be problematic on the ends of parts.
Choosing the right method depends on your design needs. We’d love to hear which method you find most useful for your designs. As always, thank you for reading, and we look forward to seeing you in the next article!