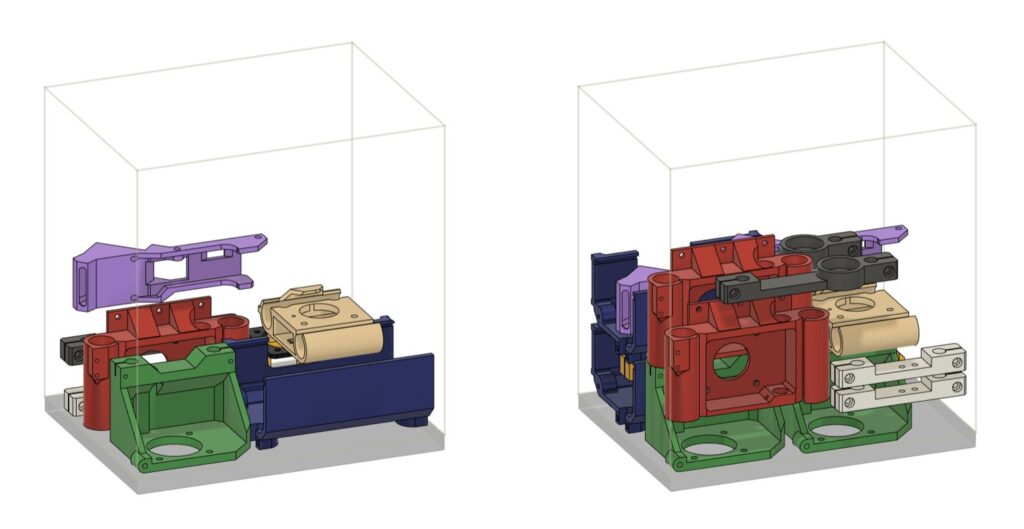
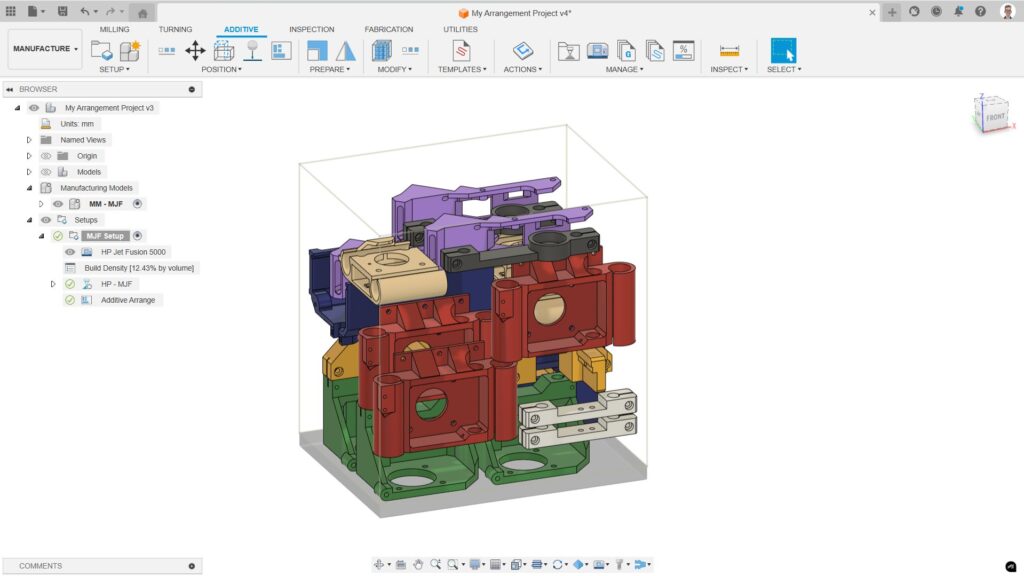
Arranging components within a 3D printer’s build volume is essential for maximizing printer capacity, minimizing waste, and optimizing production efficiency. A particularly useful feature is the ‘Create Copies’ option, which allows you to duplicate components during the packing process.
However, imagine you’ve just finished creating an additive arrangement using this ‘Create Copies’ option in Autodesk Fusion. Everything looks great, but then you realize that you need more or fewer copies than you initially set.
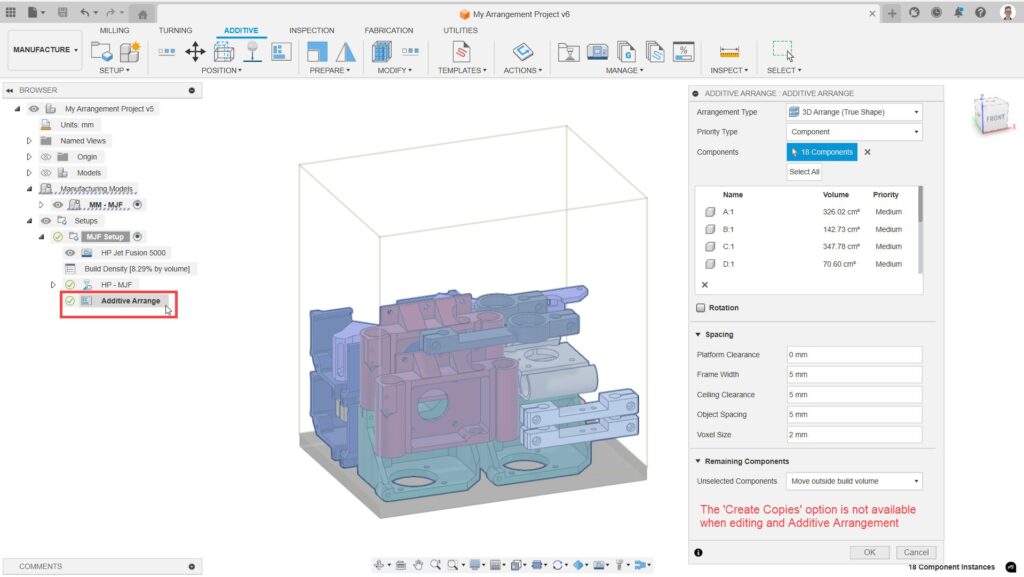
This is quite common, and one’s first thought might be to try editing the additive arrangement they’ve just created. However, users will find that the ‘Create Copies’ option is no longer available when editing an Additive Arrange. This is because once copies have been created, they are added to the manufacturing model and the setup. Therefore, users will find themselves having to do one of the following manual workflows in order to edit the number of copies of parts and continue with the arrangement.
How to add copies after an additive arrangement
- Using the Duplicate command: Users can create new copies of components by using the ‘Duplicate’ command in the ‘Modify’ toolbar group. This method is straightforward and enables you to quickly add more copies to your arrangement. You may then want to regenerate the additive arrange by selecting all the components.
- Fill Build Volume: Another efficient way to add copies is by using the ‘Fill Build Volume’ command for each unique component to create further copies. The benefit of doing this is that the copies get arranged automatically after creation.
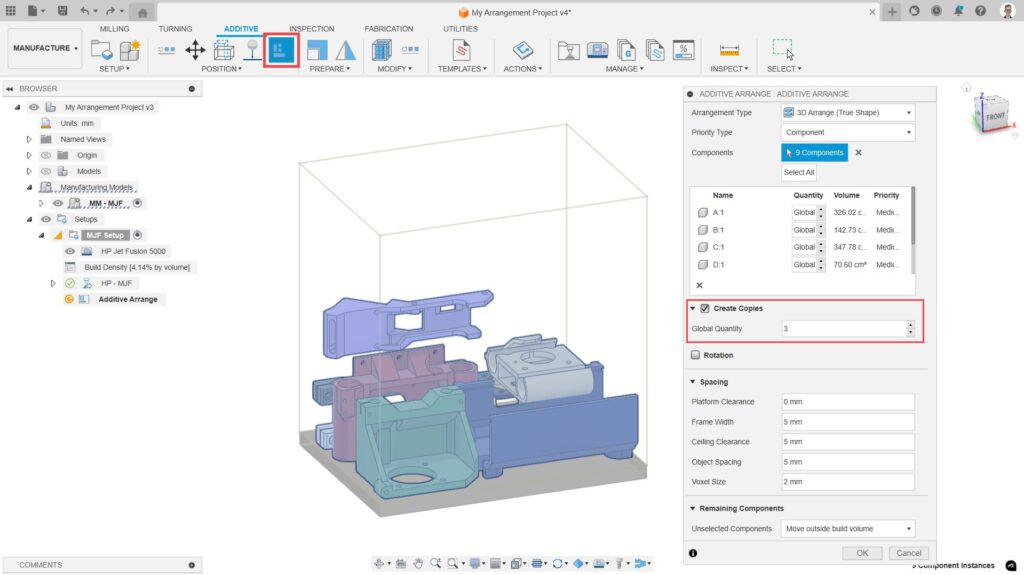
- Create a New Arrangement and edit “Quantity” of each component: This method requires deleting the old arrangement and then creating a new Additive Arrangement. With the new arrangement created, you can manually edit the quantity of each component in the arrangement table of the Additive Arrange dialog.
How to remove copies after an additive arrangement
- Manually Removing Components: Conversely, for removing copies, this can be done by selecting the extra copies and manually moving them outside of the build volume. Once they are outside of the build volume, right-click on the setup and select ‘Remove Excess Components’. You may then want to regenerate the additive arrangement by selecting all remaining components.
- Editing the Additive Arrange: Edit the existing arrangement and select only the components you wish to be arranged. Ensure ‘Unselected Components’ are set to “Move outside build volume” and regenerate. Like before, right-click on the setup and select ‘Remove Excess Components’.
How to use the ‘Undo’ Command
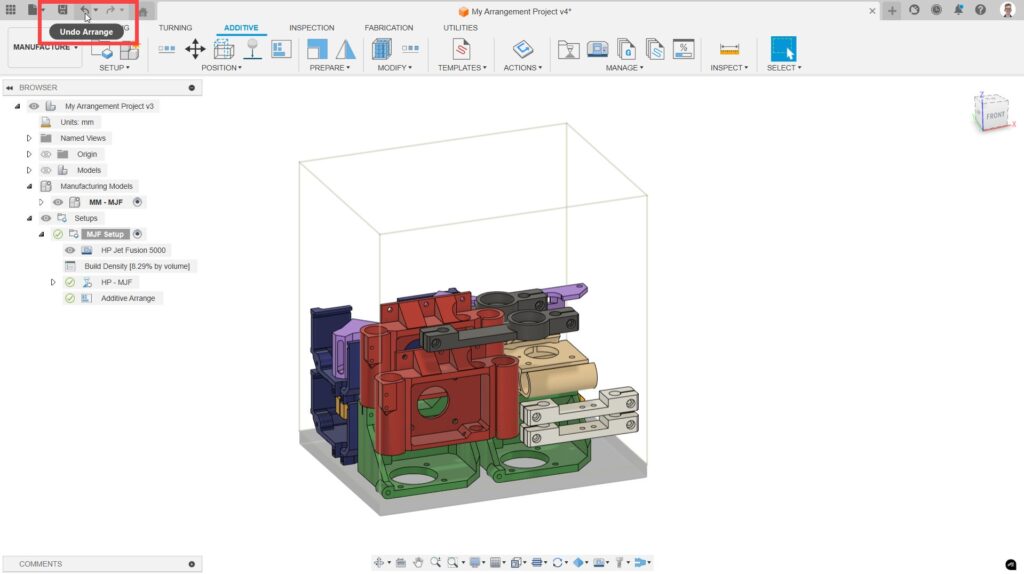
You’re probably thinking that all the above workflows are tedious and time-consuming—and you’d be right! Thankfully, there is a much faster and more efficient way of doing what we need, and that is to simply use Fusion’s “Undo” function and then re-create the additive arrangement.
- Undo the Arrangement: Once you realize the need to change the number of copies, hit the Undo button. This will revert your arrangement back to its previous state before the copies were created.
- Repeat the Additive Arrangement with New Parameters: After undoing, you can immediately re-create the arrangement, entering the new desired number of copies.
This approach ensures that your workflow remains smooth and efficient. Stay tuned for more tips and tricks on optimizing your Fusion workflows. Happy 3D printing!