3D printing has revolutionized the way we create prototypes, parts, and even final products. Autodesk Fusion is a powerful tool that can help you design and prepare your models for 3D printing with ease. Ready to get started 3D printing with Autodesk Fusion? Here are some essential tips & tricks to make the process as smooth as possible.
Table of Contents
- 1. Configure your preferences
- 2. Download and install the 3D Printing Essentials add-in
- 3. Automate common additive manufacturing workflows
- 4. Manufacture Workspace: Navigation bar and display settings
- 5. Create a folder for printer and print settings
- 6. Customize ribbon menu
- 7. Create user default settings
- 8. Create templates for common operations
- 9. Disable Auto-Remove for Tasks in CAM Task Manager
- 10. Explore other relevant Fusion add-ins
Elevate your design and manufacturing processes with Autodesk Fusion
1. Configure your preferences
Properly configuring your preferences in Fusion is crucial for optimizing your additive workflows. To make the most out of Autodesk Fusion for 3D printing, my first recommendation is to customize your ‘Preferences’ and make the following adjustments:
General section
- Default Modeling Orientation: Change from ‘Y up’ to ‘Z up. ’ This adjustment aligns your modeling orientation with most 3D printers, making it easier to visualize and prepare your models for printing.
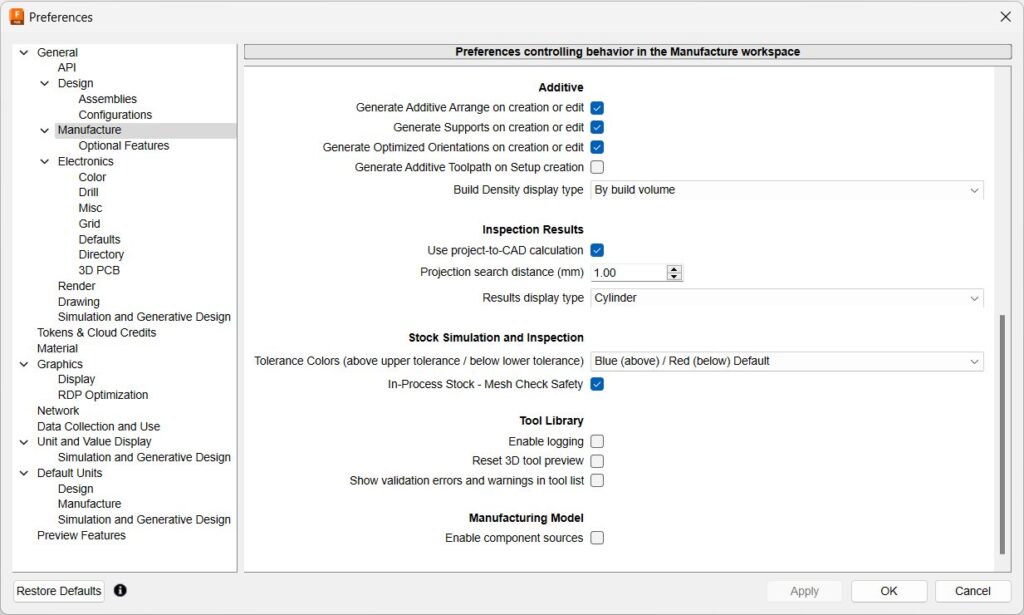
Manufacture section
- Set the Default workspace tab and Default operation type options to “Additive”. This ensures that the ADDITIVE tab automatically opens when you navigate to the MANUFACTURE workspace, displaying Fusion’s additive commands immediately.
- In the Additive subsection, there are additional relevant preferences you may want to adjust. I recommend changing the Build Density display type to “By build height” to visualize the packing density in the browser based on the Max Z coordinate of the parts in a build volume. As we all know, the build height plays an important role when 3D nesting parts in an SLS/MJF 3D printer and is a key variable that impacts printing time and material usage.
Optional Features subsection (within Manufacture section)
- In the Optional Features subsection, ensure “Automatically get latest Posts, Machines, and Print Settings” is selected. This keeps your machine profiles, post processors, and print settings up to date.
Graphics tab
- When working with complex models, or a large number of components, users may experience performance issues depending on their hardware. This can be remedied by disabling the high-resolution canvas graphics on high-DPI displays.

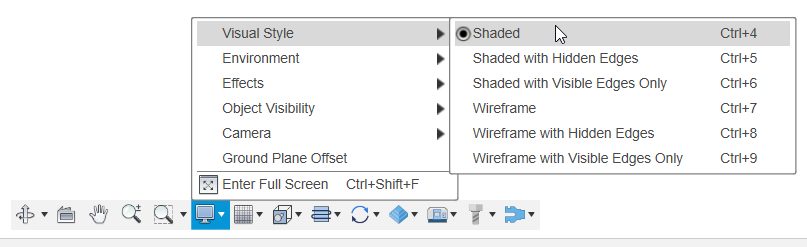
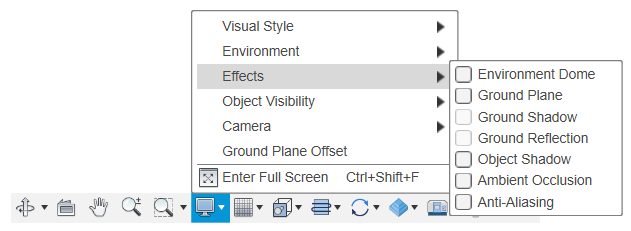
Working with large meshes
- When working with mesh bodies with large number faces, you can solve potential graphical performance issues by changing the Visual Style to “Shaded” to hide the edges and by turning off all the Effects.
2. Download and install the 3D Printing Essentials add-in
The next key step in optimizing your 3D printing workflow with Autodesk Fusion is to download and install the 3D Printing Essentials add-in. This add-in contains a range of useful tools and scripts tailored for various additive workflows.
3. Automate common additive manufacturing workflows
In addition to the scripts included with the 3D printing essentials app, you can download, customize, and execute several ready-to-run scripts in order to automate common Additive manufacturing workflows here:
- Additive Manufacturing FFF API Sample
- Additive Manufacturing SLA API Sample
- Additive Manufacturing MJF API Sample

4. Manufacture Workspace: Navigation bar and display settings
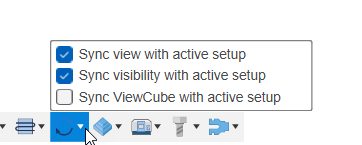
Sync visibility with active setup
At the bottom of the canvas, you will find your Navigation Bar and display settings. In the display settings, make sure that “Sync visibility to active setup” is enabled in the Synchronize Active Setup options. This ensures that the components you see on your screen are the same components in the active setup. This makes working with and switching between multiple setups easier.
5. Create a folder for printer and print settings
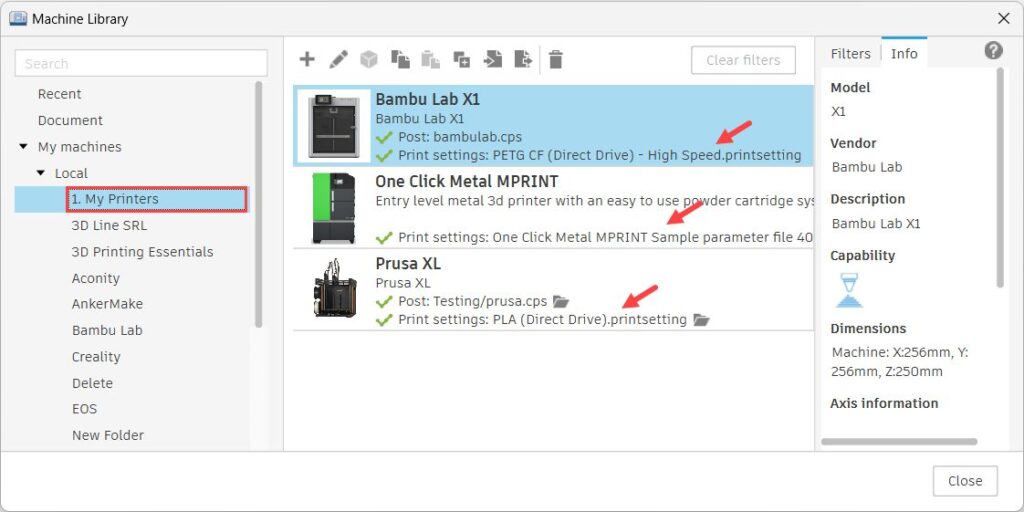
Organize your workspace by creating a dedicated folder for your printer and print settings. This will streamline your workflow, allowing you to easily access and reuse your settings for future prints.
Furthermore, you can also associate a print setting with a printer. This means that every time you select your printer, the associated print setting is also selected by default.
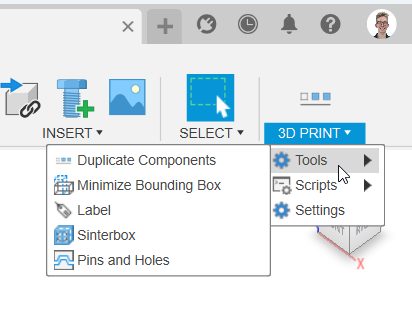
6. Customize ribbon menu
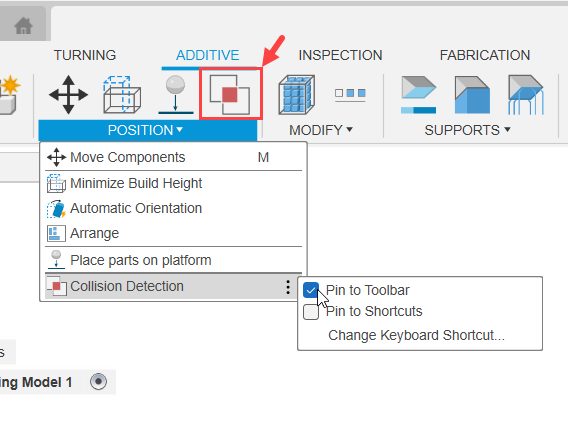
As you become more familiar with Fusion, you’ll find yourself using certain functions over and over. To further streamline your workflow, consider customizing the ribbon menu by pinning the most used functions to your toolbar and removing the ones you don’t need.
7. Create user default settings
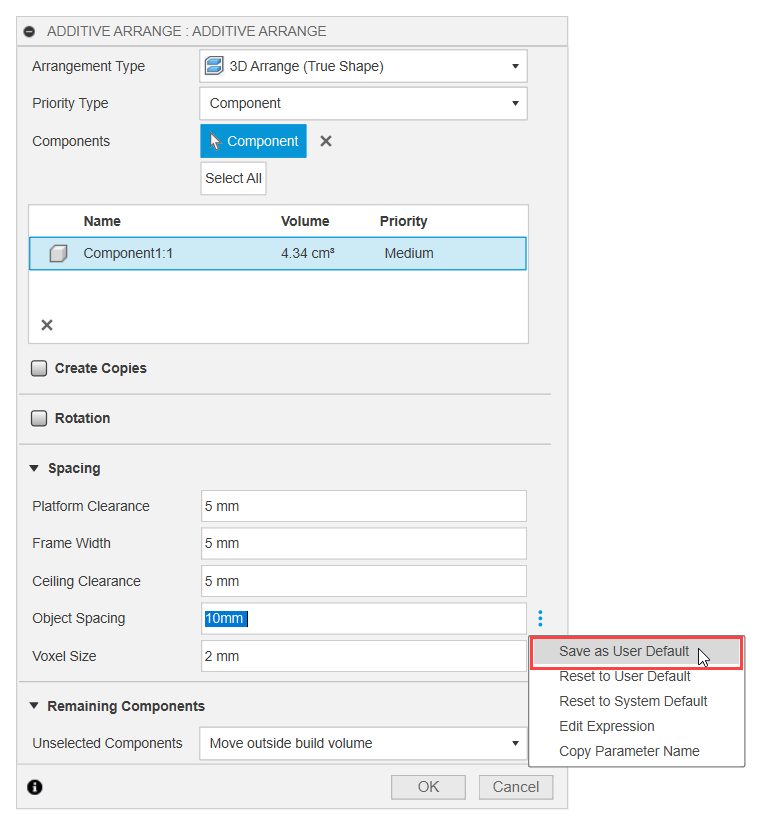
If you really want to increase your efficiency, create user default settings that are used automatically when accessing certain functions within Fusion’s Manufacturing workspace. For example, in the image below you can see how you can set the object spacing to 10 mm and then save it as a user default by selecting the three vertical dot icon next to the setting. Such customizations ensure that your preferred settings are always used, speeding up your workflow.
8. Create templates for common operations
Create templates for commonly used operations. You can select one or multiple operations from the browser, right-click, and select ‘Store as Template’ from the pop-out menu.

After creating templates, you can easily manage them in the Template Library. You can also favorite any template by activating the star icon within the Template library.
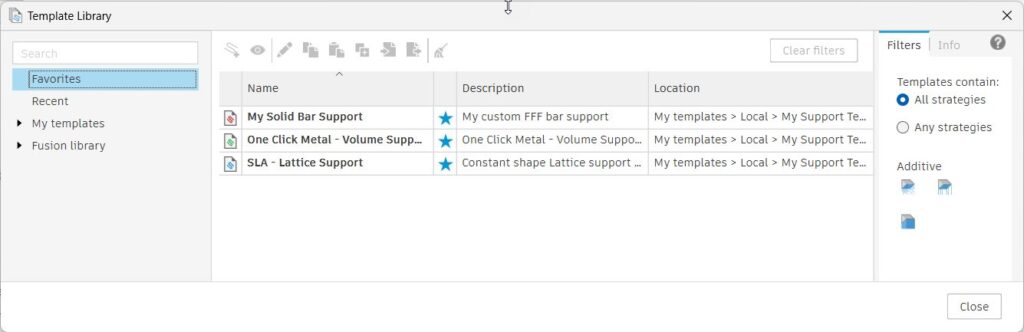
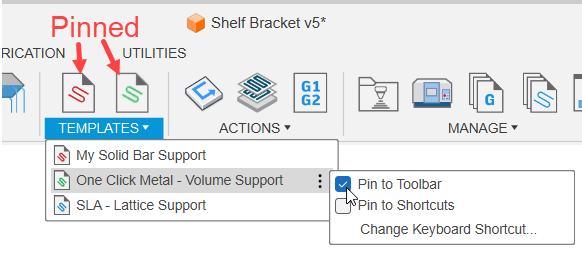
When you designate a template as a favorite, it will be added as a unique command within the Templates panel of the Ribbon UI. If you have multiple favorite templates, you can then pin certain ones to the toolbar itself, making your favorite operations easily accessible.
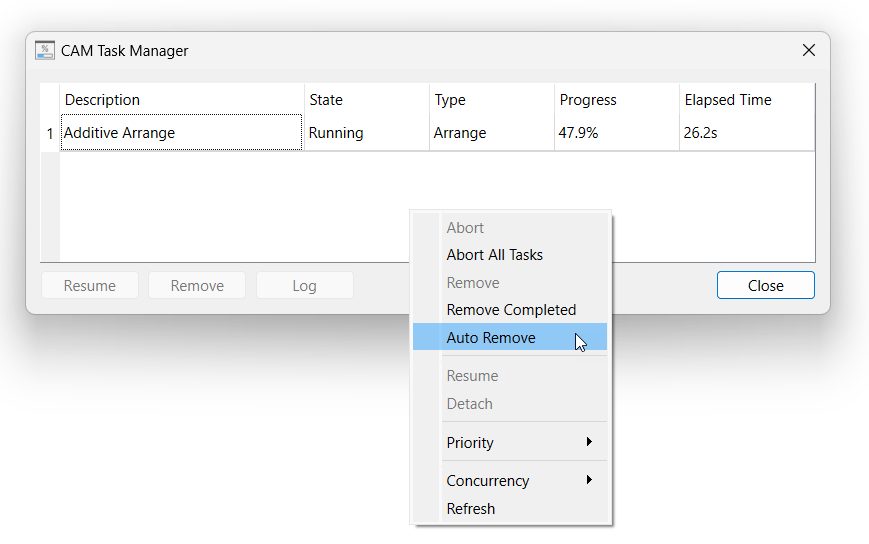
9. Disable Auto-Remove for Tasks in CAM Task Manager
Disabling “Auto-Remove” for tasks in the CAM Task Manager allows you to monitor how long certain operations take. This is especially useful when comparing calculation times for different operations, such as different 3D nesting methods.
10. Explore other relevant Fusion add-ins
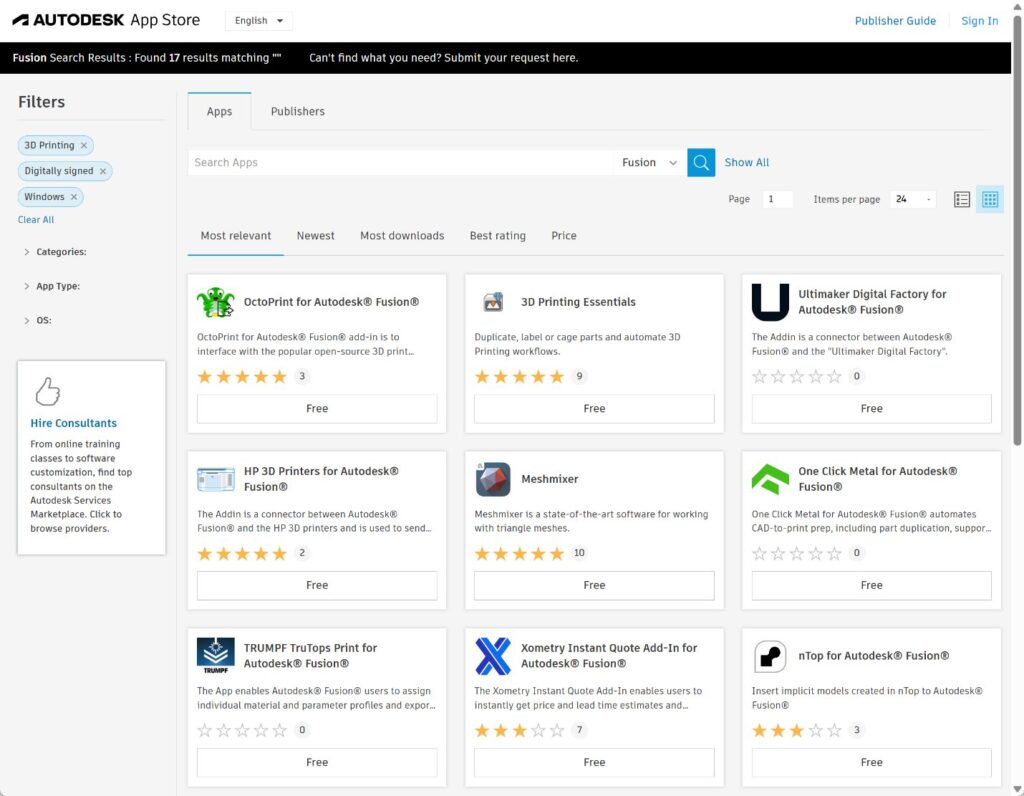
In addition to the 3D Printing Essentials add-in, there are several other valuable add-ins available on the Autodesk app store. Take some time to explore and install these add-ins to expand your toolset and further increase your additive capabilities in Fusion. Some of these add-ins include:
- OctoPrint for Autodesk Fusion
- Ultimaker Digital Factory for Autodesk Fusion
- HP 3D Printers for Autodesk Fusion
- One Click Metal for Autodesk Fusion
- TRUMPF TruTops Print for Autodesk Fusion
- nTop for Autodesk Fusion
- Markforged for Autodesk Fusion
- AMAIZE for Autodesk Fusion
- EOSPRINT for Autodesk Fusion
- GPX PostProcessor for Autodesk Fusion
- Additive Assistant (FFF)
For a full list of Fusion Additive apps please see this blog here: Autodesk Fusion 3D Printing Apps That Make Your Workflows Better
https://www.autodesk.com/solutions/3d-printingBy following these tips and tricks, you can optimize and streamline your 3D printing workflows, making your design and printing processes in Fusion more efficient and enjoyable. Happy printing!