Without the ability to create planes, some geometry would be impossible to make. Learn how to create a plane in Autodesk Fusion today.
Creating planes in Autodesk Fusio is a fundamental skill for advanced modeling. It allows you to sketch and build geometry on custom orientations beyond the default XY, YZ, and XZ planes. These construction planes allow for more complex designs by providing surfaces to start sketches, define features, or reference geometry at any angle or position in 3D space.
Create a new plane in Fusion
Fusion offers several ways to create new planes:
- Offsetting from an existing plane by a specified distance
- Creating planes through three points or edges
- Aligning planes parallel or perpendicular to existing faces.
Using construction planes effectively can simplify workflows when creating angled components, patterns, or assemblies, making your design process more precise and flexible. Mastering plane creation unlocks greater control for sketching and sculpting parts within the Fusion workspace.
Getting started
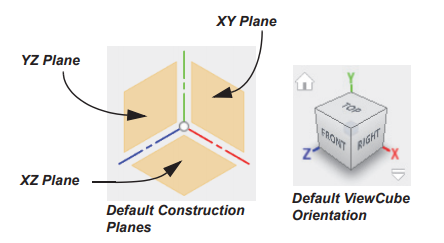
Whenever you start a design in Fusion, you’re given 3 construction planes to work from: XY, YZ, and XZ, as illustrated below.
However, many times you’ll need to add NEW construction planes that might not fall on those locations, or subsequent planar faces. That’s why knowing how to create construction planes is essential to your efforts, as they’ll enable more freedom to define where features start or end.
Here are a few video tutorials that will help you learn how to work with planes in Fusion: