This post is also available in: Italiano (Italian) Deutsch (German)
Curious about creating threads in Fusion? Check out this guide to learn more threads, how to make custom threads, save your settings, and create internal threads using the hole command.
Elevate your design and manufacturing processes with Autodesk Fusion
Understanding threads and their types
In mechanical design, threads are helical ridges used to convert rotational motion into linear motion or to fasten parts together. In Fusion, threading can be applied internally (inside holes) or externally (on cylindrical surfaces).
Internal vs. External Threads
- Internal threads are cut inside a hole (e.g., a nut or a tapped hole).
- External threads are cut on the outside of a shaft or a screw.
When to use modeled vs. cosmetic threads in Fusion
Fusion supports two main threading modes — modeled and cosmetic — each suited to different workflows.
Modeled threads
- Physically represent the helical cut of the thread.
- Ideal for 3D printing, CNC machining, or detailed visualization.
- Provide accurate engagement simulations and fit checks.
Cosmetic threads
- Use decals to visually represent threads without geometry.
- Preferred when high performance and lightweight modeling are priorities.
- Recommended for assemblies with numerous threaded parts or where only visual reference is needed.
You can switch between types directly from the Fusion 360 browser (right-click the thread feature → Change Thread Type).
Thread settings explained
The Thread dialog box in Fusion contains foundational settings that influence how your thread behaves in manufacturing.
| Setting | Description | Manufacturing Impact |
|---|---|---|
| Thread Type | Defines the naming standard (e.g., ISO Metric, UNC, BSP). | Determines compatibility with fasteners or piping systems. |
| Size | Specifies thread diameter and pitch. | Affects load capacity and fit tolerance. |
| Class | Indicates tolerance or tightness of fit (e.g., 6H/6g). | Controls manufacturing precision and screw/nut interchangeability. |
| Direction | Right-hand or Left-hand threading. | Left-hand threads prevent loosening in reverse rotation systems. |
Thread pitch and designation
- Pitch is the distance between adjacent thread crests.
- Designation combines diameter and pitch (e.g., M12x1.5). This influences the tightness and clearance in assemblies.
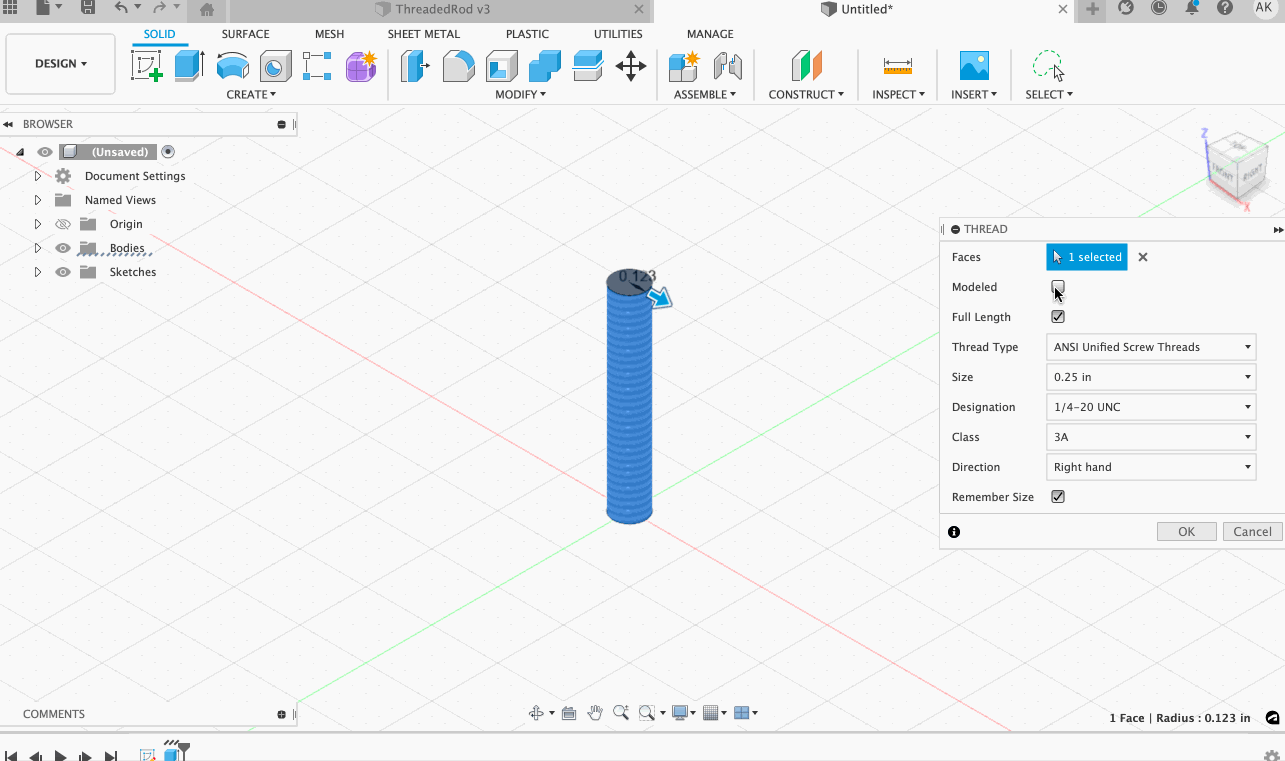
Creating external threads in Fusion
1. Open the thread command under the Create option in the tool bar.

2. Select the face you would like to thread.

3. Check the “Modeled” option to create physical threads in Fusion instead of a visual representation.
—
4. (Optional) Customize your threads in Fusion.
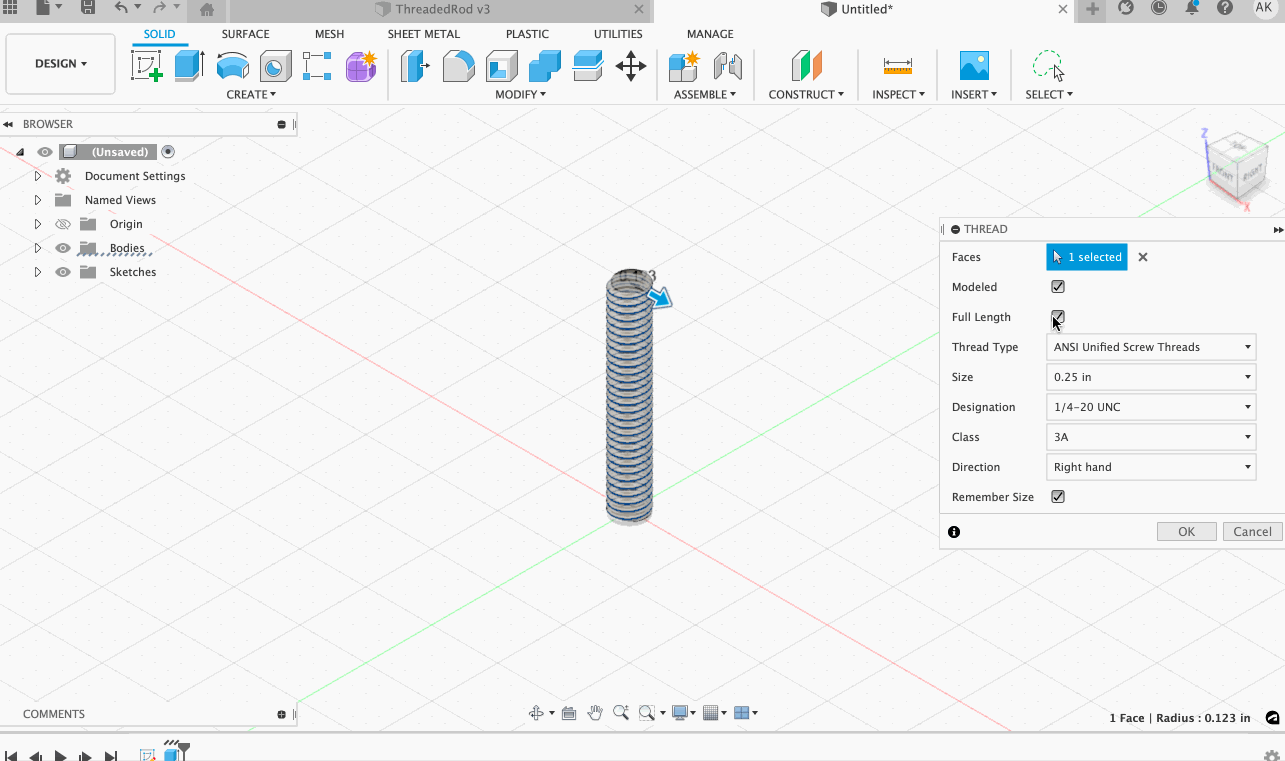
Full length: Uncheck the full-length command to customize the location of your threads; this will give you the option to edit the length and offset of your threads.
Thread type: Fusion automatically fills in a Thread Type that fits with your model and unit of measurement. If you would like to change your Thread Type, click on the drop-down menu for a large assortment of alternative options.
Size: The number automatically filled into the size function is the closest manufacturable thread size. If you would like to change to a different manufacturable thread size, the model will automatically update to configure to your choice.
Designation: Thread designation is the Major diameter of the thread followed by the pitch. This determines how your threads are populated. Switch between designations to see an immediate visualization of how that designation would look on your model.
Class: Thread class determines the tolerance allowed in manufacturing. This creates either a tighter or looser fit.
Direction: Change the direction of your threading from right hand to left hand.
Remember size: Select to remember the specified settings the next time the Thread command is used.
Creating internal threads in Fusion
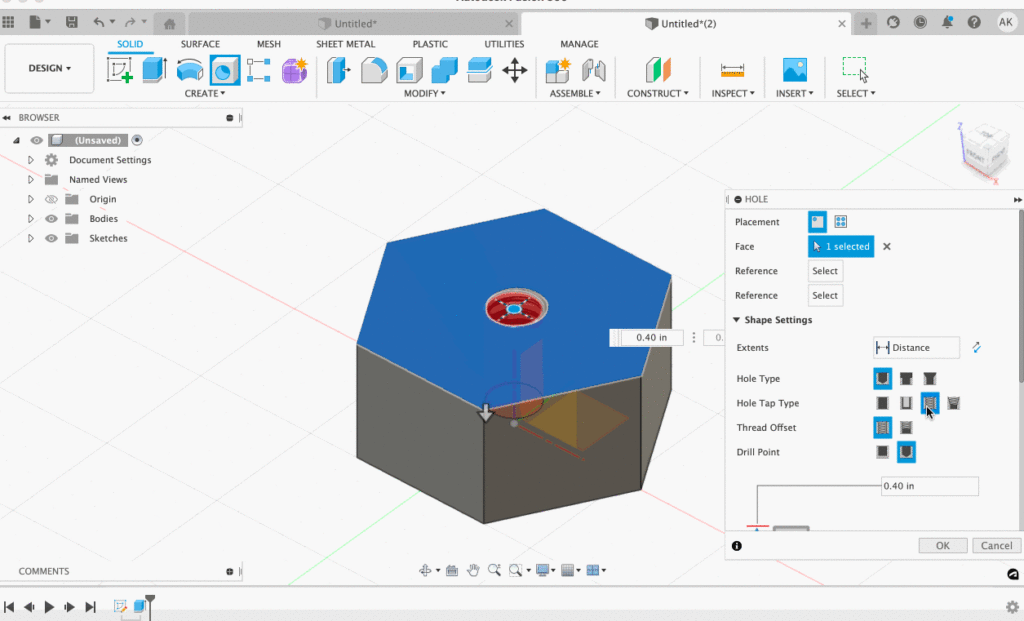
Option 1: Tapped hole
1. Create a hole. To create a hole, either select the hole command located on the toolbar or use the shortcut “h”.
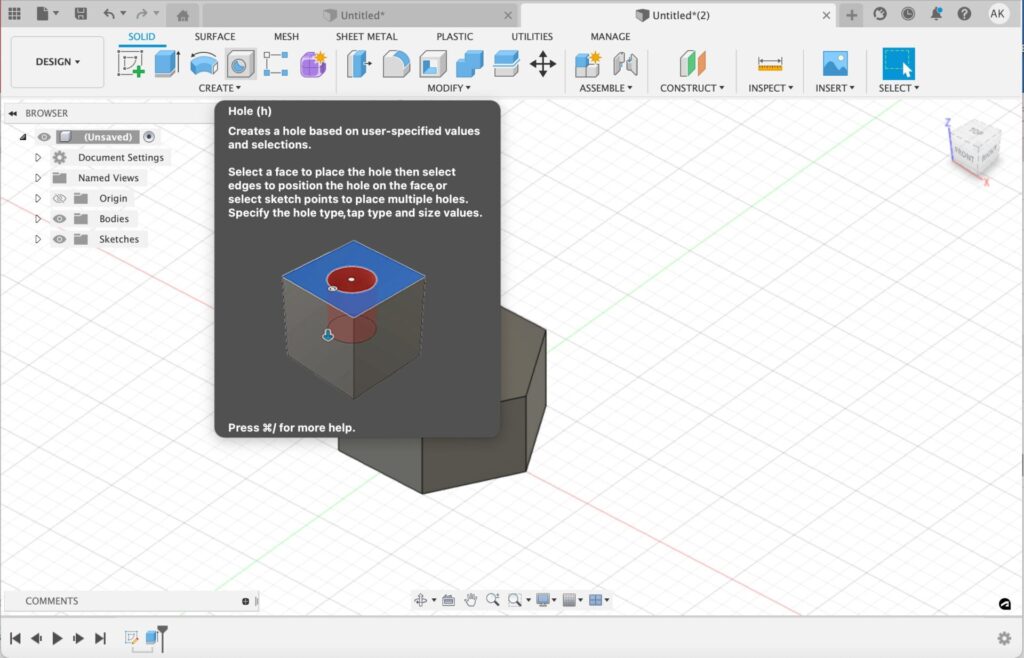
2. Select a face to place the hole, then select edges to position the hole on the face, or select sketch points to place multiple holes.
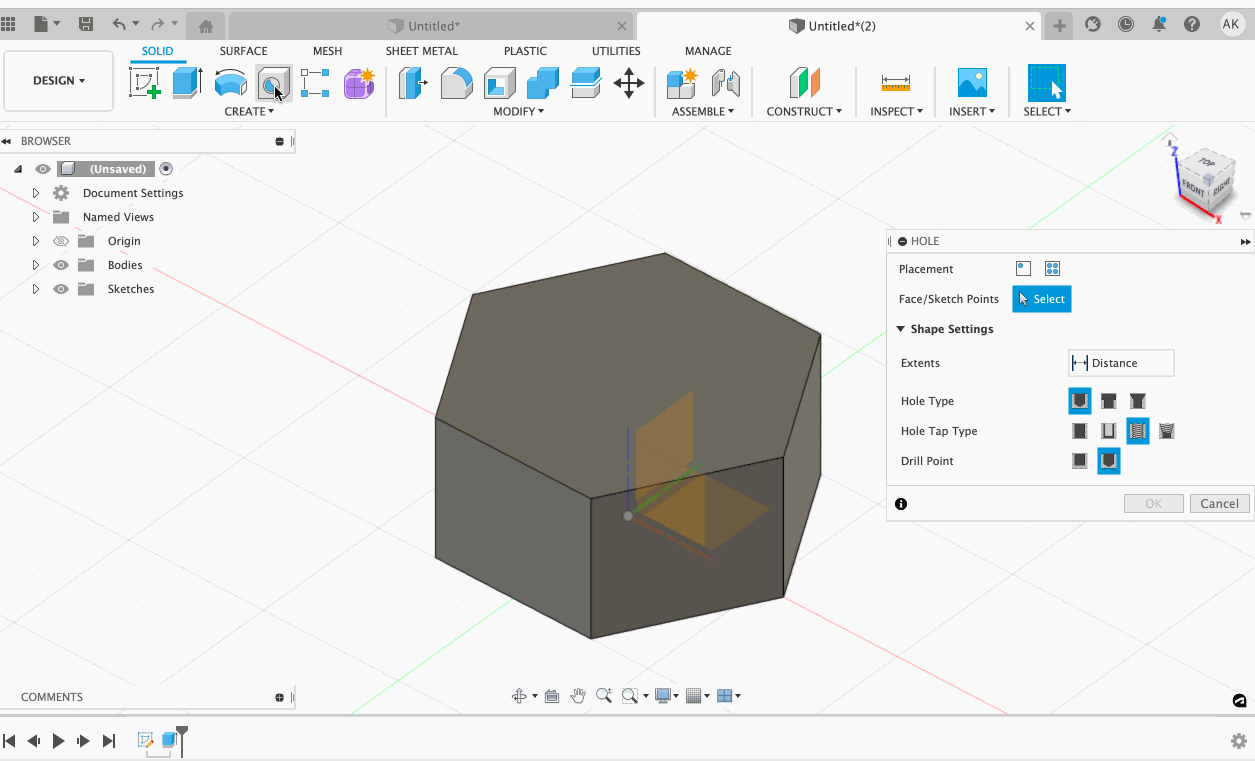
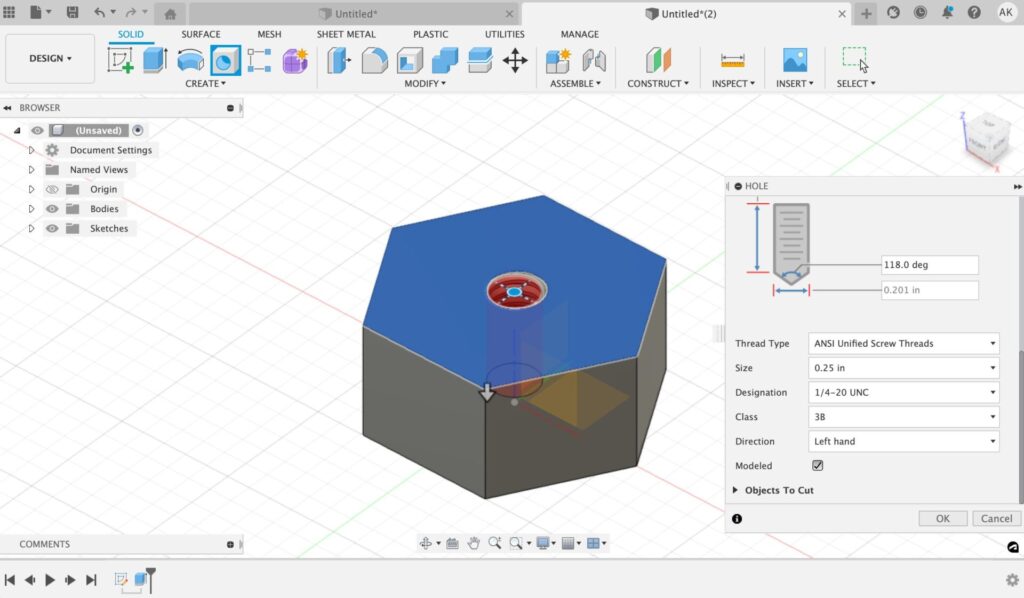
3. Select “Tapped” under “Hole Tap Type”
—
4. (Optional) Customize your Shape Setting. Here you can specify your hole type, input your drill dimensions, and fine-tune your threads.
Hole type: Decide between a Simple, Counterbore, or Countersink hole type.
Hole tap type: Choose between Simple, Clearance, Tapped, and Taper Tapped.
Thread offset: Select the distance you would like the Thread to cover.
Drill point: Choose whether you want a flat or angled drill point and modify the dimensions of your drill point.
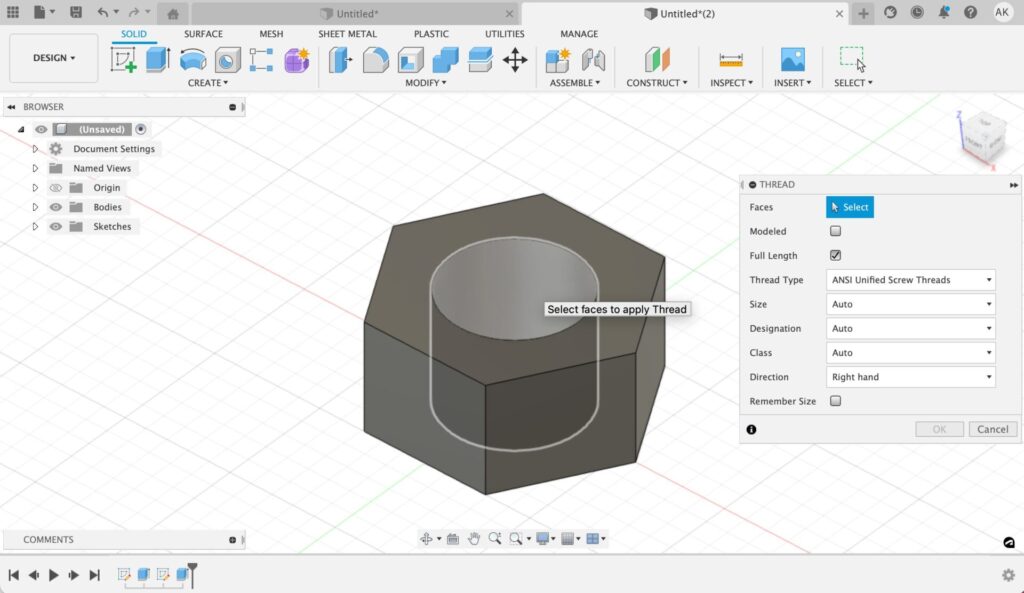
Option 2: Add threading to a pre-existing hole.
To add threads in Fusion to a pre-existing hole, simply follow the same procedures as you would when creating External Threads, the only exception being this time you will select an interior face.
What next?
When you are finished creating threads in Fusion, implement your components into a broader assembly to create a more complex comprehensive design.

Want to learn more about threads in Fusion? Check out this YouTube video:
QUICK TIP: Partial Thread Hardware
Want to learn more about Fusion? Download a 30-day free trial today.