This post is also available in:
Learn how to assemble components in Fusion using Constraints — a faster, simpler alternative to SolidWorks mates. This step‑by‑step guide covers creating assemblies, applying multiple constraints efficiently, and managing them through the browser, helping you streamline the design process and build Fusion assemblies with more clarity and speed.
Build Fusion assemblies faster with constraints
If you read our previous post, you already know: Fusion Constraints = SolidWorks Mates, but with fewer tantrums and less feature manager clutter. In Part 1, we explored why Constraints are the smarter, cleaner cousin of the Mates you’ve been wrangling for years.
Now in Part 2, we’re giving you the hands-on how-to. No jargon. No CAD-snobbery. Just a step-by-step guide to help you get your Fusion groove on—in fewer clicks, with more clarity, and maybe (just maybe) a bit more joy.
Let’s dive in…
Step-by-step guide: Using constraints in Fusion (for SolidWorks Mates fans)
Same assemblies, less stress. Here’s how to build better—with constraints.
- Open or create your assembly: Assemblies in Fusion are just designs with components.
- Go to the Assemble tab and choose Insert into Current Design to bring in your parts.
- Think of this like inserting components into a SolidWorks assembly file.
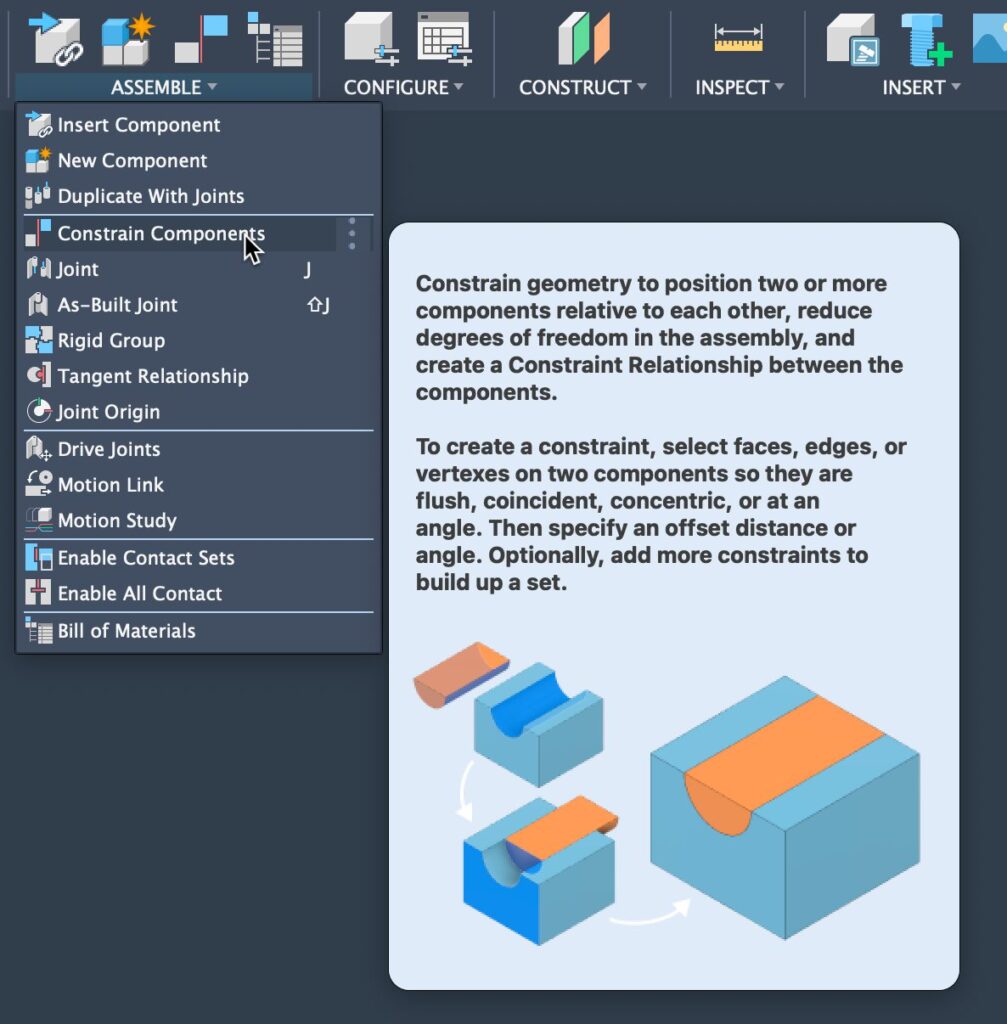
- Activate the constraints tool
- In the Assemble tab, click Constraints
- It’s right next to Joints. New as of July 2025—welcome to the future.
- Select the first component face or edge
- Click the face, edge or point you want to contstrain.
- Select the matching gace on the second component
- Pick a face, edge, or point on another component. Fusion shows a live preview.
- Yes, real-time feedback. No “blind mate” guesswork.
- Choose the constraint type (if needed)
- Fusion often picks the right one, but you can override it.
- Types include:
- Align – like Coincident Mate
- Flush – like Parallel or Distance
- Tangent, Rigid, and more
- Types include:
- Fusion often picks the right one, but you can override it.
- Confirm and repeat (or batch it)
- Click OK to apply
- OR… keep the tool active and knock out multiple constraints without relaunching the command.
- That’s right—multi-part constrainting. It’s like batch mating, but without the pain.
- Use the Bbrowser to Rreview Cconstraints
- Constraints are cleanly organized under their own folder in the design tree.
- Right-click to edit, suppress, or delete. No buried mate soup.
That’s a wrap (and a mate upgrade)
Congrats—you just leveled up. If you’ve followed along, you’ve not only survived your first Fusion assembly—you’ve probably noticed how much lighter, faster, and cleaner it feels compared to the Mate maze you’re used to.
So next time someone asks, “Can Fusion do mates?” You can confidently smirk and say, “Nope. It does constraints—and it does them better.”