Good renders in Fusion come down to three things: custom lighting, dramatic angles, and a bit of post‑editing. The recent update to the rendering engine makes it pretty powerful. Treat it like a real photoshoot—add custom lights, position your model dynamically, and fine‑tune the viewport until the composition feels intentional. Treat the final render like a RAW photo file and do some light editing, and you’ll end up with product shots that look like they came out of a professional studio! Here are 7 steps on how to do it—let’s get started.
Table of Contents
- Step 1: Backdrop design
- Step 2: Model placement
- Step: 3: Scene setup
- Step 4: Lighting source
- Step 5: Test and fine-tune
- Step 6: Finalize render
- Step 7: Post-processing
Step 1: Backdrop design
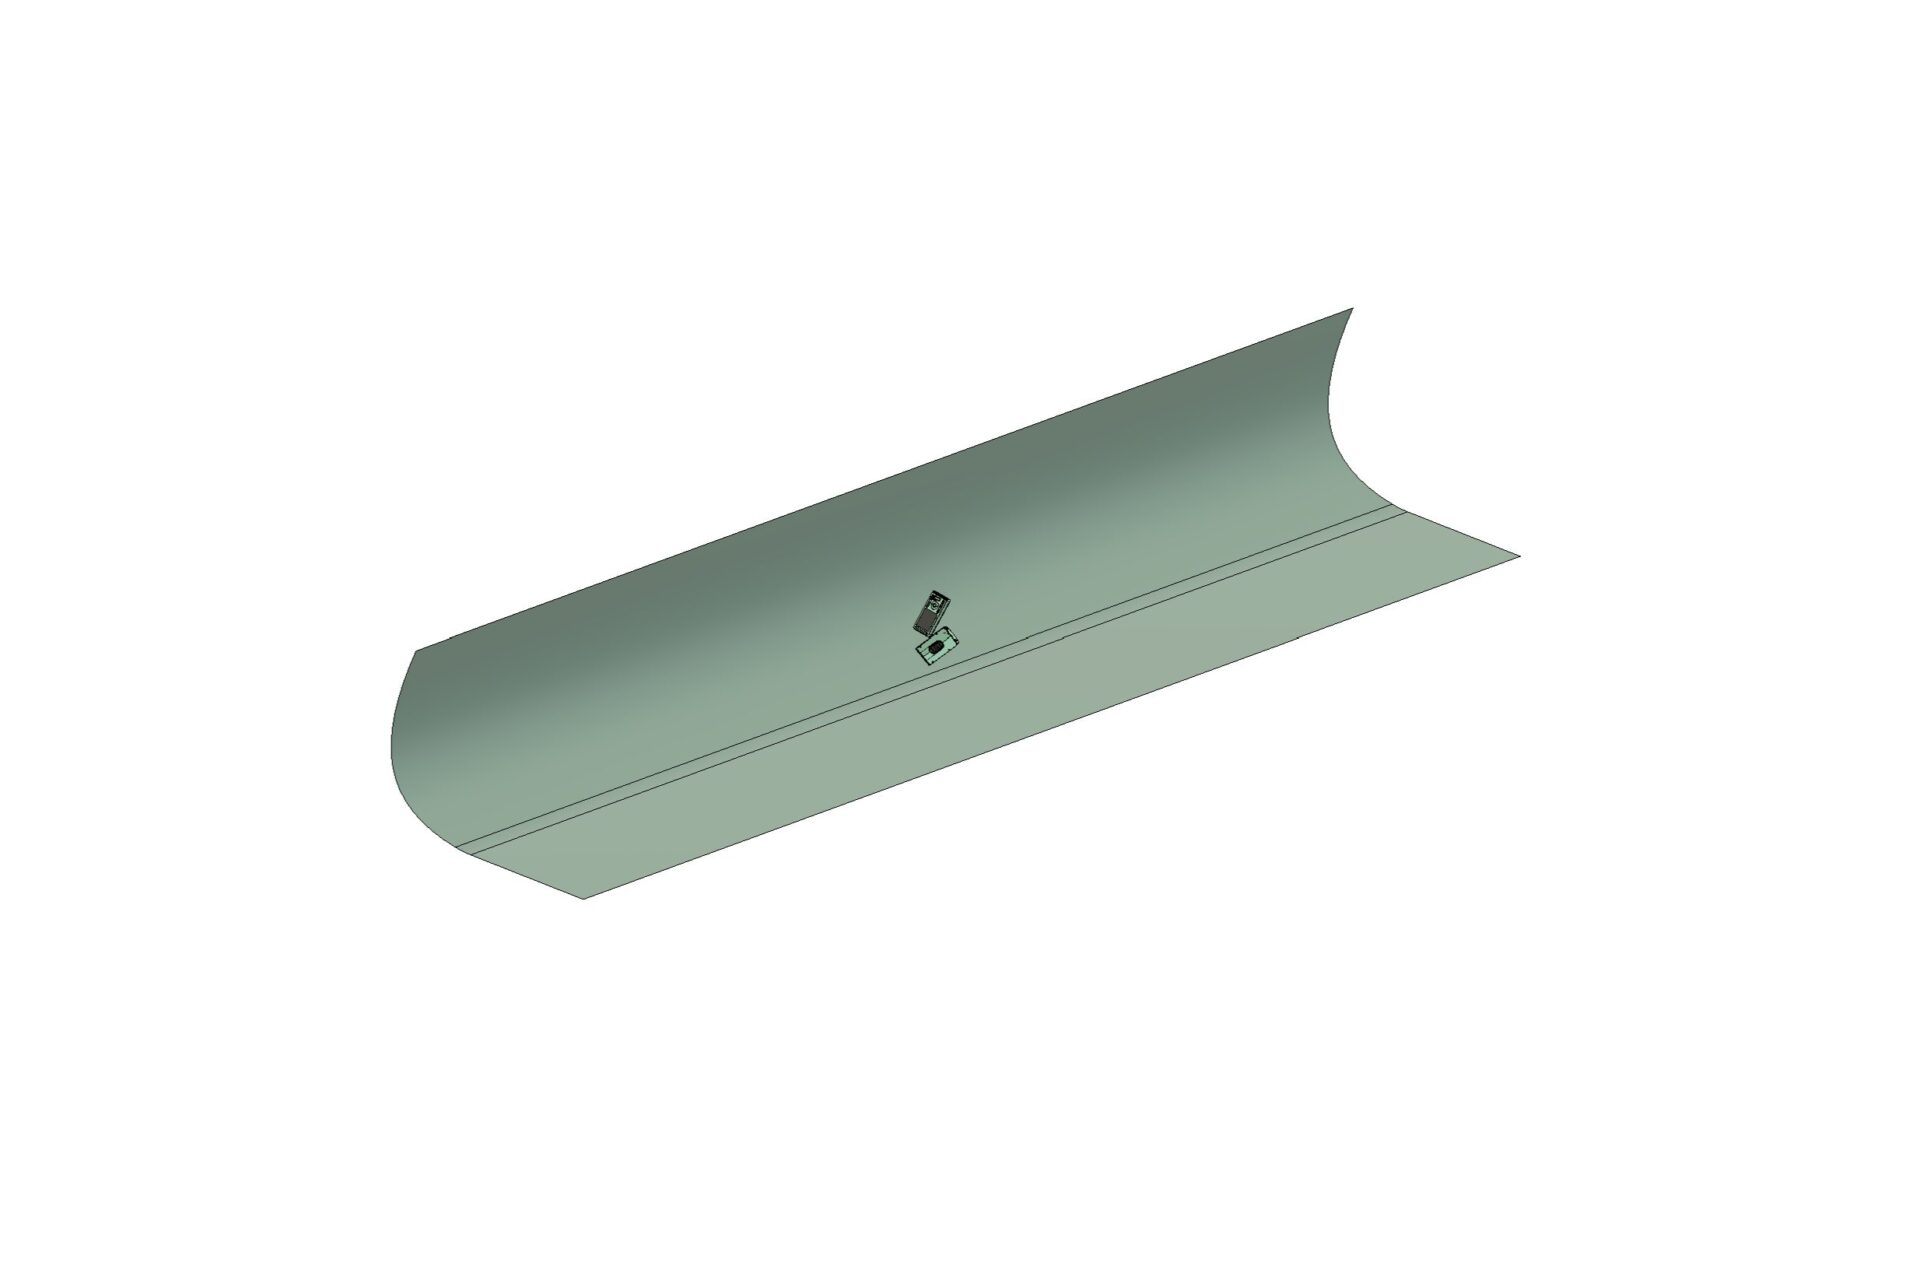
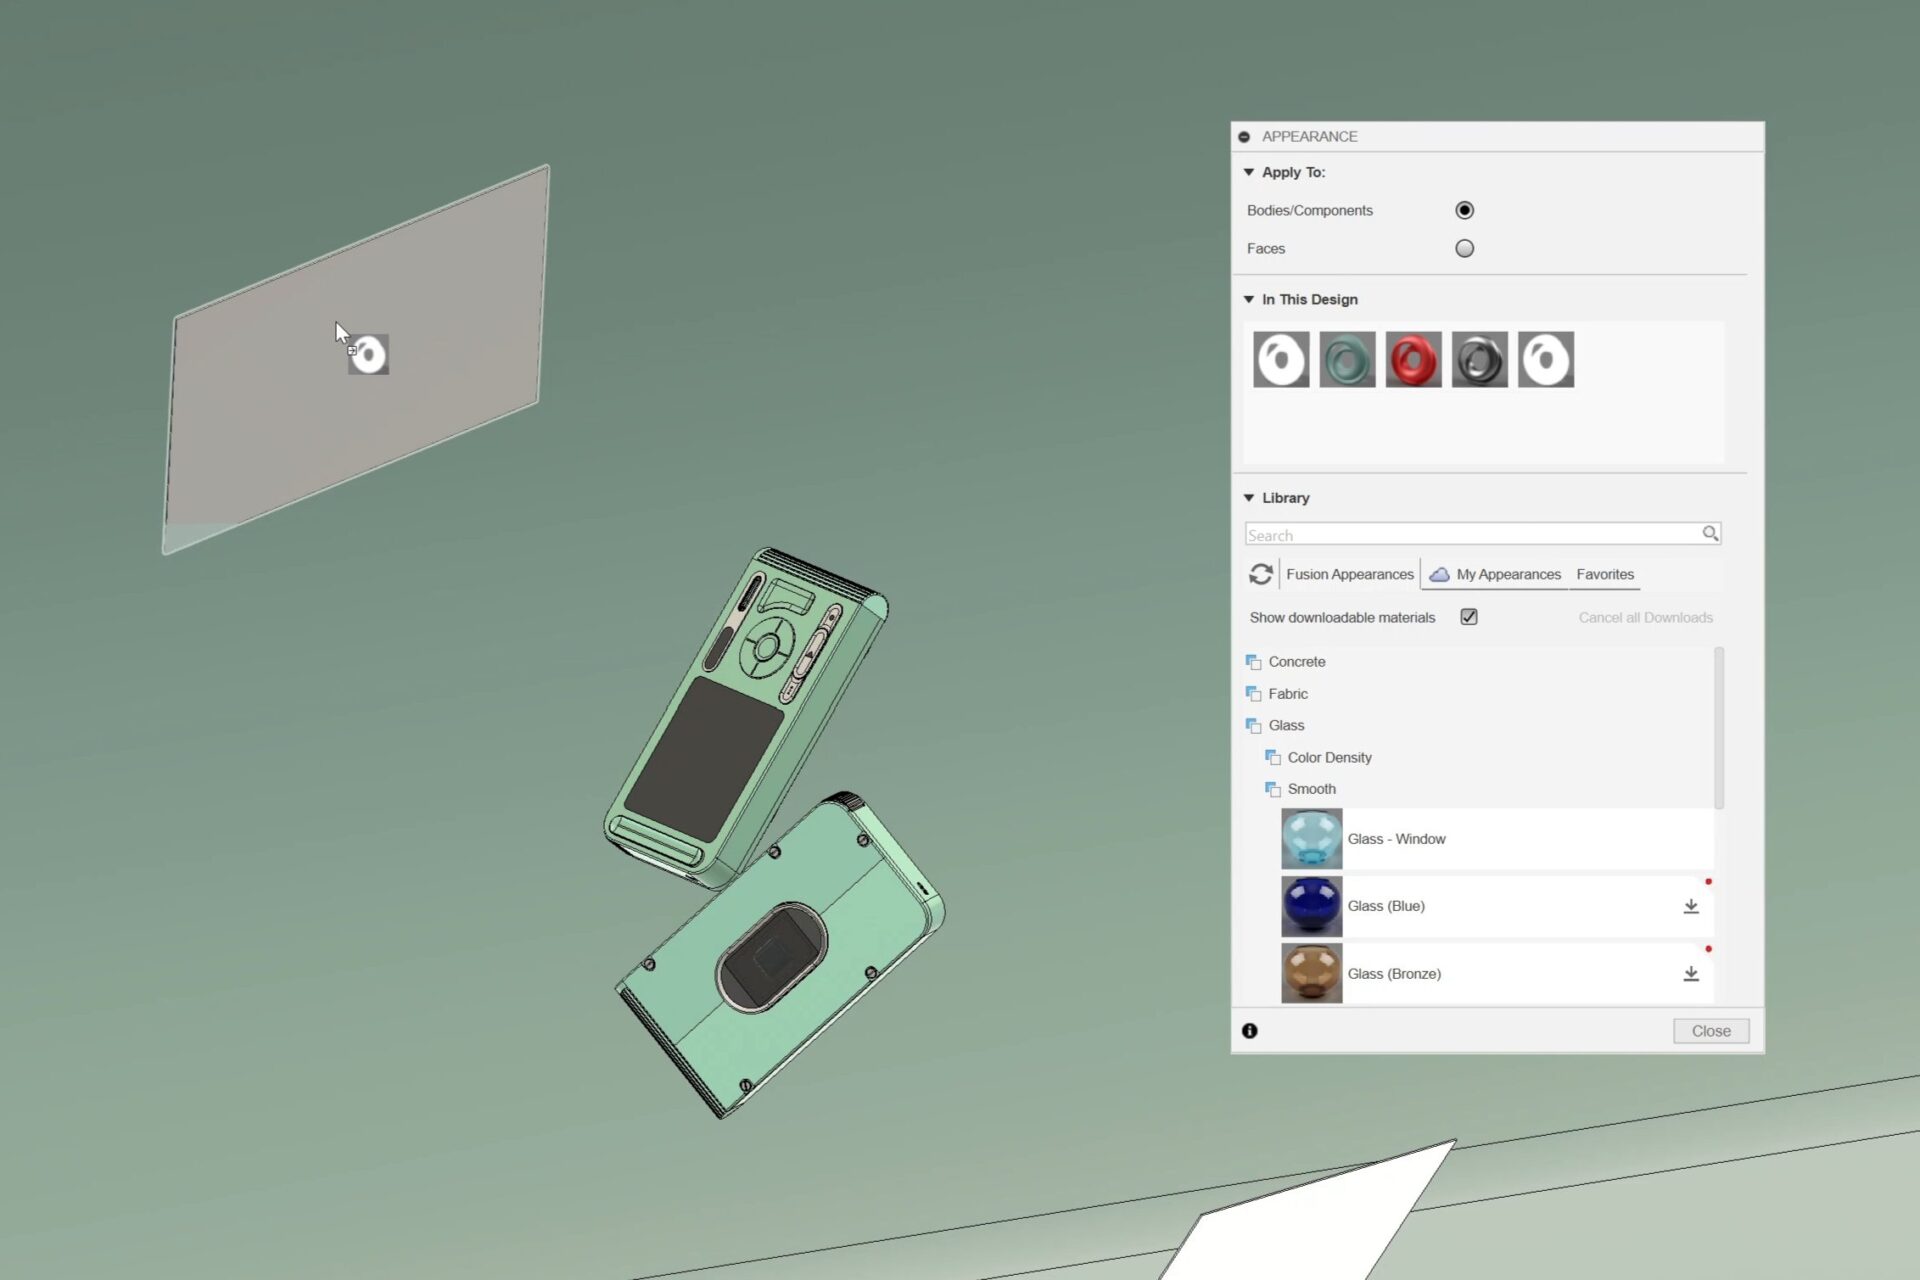
After you have finished your model and added materials to it, create a new file. This will be used to create the ‘Render Scene’ where we will add a backdrop and lighting sources. Keeping the files separate also allows you to more easily manipulate the product for angled shots, as it doesn’t affect your original file. You will then need to import your model into this scene. This is as easy as dragging and dropping it from the Data Panel into your new ‘Render Scene’ file. Following along the same lines of treating Fusion like it’s a real photo studio, using a backdrop is standard practice.
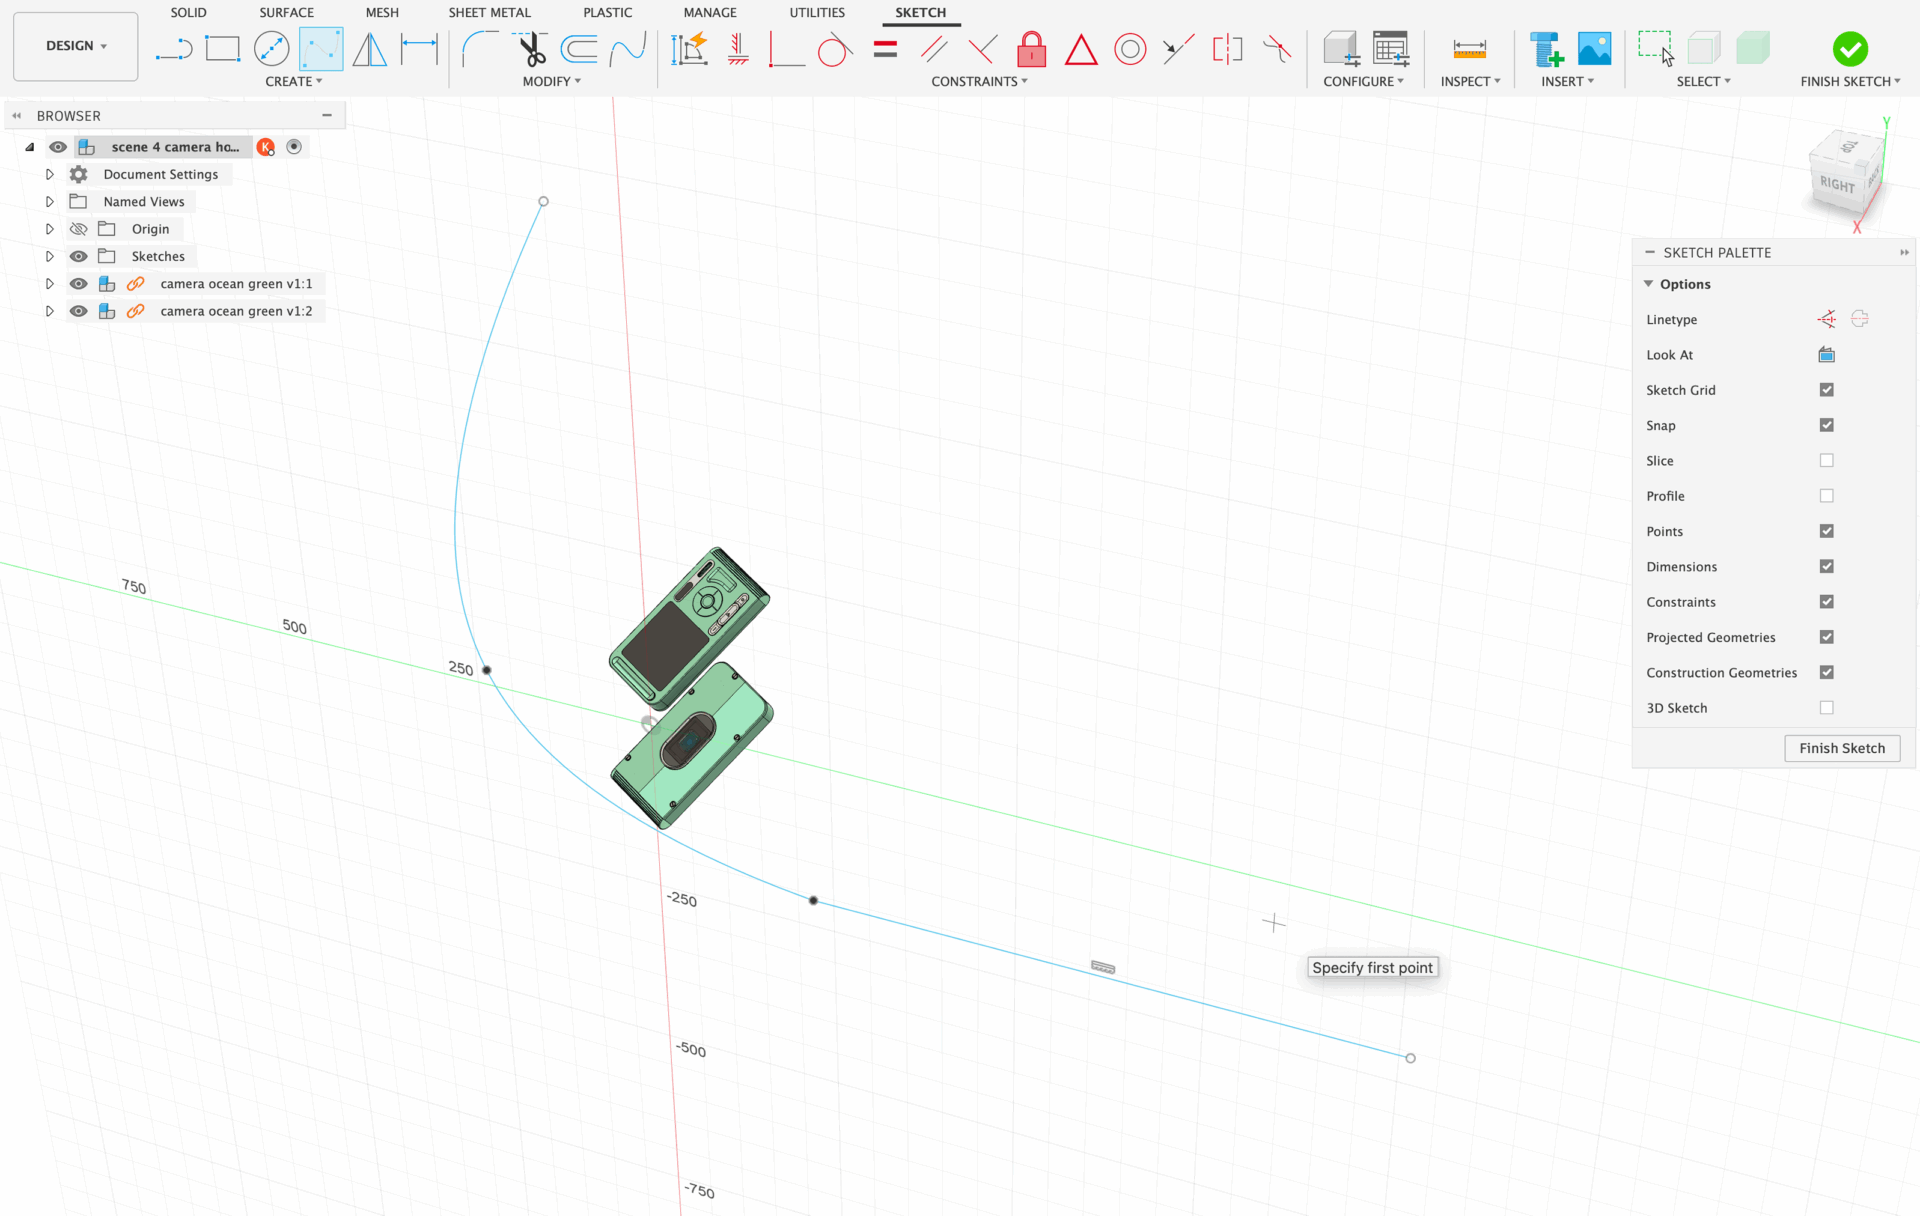
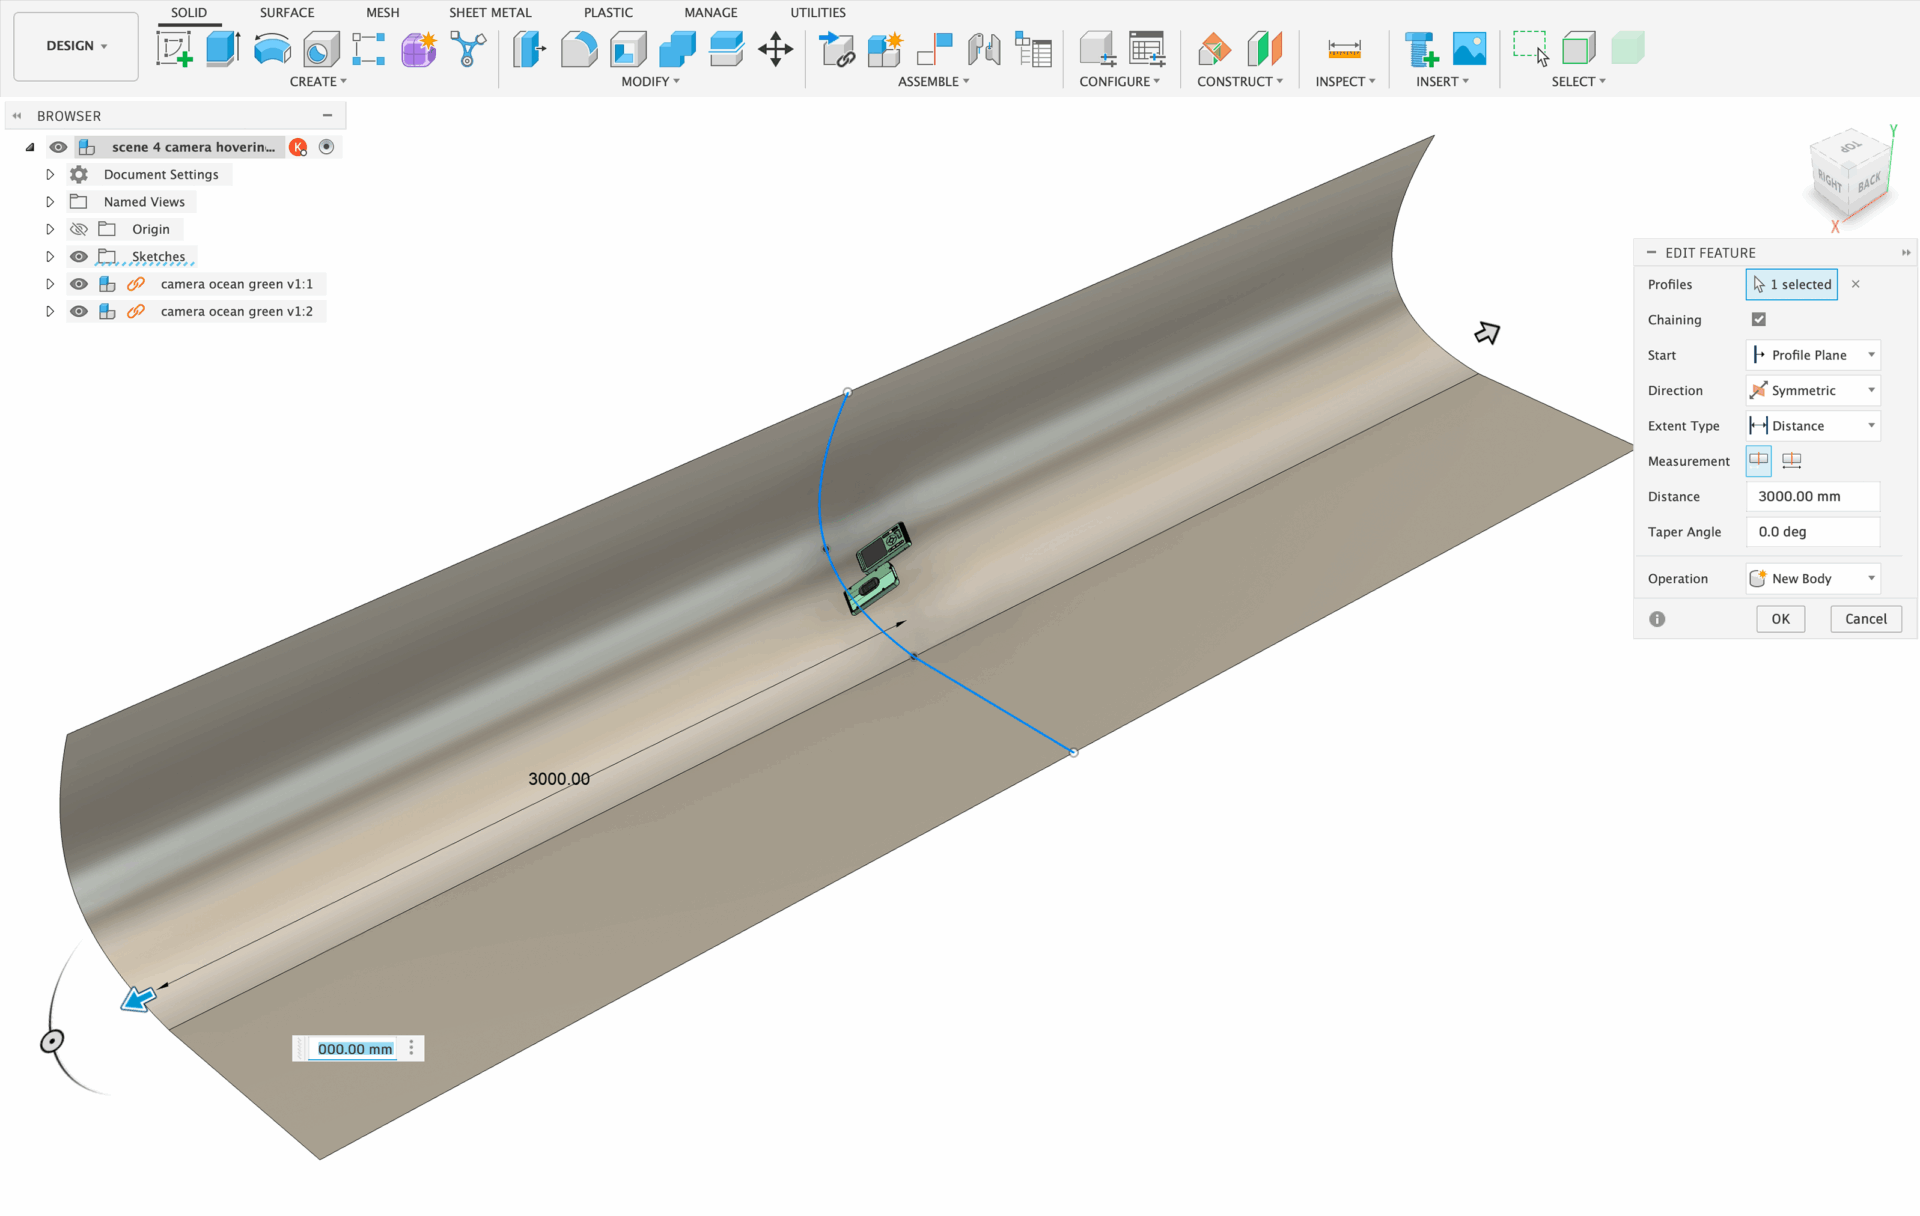
Start by sketching a simple silhouette of a backdrop, then surface extruding it. Make sure it’s wide enough so you don’t see the edges in your final render. After extruding the backdrop, I usually apply the Powder Coat – Rough (White) as I think its properties are perfect for a backdrop. It has the perfect balance of roughness and reflectivity. But I do encourage you to experiment with different materials. Sometimes, even metallic backdrops result in a really cool image!

Next, I like to change the color of the backdrop to a lighter shade of the product’s main color. This highlights the chosen color and makes the product pop. A standard white or grey background can also work if you want a cleaner look for e-commerce.
Step 2: Model placement
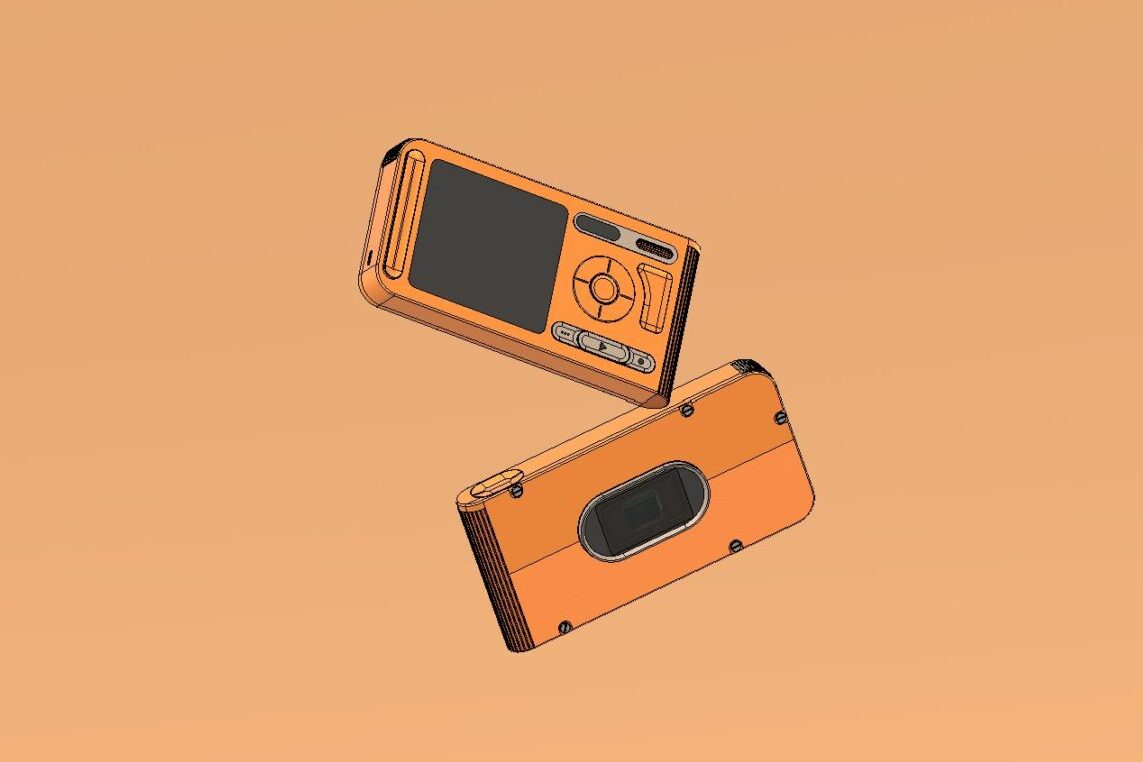
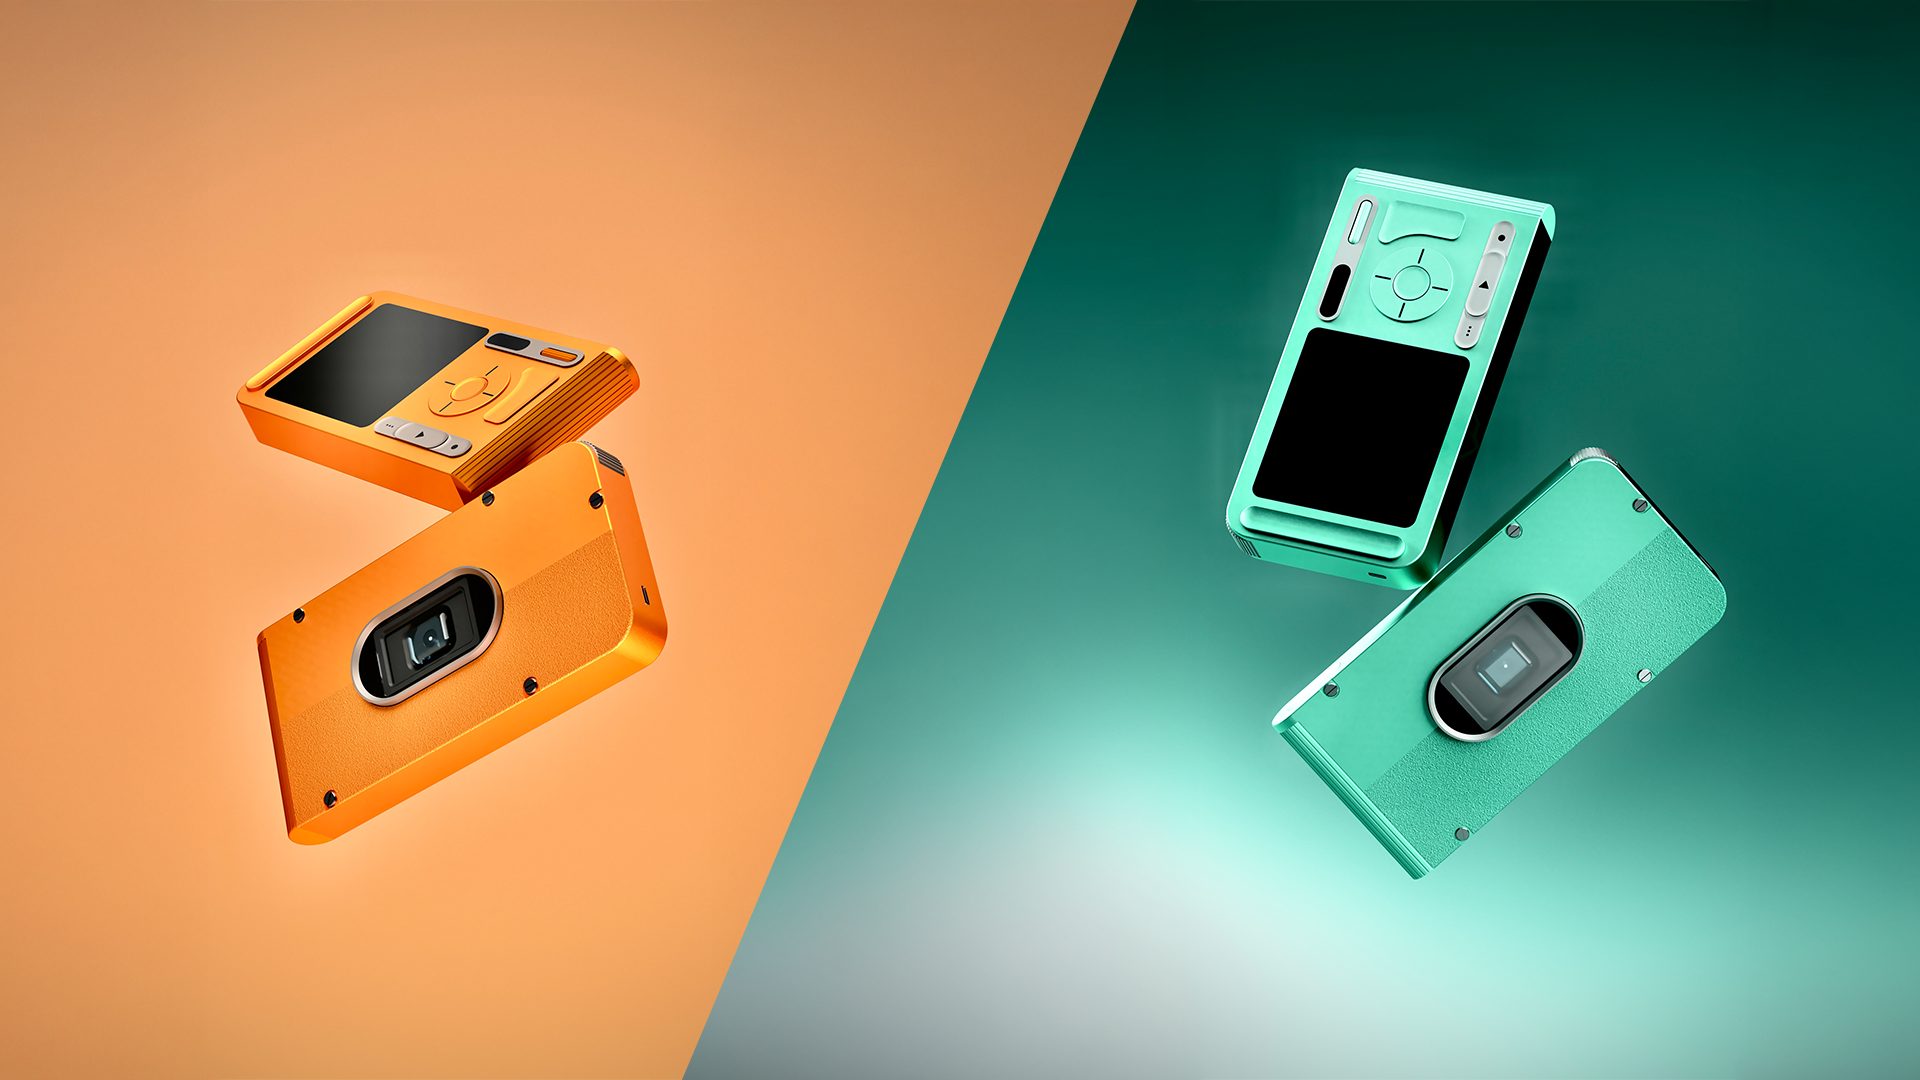
Moving on to the product itself, the placement and angle of the product play a strong role in how dramatic the render comes out. The viewer should be able to imagine where the model might move, as if the image were captured as the product was falling in mid-air. In fact, this is a pretty common photography technique as well.
To achieve this, you want to manipulate the angle toggles on the model. Tilt it, angle it, in somewhat random ways. If it makes sense for your scene, a nice way to show the backside of your product is to have two models of your product in the same scene, similar to what I have done with the cameras.
In this case, the second model should be used to show off the rear of the product and placed at an angle so it is just touching the main model. Again, it should look like these models have been thrown in the air, just touching at one point as if they briefly (and gently) collided.
Step: 3: Scene setup
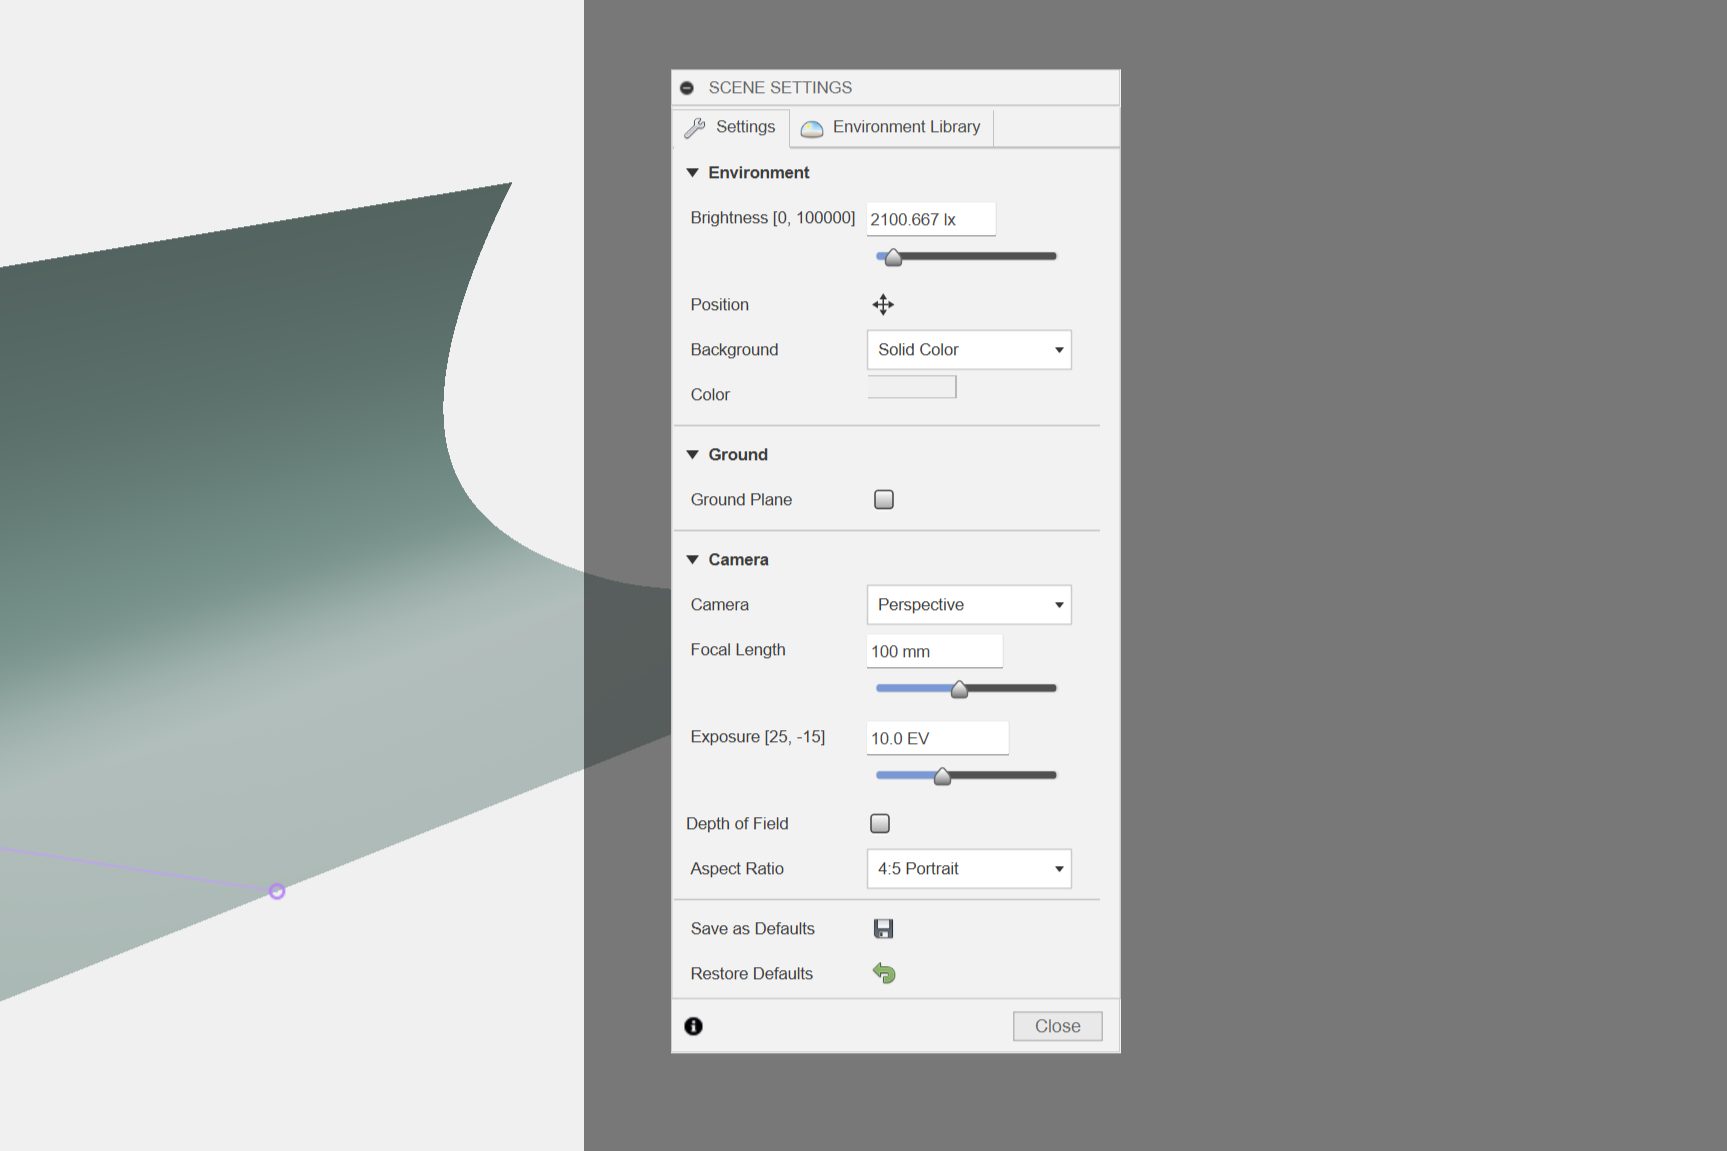
Once you have your backdrop and models adjusted, you can switch to the ‘Render’ workspace. Here, I like to change some settings. Firstly, the environment. For product rendering, I like to use the Sharp Highlights scene as I’ve personally got the best results using this. When creating product renderings, you want to highlight any intractable components on the design, such as buttons, scrolling functions, toggles, etc. The Sharp Highlights environment aims to do exactly that. Rather than having soft-box style lighting, the lights are much more direct and sharp, rather than diffused and shallow in other environments.
However, again, I encourage you to experiment. Fusion also has natural lighting environments, such as the Plaza or Fiel,d which are real HDRI’s of those exact environments. These are great if you want a natural lighting look to your renders.
Moving onto the specific render settings, I first reduce the exposure slightly to around 10-9.5 EV since we are using multiple bright light sources. I also change the camera to Perspective and change the Aspect Ratio to your desired option. For social media, 4:5 Portrait is best since most people will see it on their phones. Otherwise, sticking to the 4:3 Presentation or 16:9 Wide Screen works great.
The most important setting in the Render Settings is the Brightness. This is something that you will change depending on the materials and colors you are using on your product. Darker colors and materials that absorb more light (such as Matte metals) would need brighter lights. Staying under 2K lx is ideal since we will use other light sources in the scene.
Step 4: Lighting source
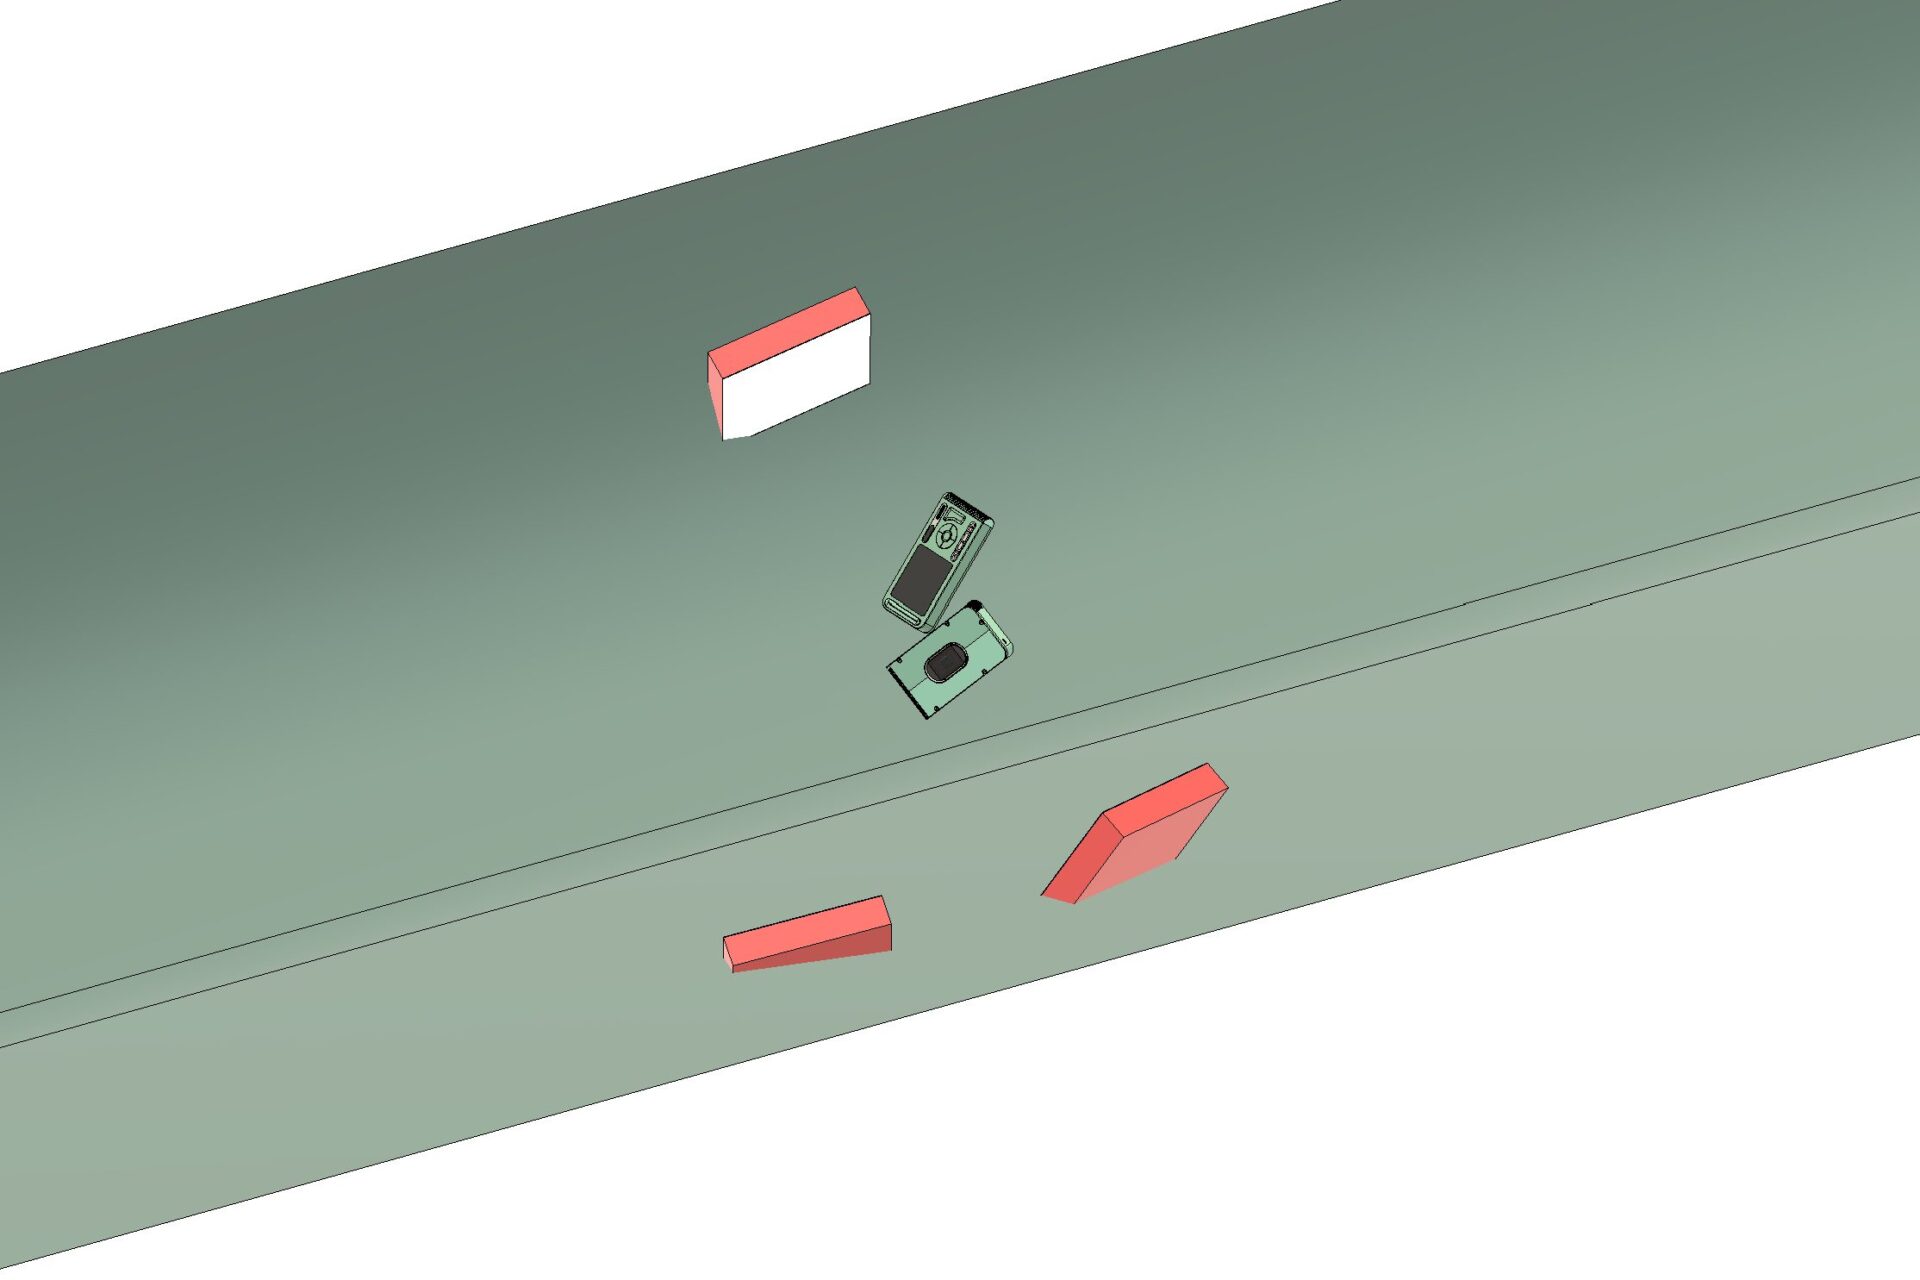
One of the main ways you can make your render stand out is by creating custom light sources. The environment’s lights are limited in their directness. Their main purpose is to brighten up the scene and act as a general light to your model, known as a Fill Light. Adding your own light will allow you to further highlight certain areas of your model.
Generally, I would add at least one additional light source and align it towards one of the corners of your product. When aligned correctly, it should highlight the perimeter of your model and some of the UI controls (buttons, knobs, toggles, etc).
Adding more custom light sources is encouraged, as it will further highlight different areas of the model. In the example of the Ocean Green camera model, I used 3 custom light sources. This is also a pretty standard photography technique to have three sources of lighting.
To create these custom light sources, it’s as easy as extruding a square by 1mm and adding the 8lm White LED appearance to it. In the example above, I added a red box for visual clarity. This turns the square into a light source that can be moved and tilted just as you would move light sources IRL. The default brightness setting on the LED appearance is often too bright. I start off by setting it to 1000.000 cd / m^2 and increase or reduce once I start rendering.
Step 5: Test and fine-tune
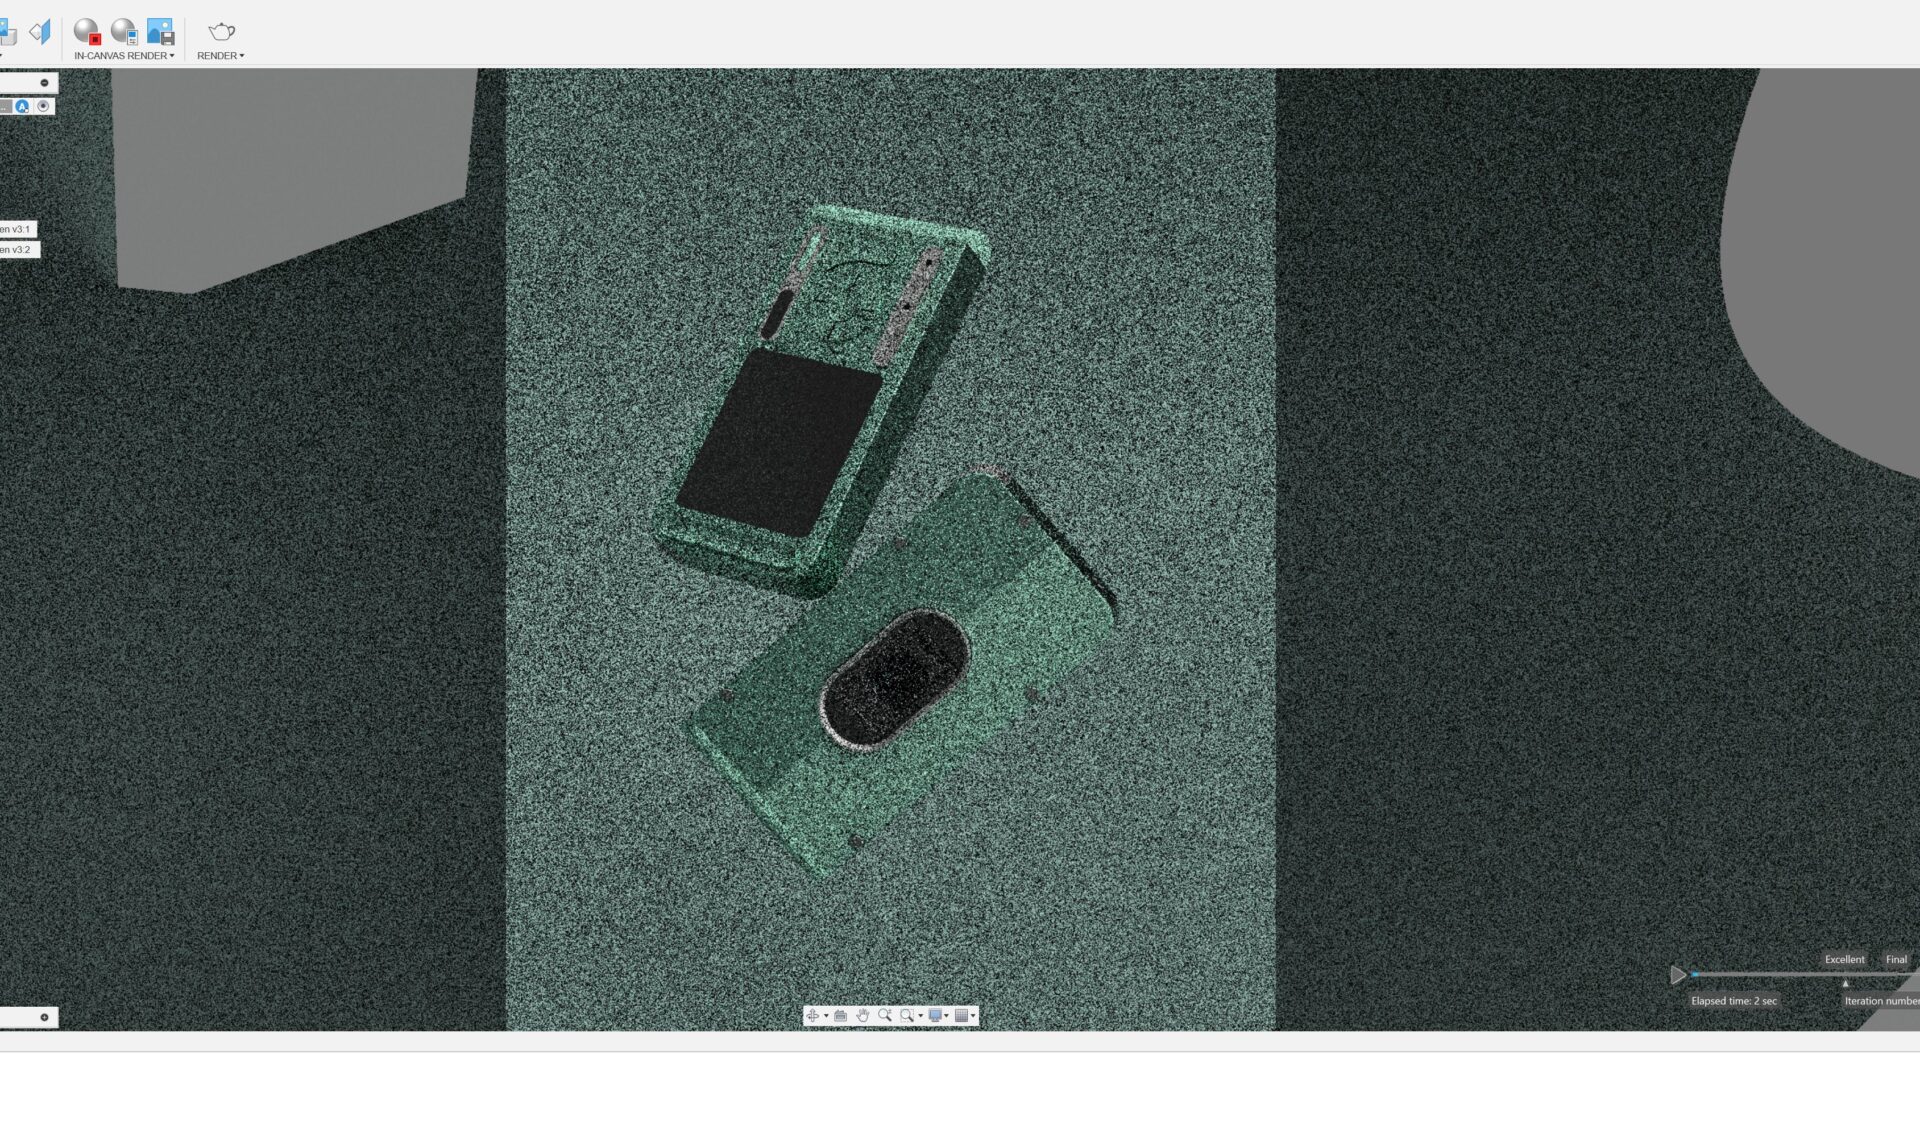
Now that your scene is set up, we can start testing the render. By clicking the In-canvas Render button in the Rendering tab, your computer will start processing the render. This is when you will see the light sources (environment + custom lights) come to life. Make sure to let it render for at least 30 seconds (depending on your computer’s speed) to allow all the lights to process.
After seeing how the lights interact with your model and the scene, you may want to move and manipulate the lights, your model, and the viewport angle. Experiment with different angles and placements to see what areas of the model are highlighted. I also recommend changing your orbit type to Free Orbit, as it will allow you to rotate the viewport and experiment with observing different areas of the model and how the light interacts with it. Keep experimenting with different viewport angles and lighting brightnesses till you get a layout that you like.
Step 6: Finalize render
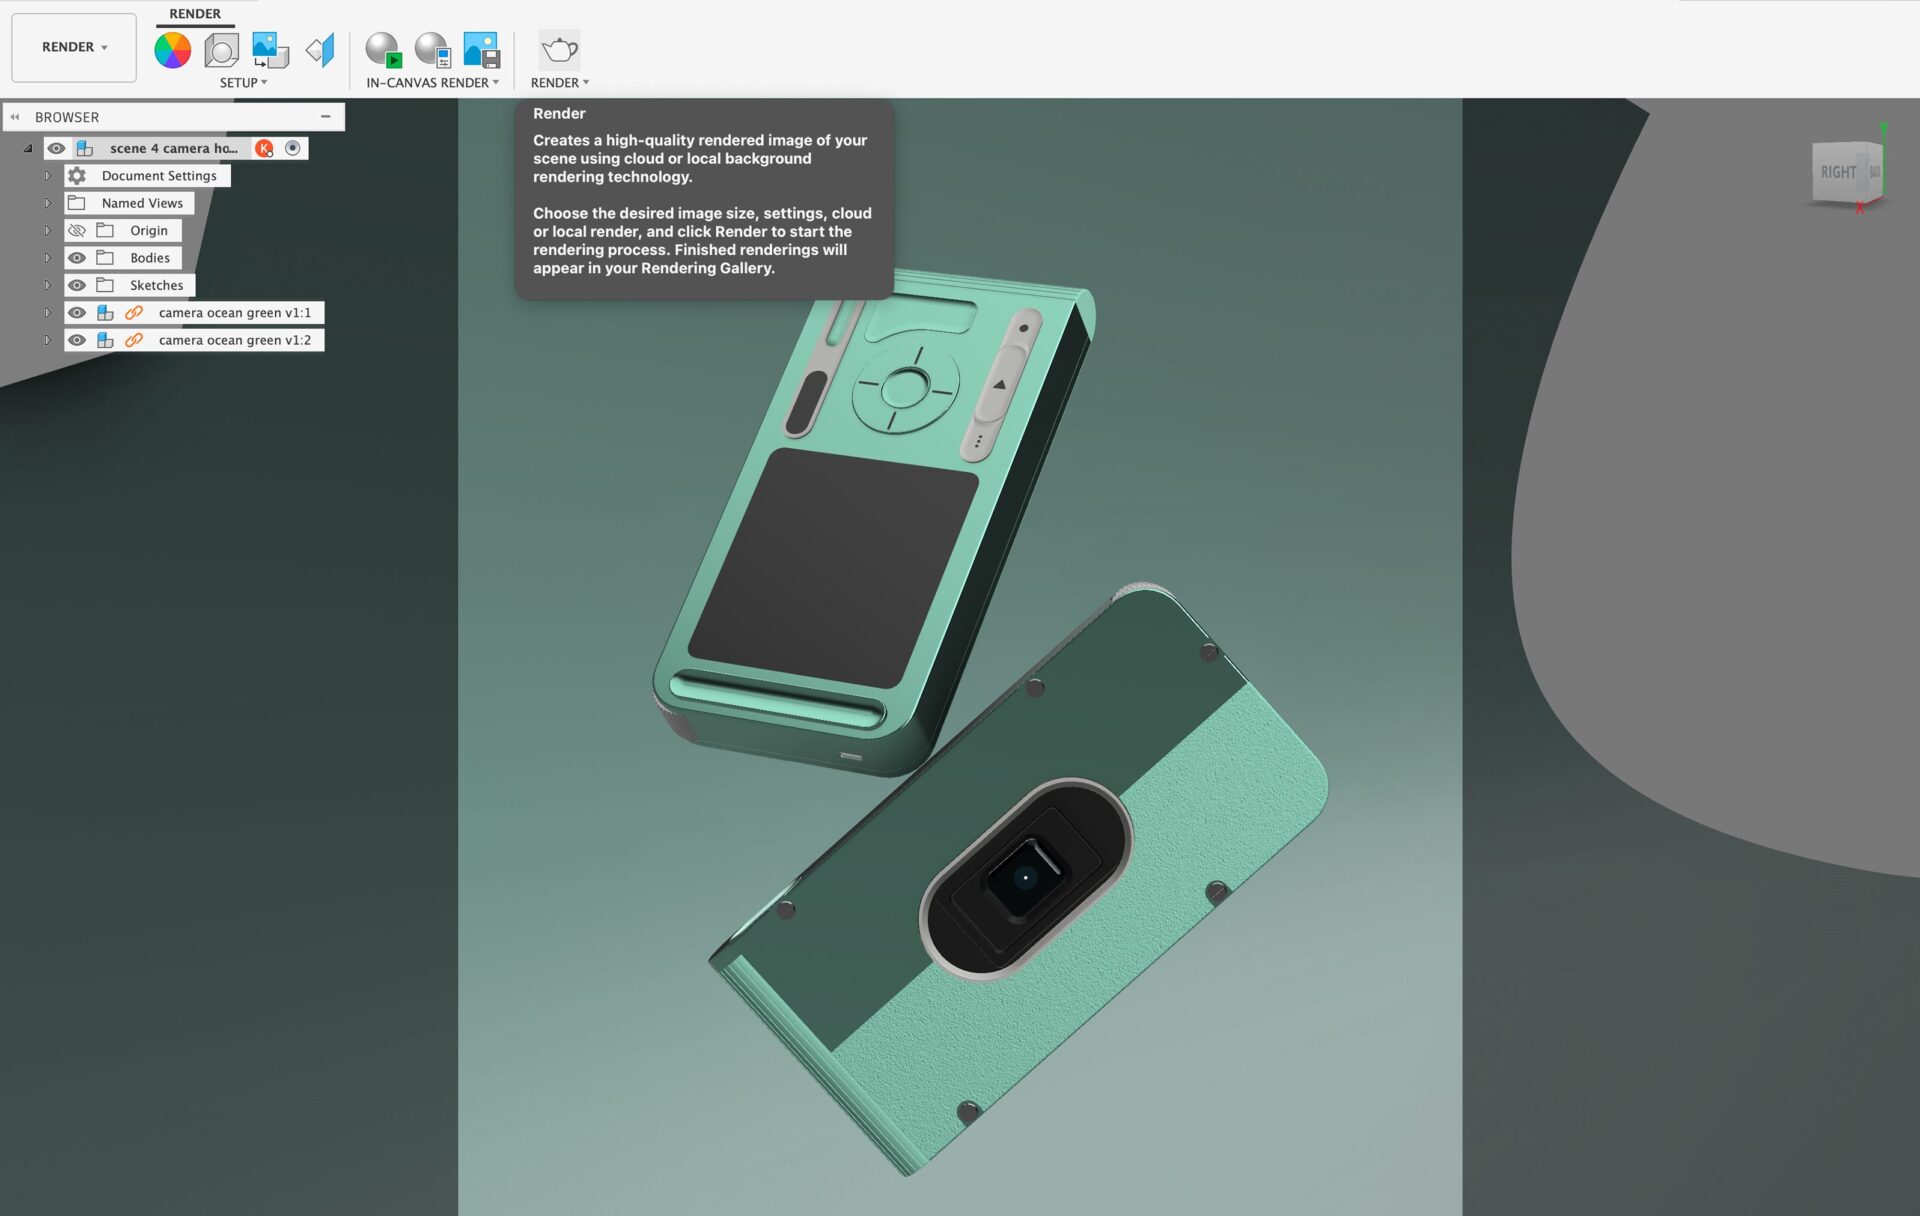
Finally, once you have created a view that you like, it’s time to render it. The resolution I normally choose is 2249 x 399px for a 4:5 Portrait aspect ratio. This will result in a high-quality render you can publish.
Fusion allows you to use Fusion’s Cloud Rendering feature, which allocates the processing of the rendering to Autodesk’s powerful computer,s allowing you to work on other variations of the scene or complete other tasks. After submitting a request, your render is added to a queue and usually takes around 10-20 minutes to process. If you don’t have Cloud Credits, you can use the Local Render option, which processes the render on your own machine. Depending on the specifications of your computer, this may take a significant amount of time to render. You may also choose to purchase cloud credits to process the render on Autodesk’s servers.
Step 7: Post-processing
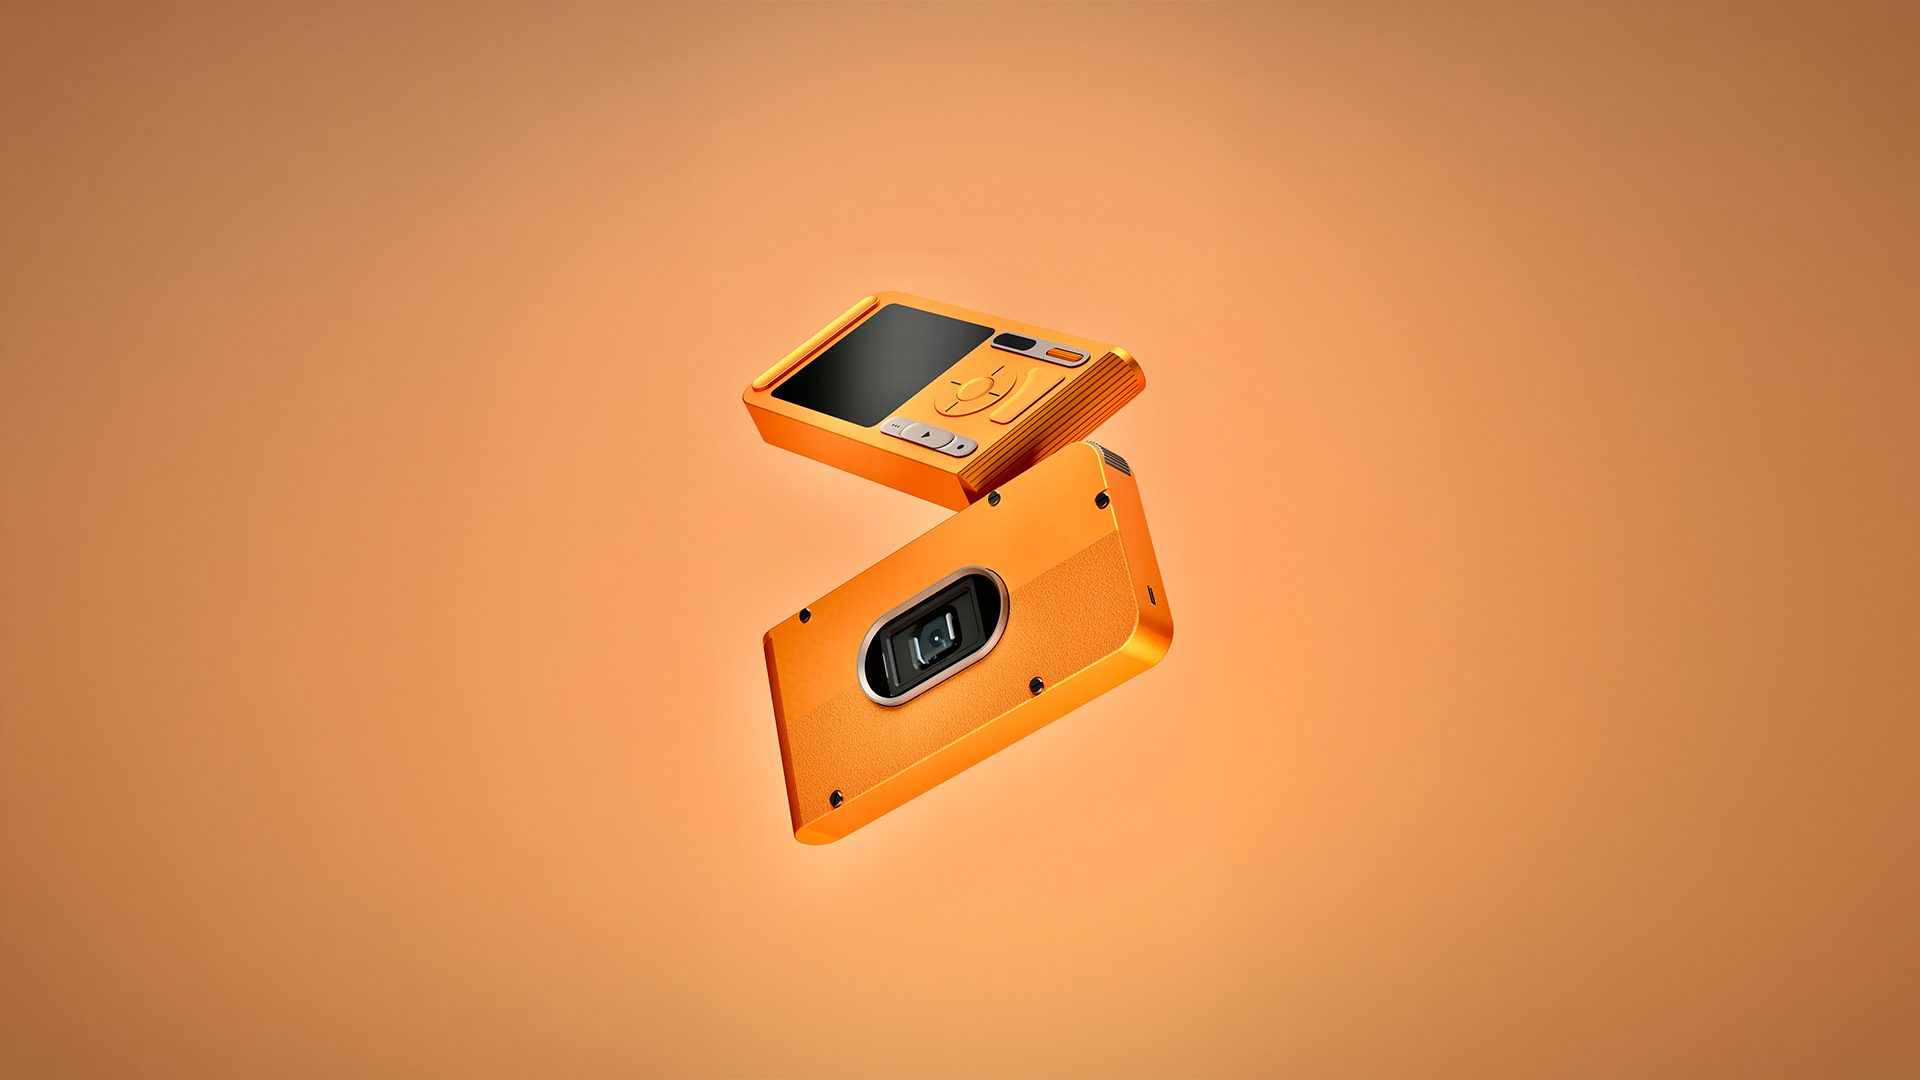
The file you get from Fusion is akin to a RAW file from a camera and should be treated as such. The render captures a lot of the color and light information, but it requires photo editing to bring it to life. Many Fusion users do not go the extra mile to finalize these renders but it is highly encouraged. Professional rendering studios also implement photo editing and other post-processing, and a core component of their rendering workflow.
After trying various photo editing software, I find Lightroom, or the default photo editing tool within iOS, to be more than sufficient. In fact, I’d recommend editing the image on your phone since that’s where a majority of people consume content. Furthermore, for most people, their phone’s display is the highest quality display they have access to, especially when it comes to color accuracy, but that’s another topic in and of itself. The main toggles I tend to adjust are brilliance, highlights, shadows, contrast, blackpoint, vibrance, temperature, tint, definition, and a touch of vignette. Again, there is no set number for either of these variables; you would need to experiment with reducing or increasing the values to see what works best for your image.
To summarize, there are three main points to create the best renders in Fusion: create and position custom light sources, dynamic positioning of objects (if you want a mid-air shot), and light photo-editing to bring it to life.
Thanks for taking the time to read this post. I hope you learned something new! If you’re a current Fusion user looking to level up your skills, or someone exploring Fusion for the first time, head over to nexgensolutions.com to get started. NexGenSolutions is an Autodesk Solution Provider for Autodesk Design & Make products, offering training classes, support packages, and even custom post processors to help you get the most out of your software.”
Any questions or comments? Feel free to reach out to me on my socials: