Discover the complete guide to GD&T symbols, their categories, standards, and practical applications across industries. Learn how Autodesk Inventor makes geometric dimensioning and tolerancing easier for beginners, improving design accuracy, manufacturing efficiency, and quality control.
Enhance Your Engineering Workflows
Precise, powerful, and ready for innovation with Autodesk Inventor.
Modern manufacturing demands precision beyond basic dimensional tolerances. Engineers rely on GD&T symbols to communicate complex geometric requirements for critical components—whether making sure that turbine blades maintain exact profiles or bolt holes align perfectly across assemblies. GD&T transforms lengthy written specifications into clear, universally understood graphical instructions.
These symbols appear across industries: auto, aerospace, medical devices, and consumer electronics. They provide manufacturing teams with precise guidance on allowable variation and quality control requirements, making sure that parts fit and function correctly worldwide.

What are GD&T symbols?
GD&T symbols are standardized geometric shapes that replace lengthy descriptions of tolerances on technical drawings. Instead of paragraphs explaining flatness or hole positioning, engineers use a single symbol within a feature control frame.
Each symbol defines a tolerance zone around nominal geometry. For example:
- Flatness creates a zone bounded by two parallel planes.
- Position creates a cylindrical tolerance zone for holes and pins.
This universal language eliminates ambiguity, ensuring consistent interpretation across global supply chains.
The five categories of GD&T symbols
1. Form tolerance symbols
Form tolerances control the shape of individual features without referencing datums.
- Straightness: Controls deviation from perfect straightness, applied to surfaces or axes.
- Flatness: Ensures surfaces remain within two parallel planes.
- Circularity (Roundness): Requires cross-sections of cylindrical/spherical features to lie between concentric circles.
- Cylindricity: Combines circularity and straightness, requiring surfaces to fall within coaxial cylinders.
These are ideal for features where intrinsic shape quality matters most.
2. Orientation tolerance symbols
Orientation tolerances control angular relationships between features and datums.
- Perpendicularity: Ensures features maintain 90° angles relative to datums.
- Parallelism: Controls how parallel surfaces or axes are to datums.
- Angularity: Specifies angular relationships other than 90°.
These always require datum references to establish measurement consistency.
3. Location tolerance symbols
These tolerances specify exact positioning requirements for assembly and function.
- Position: Most widely used; controls location of holes, slots, and pins relative to datums.
- Concentricity: Ensures circular features share the same axis.
- Symmetry: Controls symmetrical positioning relative to datum centerlines.
Location tolerances ensure proper fit and alignment in assemblies.
4. Profile tolerance symbols
Profile tolerances control 2D and 3D surface shapes, managing form, orientation, and location simultaneously.
- Profile of a line: Controls linear elements along a surface.
- Profile of a surface: Controls entire 3D surface geometry.
These are especially useful for complex curved surfaces like turbine blades or automotive panels.
5. Runout tolerance symbols
Runout tolerances control variation during rotation about a datum axis.
- Circular runout: Controls variation of circular cross-sections during rotation.
- Total runout: Controls entire surface variation during rotation.
These symbols ensure smooth operation of rotating parts like shafts, gears, and bearings.
Material condition modifiers
Modifiers optimize tolerances based on actual feature sizes:
- MMC (Maximum material condition): Provides bonus tolerance when features contain maximum material.
- LMC (Least material condition): Provides bonus tolerance when features contain minimum material.
- RFS (Regardless of feature size): Maintains constant tolerance regardless of size.
These modifiers reduce costs by allowing practical tolerance adjustments while maintaining functionality.
Reading feature control frames
Feature control frames organize tolerance information:
- Symbol: Indicates type of control.
- Tolerance value & modifiers: Defines allowable variation.
- Datum references: Establish measurement order.
This standardized format ensures consistent interpretation across design, manufacturing, and inspection.
Standards governing GD&T
ASME Y14.5
The most widely used GD&T standard in North America. Defines 14 main symbols and supporting concepts. Updated every 10–15 years, with the 2018 version clarifying datum concepts, tolerance zones, and integration with modern inspection methods.
ISO 1101
The global alternative, widely used in Europe and Asia. Shares similar symbols but differs in applications and interpretations. Often combined with national standards like BS 8888 for compatibility.
Practical applications
- Automotive: Engine components, transmission parts, and safety systems rely on GD&T for precise fit and performance.
- Aerospace: Flight-critical components require tight tolerances for reliability under extreme conditions.
- Medical Devices: Implants and instruments demand precise surface profiles and form tolerances.
- Consumer Electronics: Tight tolerances ensure proper connector alignment and heat dissipation.
- Additive Manufacturing: GD&T communicates post-processing requirements for critical surfaces.
Benefits of GD&T
- Cost reduction: Avoids over-specification, applies tight tolerances only where necessary.
- Bonus tolerance: MMC and LMC provide flexibility, reducing machining costs.
- Improved quality control: Clear inspection criteria eliminate ambiguity.
- Statistical process control: Enables monitoring of manufacturing processes.
- Enhanced communication: Standardized language improves collaboration across teams.
- Global supply chains: Ensures consistent interpretation worldwide.
- Integration with CAD/CAM: Directly interprets tolerances for machining and inspection.
Common mistakes
- Applying form tolerances larger than size tolerances.
- Using position tolerances without proper datum references.
- Mixing ASME and ISO conventions in the same drawing.
- Over-constraining features with conflicting tolerances.
- Neglecting material condition modifiers when bonus tolerance is intended.
Avoiding these errors ensures manufacturability, cost efficiency, and functional reliability.
Autodesk Inventor for GD&T
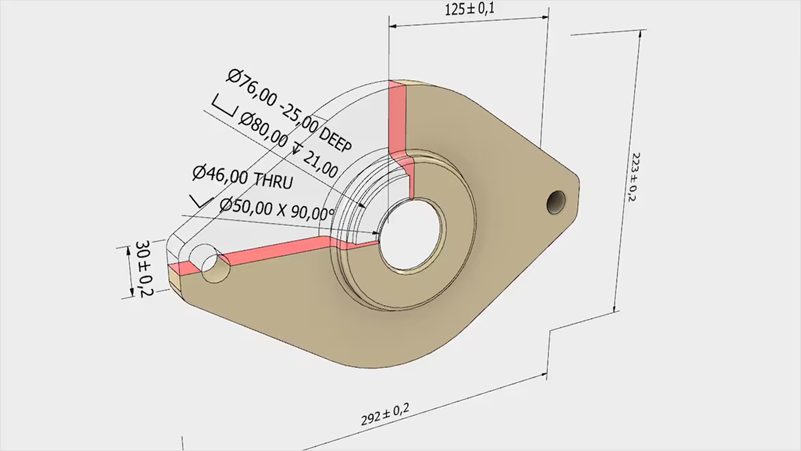
Autodesk Inventor integrates geometric tolerancing directly into the 3D modeling workflow. Instead of struggling with abstract symbols on a 2D drawing, users can apply GD&T controls to actual features in their digital models and immediately see how tolerance zones interact with part geometry. Inventor’s intuitive interface guides users through feature control frames, datum selection, and modifier application, reducing the risk of common mistakes. It also connects tolerancing decisions to downstream processes like CAM programming and inspection planning, so users quickly understand the practical impact of GD&T on manufacturing and quality control. Try it free for 30-days today.