
In a recent Tuesday Tips, I focused on some solutions for the poor drafting practice of not having your annotations in alignment. This time, the focus will be on overlapping objects and annotations. The drafting rule is quite simple: don’t overlap things.
But as we learned from that pirate movie franchise, sometimes rules are more guidelines than actual rules. By that, I mean that there are times when overlaps are just unavoidable. However, there are some tools in AutoCAD that let you hide objects in these cluttered areas. AutoCAD wipeouts and text masking are the focus of today’s Tuesday Tip.
Wipeout
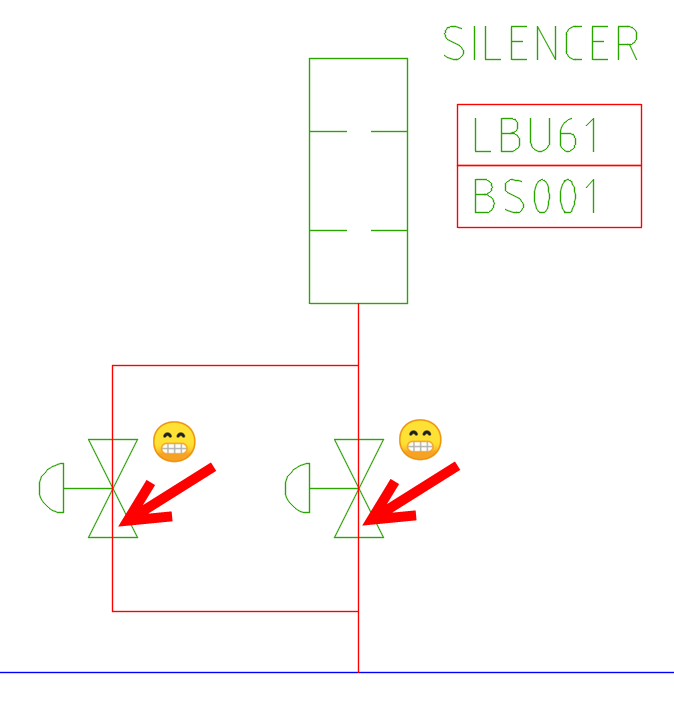
Consider the image below. Having the line appear behind the pneumatic gate valve symbol is a big no-no. These days, programs such as Plant 3D take care of this for you, but if you’re using an old-fashioned symbol library, your only option is to trim out the line within the block. Not an optimal solution.
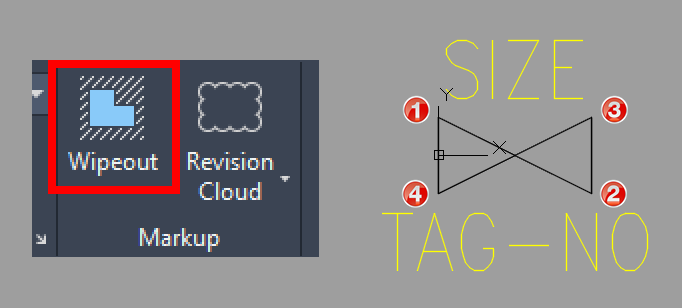
Instead, we’ll add a Wipeout object to the block definition. In the next image, you’ll see the valve block open in the Block Editor, and we can find the Wipeout tool in the Markup panel of the Annotation tab. It’s incredibly easy to use; if you can draw a polyline, you can create a Wipeout. Select points and enter close to end it, or you can choose an existing polyline (then erase it or not),
In our case, we want the wipeout to take on the same shape as the valve symbol, or a “bowtie” shape. Using an Endpoint Osnap, select the corners of the valve in the order shown. Save the edited block, and return to the drawing editor.
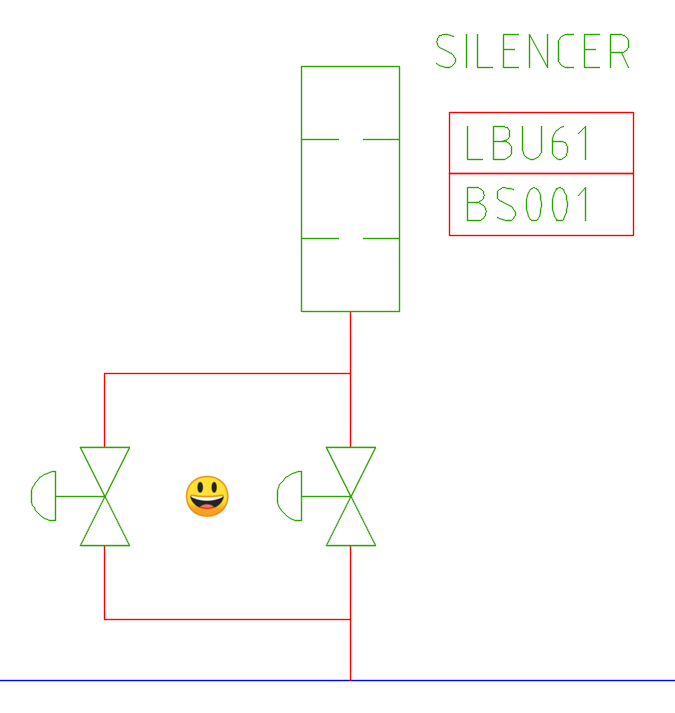
If you’re following along at home, the red lines are probably not hidden. If the block already exists, as it does in our example, you may need to change the draw order of the newly edited block. Select all instances (a good use of Select Similar, or Quick Select), then right-click, expand Draw Order, and select Bring to Front. Your wipeout should now hide the red line behind it.
Wipeouts come with an additional control you’ll need to know about. There is a system variable that controls how the frame, or outline, of the wipeout works. The variable is WIPEOUTFRAME, and you can set it to 0, 1, or 2, which correspond to:
0: The frame is not visible, and it is not plotted. The frame temporarily reappears during selection preview or object selection.
1: Displays and plots the frame.
2: Displays, but does not plot the frame.
A lot of underlay image objects have their own setting (such as PDFFRAME), and the FRAME command itself controls all of them. Sounds confusing, doesn’t it? Don’t worry, I’ve got you covered. I wrote about it a few years ago. Just go here (after you finish this blog) to learn all about it.
Text Masking
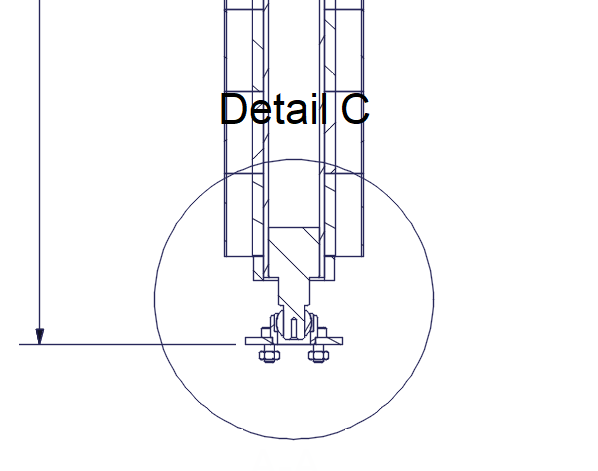
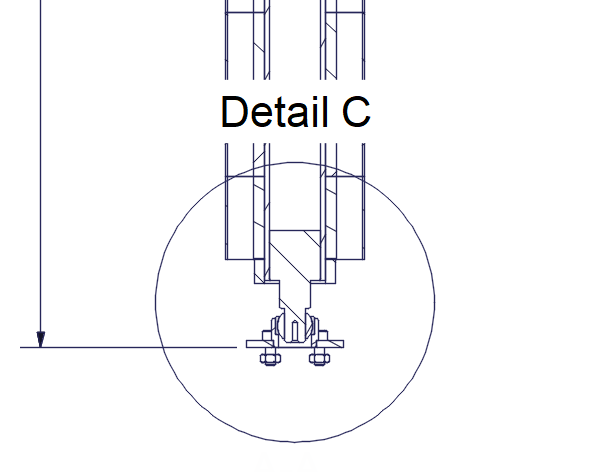
A close cousin to Wipeouts are Background Masks. Think of them as specialized wipeouts that work only with MTEXT objects. Consider the image below. The drawing contains a detail callout block with an MTEXT object identifying the area as Detail C. Its placement falls on top of the objects above it. It’s poor drafting to say the least.
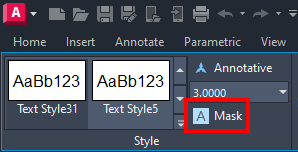
Again, I’ll edit the block via the Block Editor. I’ll double-click on the MTEXT as if I’m going to edit it (which I am). The Ribbon will switch to the contextual Text Editor tab, where I’ll click on the Mask tool from within the Style panel.
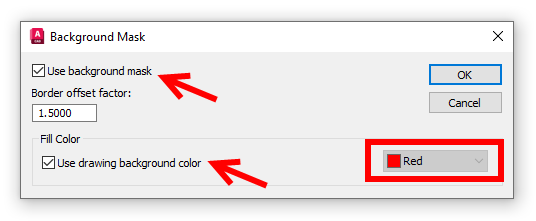
You’ll immediately be presented with the Background Mask dialog. It’s pretty simple. There’s a checkbox to use a mask or not. That’s why I’m here, so I’ll make sure it’s selected. I don’t want a special color for the mask (are you trying to call attention to your text? Perhaps you’ll want to set a color).
We want our mask to be effectively invisible, so I’ll select the Use drawing background color checkbox. If I left it unchecked, I could select my color from the widget on the lower right side.
When you’re done, save the block, and you should see the mask applied to the block’s text as shown in the image below. In the example, there’s some extra space above and below the text. That’s the offset factor that you saw in the mask dialog.
A Few Final Thoughts
In both examples, I added the Wipeout and Text Mask to existing blocks. Obviously, they work straight from the drawing editor as well, and you’ll probably never encounter the Draw Order issue – at least at the time of their creation.
And yes, I know, the examples were a bit flawed as well. I alluded to that with the valve symbol. I doubt if any serious piping designer would be using such old-school blocks, but it helped drive home the point. And, what about the Detail C symbol block? Making the text into an attribute and adding a dynamic Move action would be a better way to manage the block. But thanks for sticking with me!
Of course, you should make every effort to use good drafting techniques. If at all possible, you should avoid these object overlaps whenever you can. But when it’s not possible, these masking tools can help you keep your drawing clean.
More Tuesday Tips
Check out our whole Tuesday Tips series for ideas on how to make AutoCAD work for you.