
You may recall a couple of my more recent Tuesday Tips that revolved around some 3D modeling and editing basics. I thought I’d build on that by showing you how easy it is to create projected views of your model in a layout.
If you’re not already familiar with this workflow, your first thought is probably to create three (or four) viewports in your layout, then use the view tools to create a front, top, and side view (and maybe an iso.) Of course, you need to make sure your scaling and visual states are consistent and that the views are aligned with each other. Well, that’s too much work, and if you’ve read this blog for any time at all, you’ll know that I’m always in favor of working less.
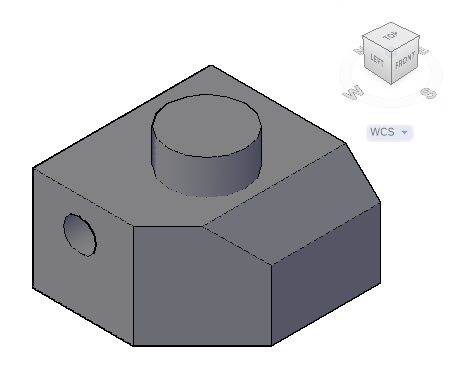
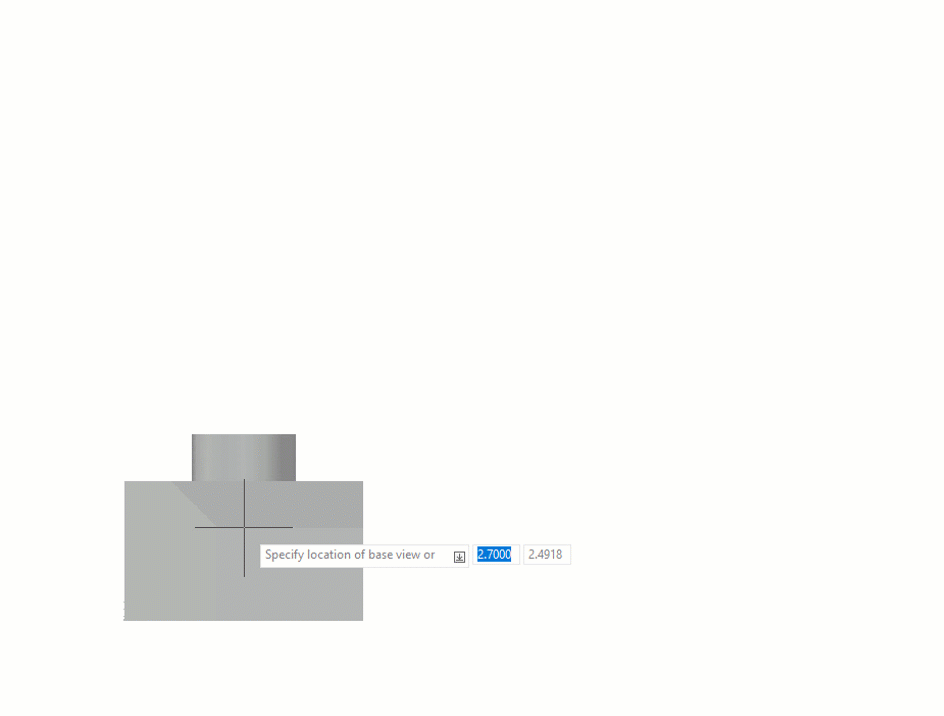
I started to use the same example object that I used in my previous posts, but it made for a pretty boring orthographic projection, so to liven it up a bit, I added a couple of chamfers and bored a hole through it. As you can see in the below image, the chamfers are in the front view, as seen on the included ViewCube.
First Things First
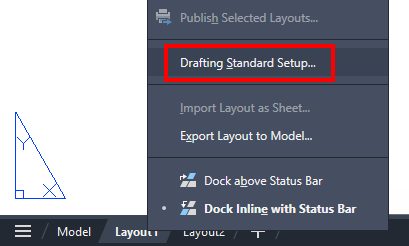
As with many things in AutoCAD, proper setup is essential to creating the workflow you want. You’ll start by accessing the Drafting Standard Setup dialog box. The easiest way is to right-click on a layout tab and select Drafting Standard Setup.
AutoCAD will display the following dialog. For our simple model, we’re interested in the Projection Type, but if you have the need to display threads, you have a couple of options, along with the ability to adjust the shading and/or preview of your inserted views.
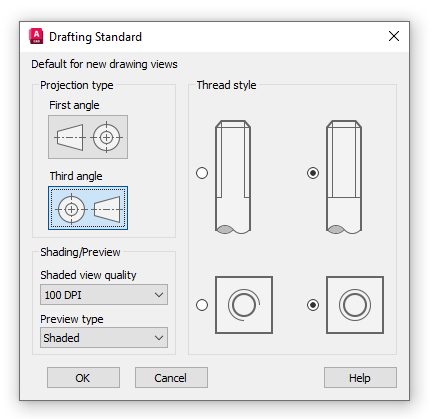
But we’re interested in how our object is projected. If you can remember back to your drafting classes, you learned all about orthographic projection. You’re presented with two options: First Angle and Third Angle.
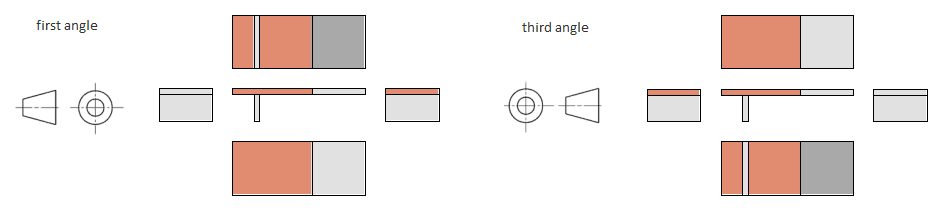
Quite simply, if the active projection type is First Angle, top views are placed below the front view. In the Third Angle, top views are placed above the front view. That is not just typical in the United States, but it was how I was taught, so I’ve selected Third Angle. I’ll typically leave the shading and preview alone, and I don’t have any threads, so my work is done here. Just click OK to save your changes.
Now comes the easy part (as if the first part was really hard.) Make sure you’re in a Layout tab, and if you have AutoCAD set to create a new viewport automatically, you should probably delete it now. Since you’re in a layout, the blue contextual Layout ribbon tab will appear. Click on it to display its panels and tools.
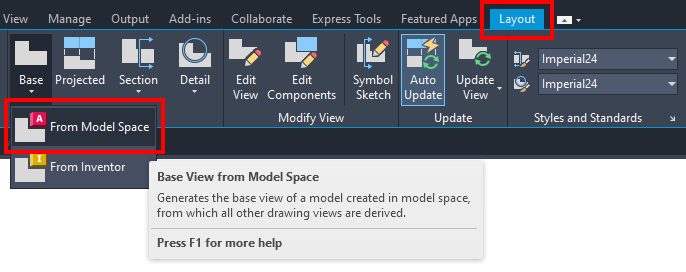
In the Create View panel, click on Base. It will expand to give you two options. Choose “From Model Space.” Notice that you can use an Inventor file, but since this is an AutoCAD blog, we’re going that way.
That was easy, but it gets even easier. It’s time to insert your views. The VIEWBASE command has already examined your model and is just waiting on a few clicks from you.
It will start by inserting the Front view. Just a click of your mouse inserts it. You’ll have some options for the views after this, but if you want to just move on, select exit. Next is the Top view. Click. Then comes an isometric view. Click. Finally, you get the side view. Click and Enter to exit. You’re done! If you don’t want the isometric, erase it. That’s all there is to it. You can see it all in action by viewing the animated GIF below.
That’s All Folks
I told you it was easy. I’d also be willing to bet that many AutoCAD users aren’t even aware of it. One more thing during the creation phase: I’d suggest leaving Auto Update from the Update panel turned on. That way, it’s a live, dynamic look at your model, so any changes you make will be reflected in your layout views.
Finally, a shout-out to my friend and colleague Kristina Youngblut for playing my muse and providing inspiration for today’s blog. (And be sure to check out her year-long Community-Driven Collaboration Project – A Tip a Day! on LinkedIn.) If you have a good idea, feel free to reach out. I’m on several platforms, and I’d love to hear them.
More Tuesday Tips
Check out our whole Tuesday Tips series for ideas on how to make AutoCAD work for you.