
It’s time to revisit the Layer Properties Manager Palette. There are so many things to discuss in this palette, many of which are overlooked. From our training days to our daily work, we’re generally focused on the table of layers and properties. Oh, but there’s so much more.
Previously in this blog, I’ve discussed the tools found to the left of the table. One was about creating and using Layer Filters, and then another about Layer States (links included for your convenience). Today’s post focuses on the columns of the table. I’m again using the Floor Plan sample file and in a Layout Tab so that all of the VP columns are displayed.
Property Column Tools
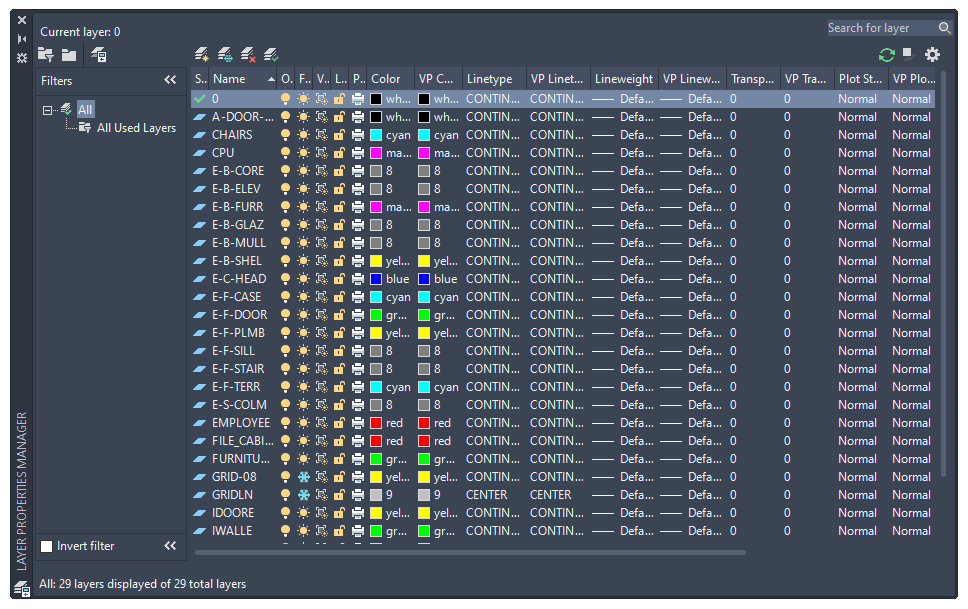
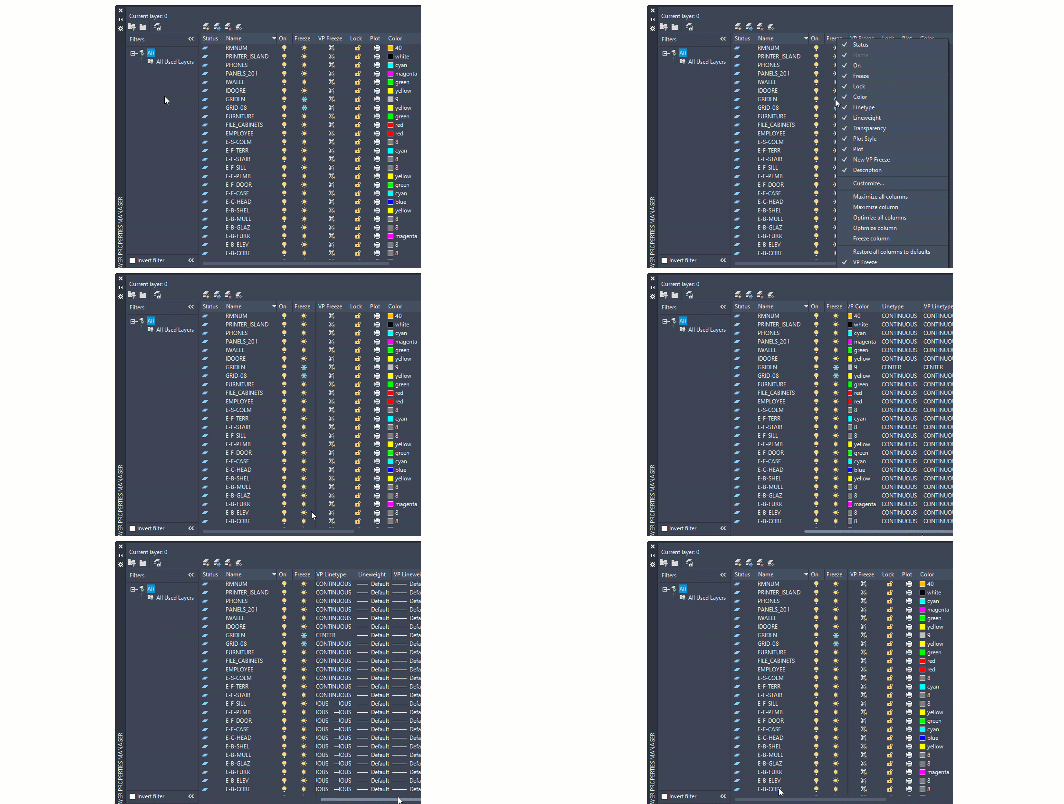
By default, the layer property columns appear as they do in the image below. They appear condensed and generally hard to read.
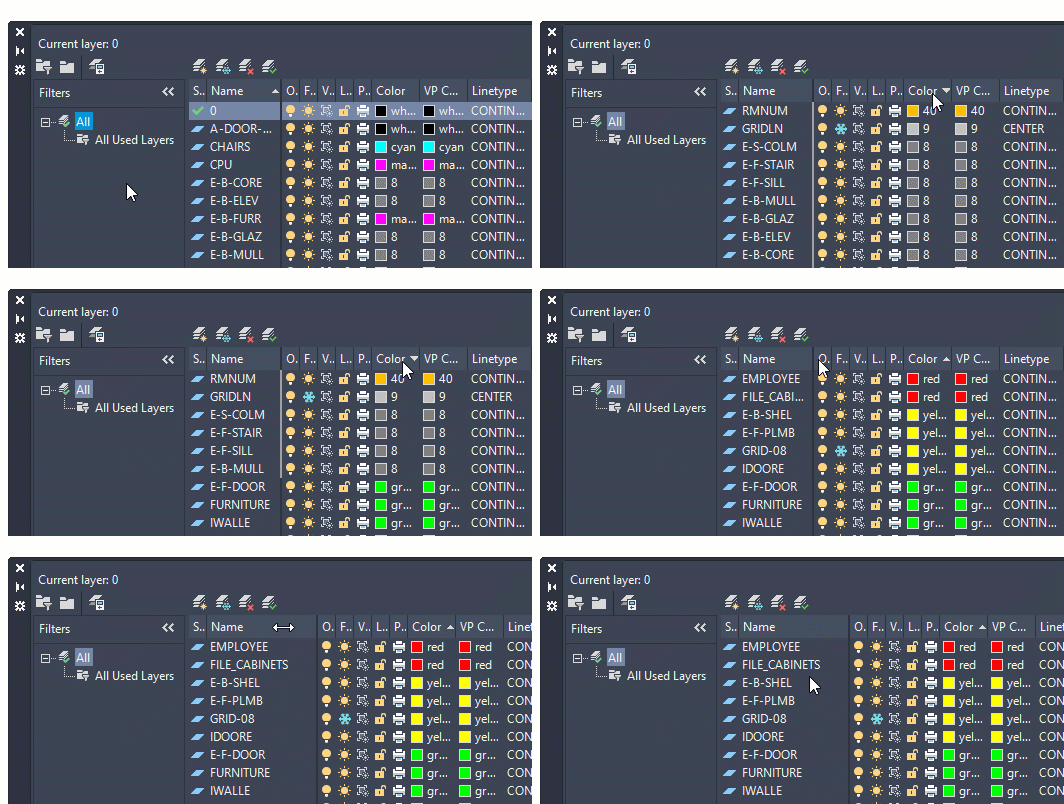
You’ve probably already figured out that you can sort the table in an ascending or descending manner based on a column. Simply click that column header (as shown below) to sort. The up or down arrow will be your visual cue.
Also, double-clicking on the right edge of a column will expand that column to its optimized state. I’ll get back to what that means in a moment, but again, the animation below shows it in action.
The Right-Click Menu
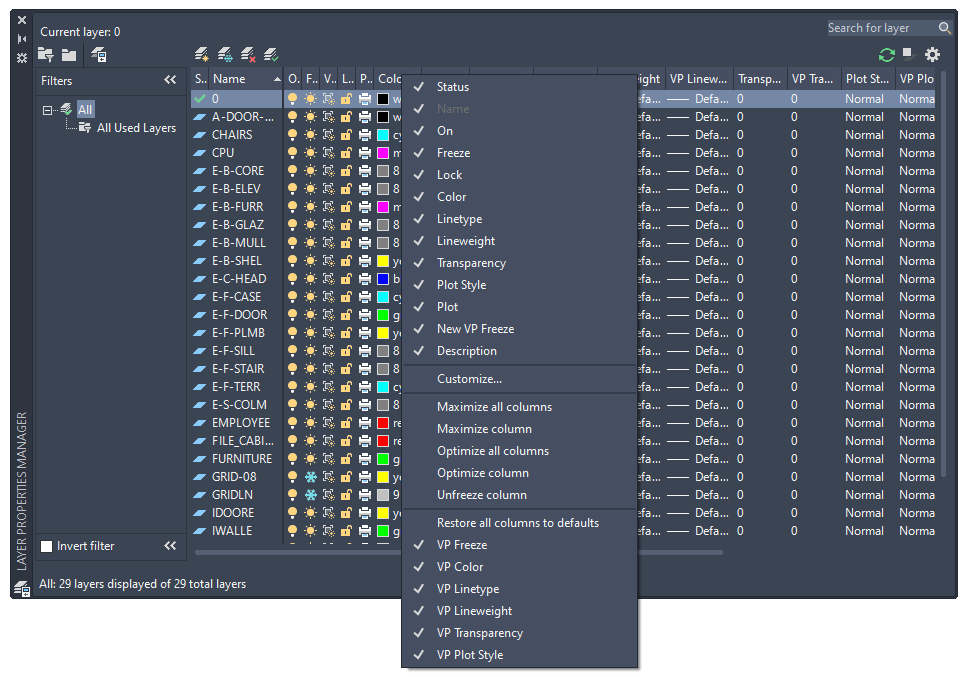
That last nugget is indeed handy, but in a layout view, there are 19 columns – hardly an efficient way to handle the task. That’s where the right-click menu comes in. Just hover over any column header and right-click. You’ll be presented with the menu as shown in the following image.
In the top and bottom sections, you’ll see each column with a check mark beside it, indicating it’s displayed (the bottom VP columns won’t appear in Model Space). Don’t need a property column? Turn it off by clicking on the name. Are you a CTB office? If so, the Plot Style column just takes up space, so you can turn it off here.
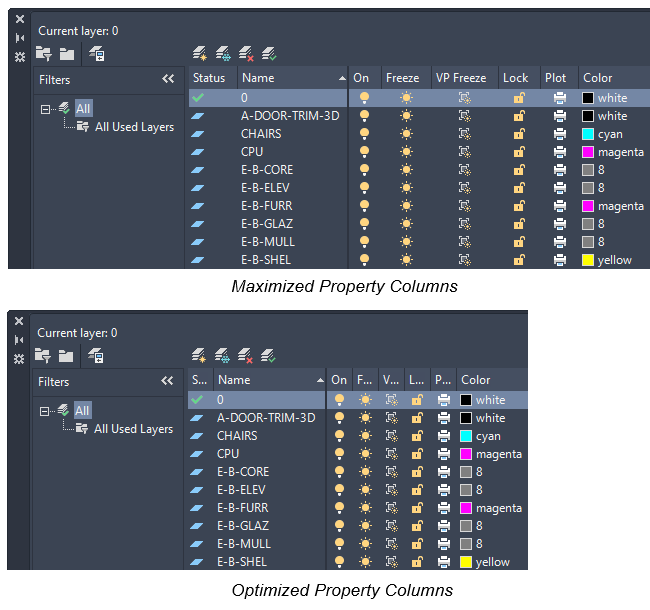
Let’s turn our focus to the middle section of the menu. Here, we have tools to Maximize or Optimize all columns, or only the one you right-clicked on. What’s the difference? Maximize changes the width of all columns to fit the column headers and the data content. Optimize changes the width of all columns to fit the content in each column. You can see the effect of each in the image below.
Below these four tools is one more that is labeled as either Freeze or Unfreeze column. Please note that with this command, it does matter which column header you right-clicked on, so keep that in mind. Also note that by default, the Status and Name columns are frozen.
What does this mean exactly? Freeze keeps the column, and any columns to the left, visible while scrolling. Unfreeze it so that all columns scroll. Let’s say I need to see the On and Frozen status while I’m way off in the far right side of the palette. The animation below will show you the workflow and the results.
That’s a lot of power, and since these tools aren’t used all the time, you might forget about what they do exactly and royally mess up your palette. Don’t worry, there’s also a restore all to default tool for just such an occasion.
There’s just one more tool on the right-click menu. You may have noticed one called Customize… right below the standard column names. Clicking it will display the dialog shown below. Now, here at Tuesday Tips HQ, we pride ourselves on minimizing picks and clicks. My tip for you then is to use the method described above to display your desired columns. Otherwise, you’re just adding unnecessary clicks to your workflow.
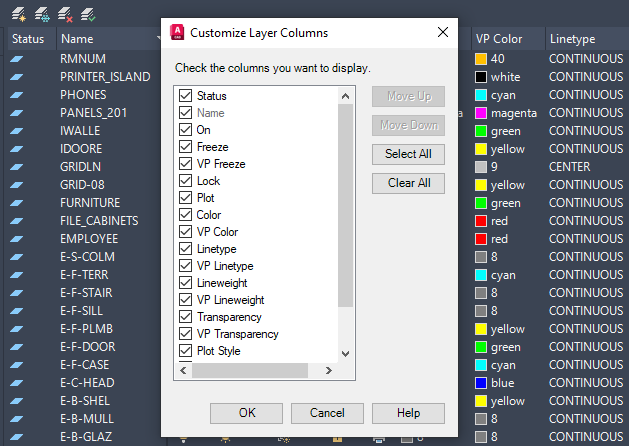
I guess if you wanted to turn off multiple columns at once, this would be more efficient, as the right-click menu dismisses once you select one to display or not, but since I’ve never done that in my four decades of using AutoCAD, I doubt you will either. Or I might be wrong – that I do know that I’ve done in that time frame.
Until Next Time
It’s not unlikely that I’ll see you again in the future with even more AutoCAD Layer Properties Manager tips, as there’s a lot of functionality in there.
Meanwhile, don’t forget to review the Layer Filters and Layer States tips. There’s a lot there that can improve your overall efficiency.
More Tuesday Tips
Check out our whole Tuesday Tips series for ideas on how to make AutoCAD work for you.