
I’ve said it here before: I never know where I’ll get the inspiration for a Tuesday Tip. This time it came from an old friend and colleague thanks to an interesting LinkedIn post. It demonstrated an alternate method for creating arrays, without using the actual array command. Intrigued yet? Asking why you would do such a thing?
As you are aware, there are a lot of controls to create a modern array. Maybe whatever you’re doing doesn’t really require all of those features. It kind of reminds me of a Lambda function in AutoLISP programming, which is an unnamed function that most manuals describe as being used “when the programmer doesn’t need to go to the overhead of creating a full function.” Heh, that’s always stuck with me for some reason.

So while you may not use these two methods often, it is kind of fun, and it helps to drive home a couple of points, so let’s get started.
Creating a Linear Array With AutoCAD Grips
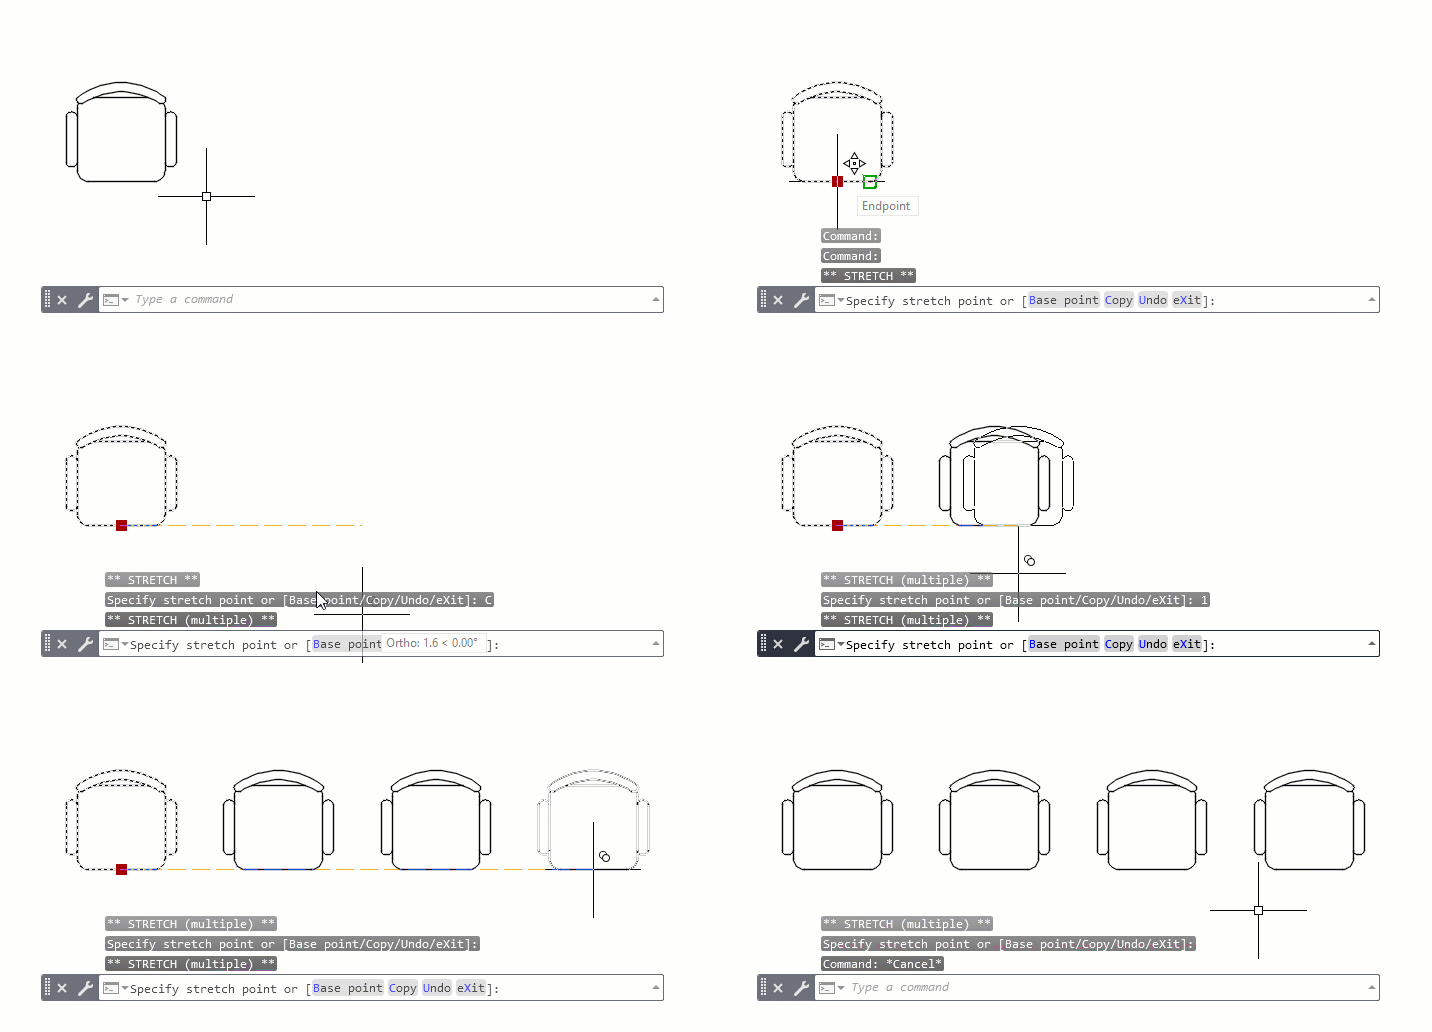
For my two examples, I’ll be using the chair block as found in the Floor Plan Sample drawing. The workflow is pretty simple, and illustrated in the animation below. First, select the block to display its insertion point grip. Select the grip to make it “hot”.
Now, recall that hot grips always start with the Stretch command. I’ll click on Copy in the Command Line, and with Ortho on, I’ll pull to the right and specify 1 unit for the grip copy. Here’s a really cool keyboard trick. I press the Control key, and my 1 unit spacing will lock into place, and I can continue clicking to the right to complete my linear array.
Creating a Polar Array with AutoCAD Grips
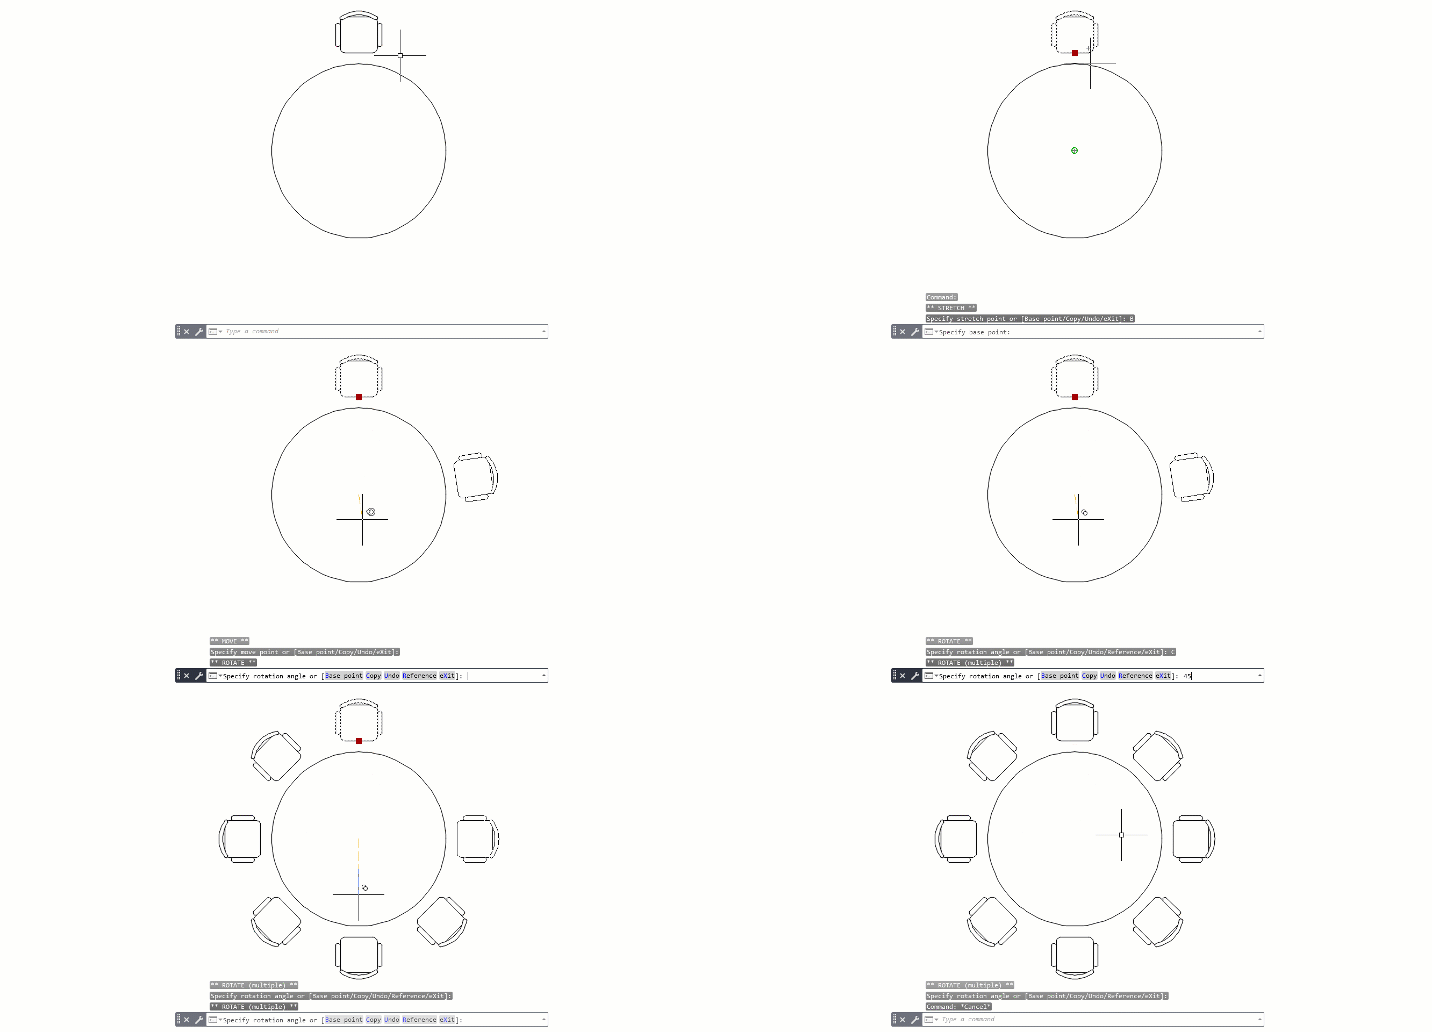
Let’s use a similar method to create a polar array. This time, we’ll imagine using our chair block to surround a table with eight equally spaced chairs. I’ll start in the same manner, selecting the block, then selecting its grip.
Since I want the chair “array” to go around the table, I’ll type in B to activate the Base Point option, then select the center of the circle using a Center Object Snap. Once that is defined, I want the Rotate option of the grip, so I press Enter to cycle through the available options, stopping when the Rotate option is current.
Now, we want to copy our chair, but do it multiple times, so I’ll enter C (copy option) into the Command Line. You’ll see the prompt change from ** ROTATE ** to ** ROTATE (multiple) **
I’ll enter my rotation angle of 45, and the second chair will appear. Now, I’ll again use that handy Control key trick to lock in the rotations, and continue to place the remaining blocks.
Granted, these alternate arrays (I think I’ll call them Lambda Arrays going forward) don’t have the cool dynamic functionality of a real array object. “But Frank”, you might also be saying, “my real arrays act as a single object, so it’s easier to copy or move them. These are all individual objects.”
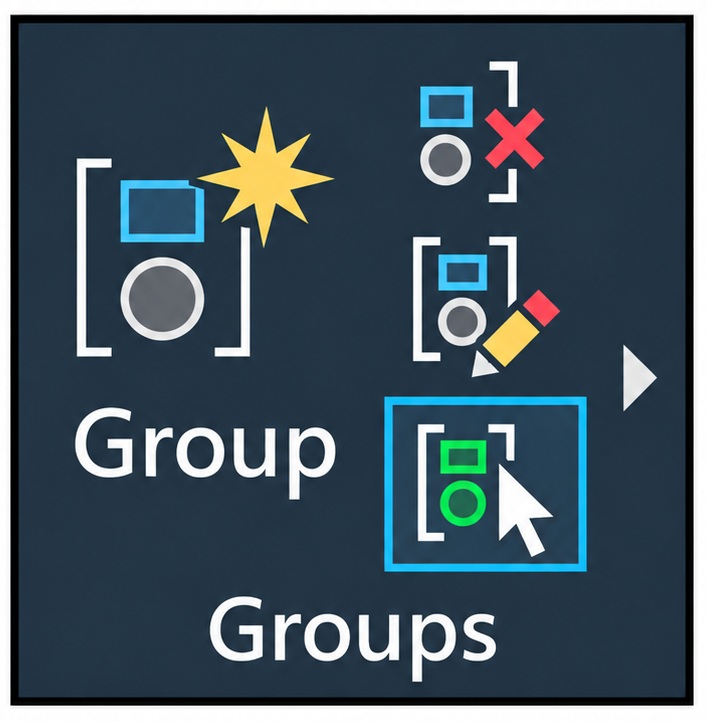
I’ve got you covered there too. Just use an unnamed group to turn them into a single, selectable object. Click on the big Group icon in the Groups panel of the ribbon’s Home tab. Select your objects and press Enter. If you decide later that you don’t want them grouped anymore, just click the icon in the panel’s upper right corner, and select any item in the group.
A Suitable Ending
While these methods may or may not be useful to you, they helped me to show some important concepts. One was to remember to use the options available with Grip editing. Access them via the Command Line, cycle through them with the Enter key, or if you have Dynamic Input turned on, use the arrow down button to see your options. While Stretch is the default for all object types, your other options can differ, so remember to check them out.
You should know by now that I’m a big fan of keyboard shortcuts. Don’t forget about using the Control key as described here. Prior to the inspiration that drove this post, I was not aware of it.
The final point is this. If you’re just getting started, training from an experienced professional can make a real difference. The author of the original referenced LinkedIn post was none other than one of the most well-known CAD trainers out there.
You’ve probably heard of him; his name is Michael Beall. Michael is known as The CAD Trainer Guy, and he’s trained thousands of people over the years on AutoCAD, and chances are, he may have even trained you. Thank you for your continued inspiration, Michael!
More Tuesday Tips
Check out our whole Tuesday Tips series for ideas on how to make AutoCAD work for you.