We’re querying our drawings for geometric information all the time. Long before our designs are dimensioned and annotated, we’re retrieving or verifying things like distances, radius, and angles or even areas and volumes.
And, just like your designs evolve, so have AutoCAD’s methods to retrieve this information. The LIST command gave way to the Properties palette (or even Quick Props) and so on. We’ve had the individual query commands for years. The MEASUREGEOM command is a one-stop shop for those I mentioned. But it, too, has evolved, and you may not even be aware of it.
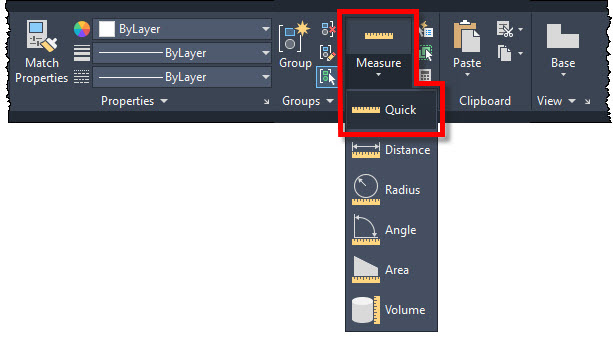
In the 2020 release, a new “Quick Measure” option was added, which measures 2D drawings simply by hovering your mouse! You can find Quick Measure in the Utilities panel in the Home tab of the Ribbon.

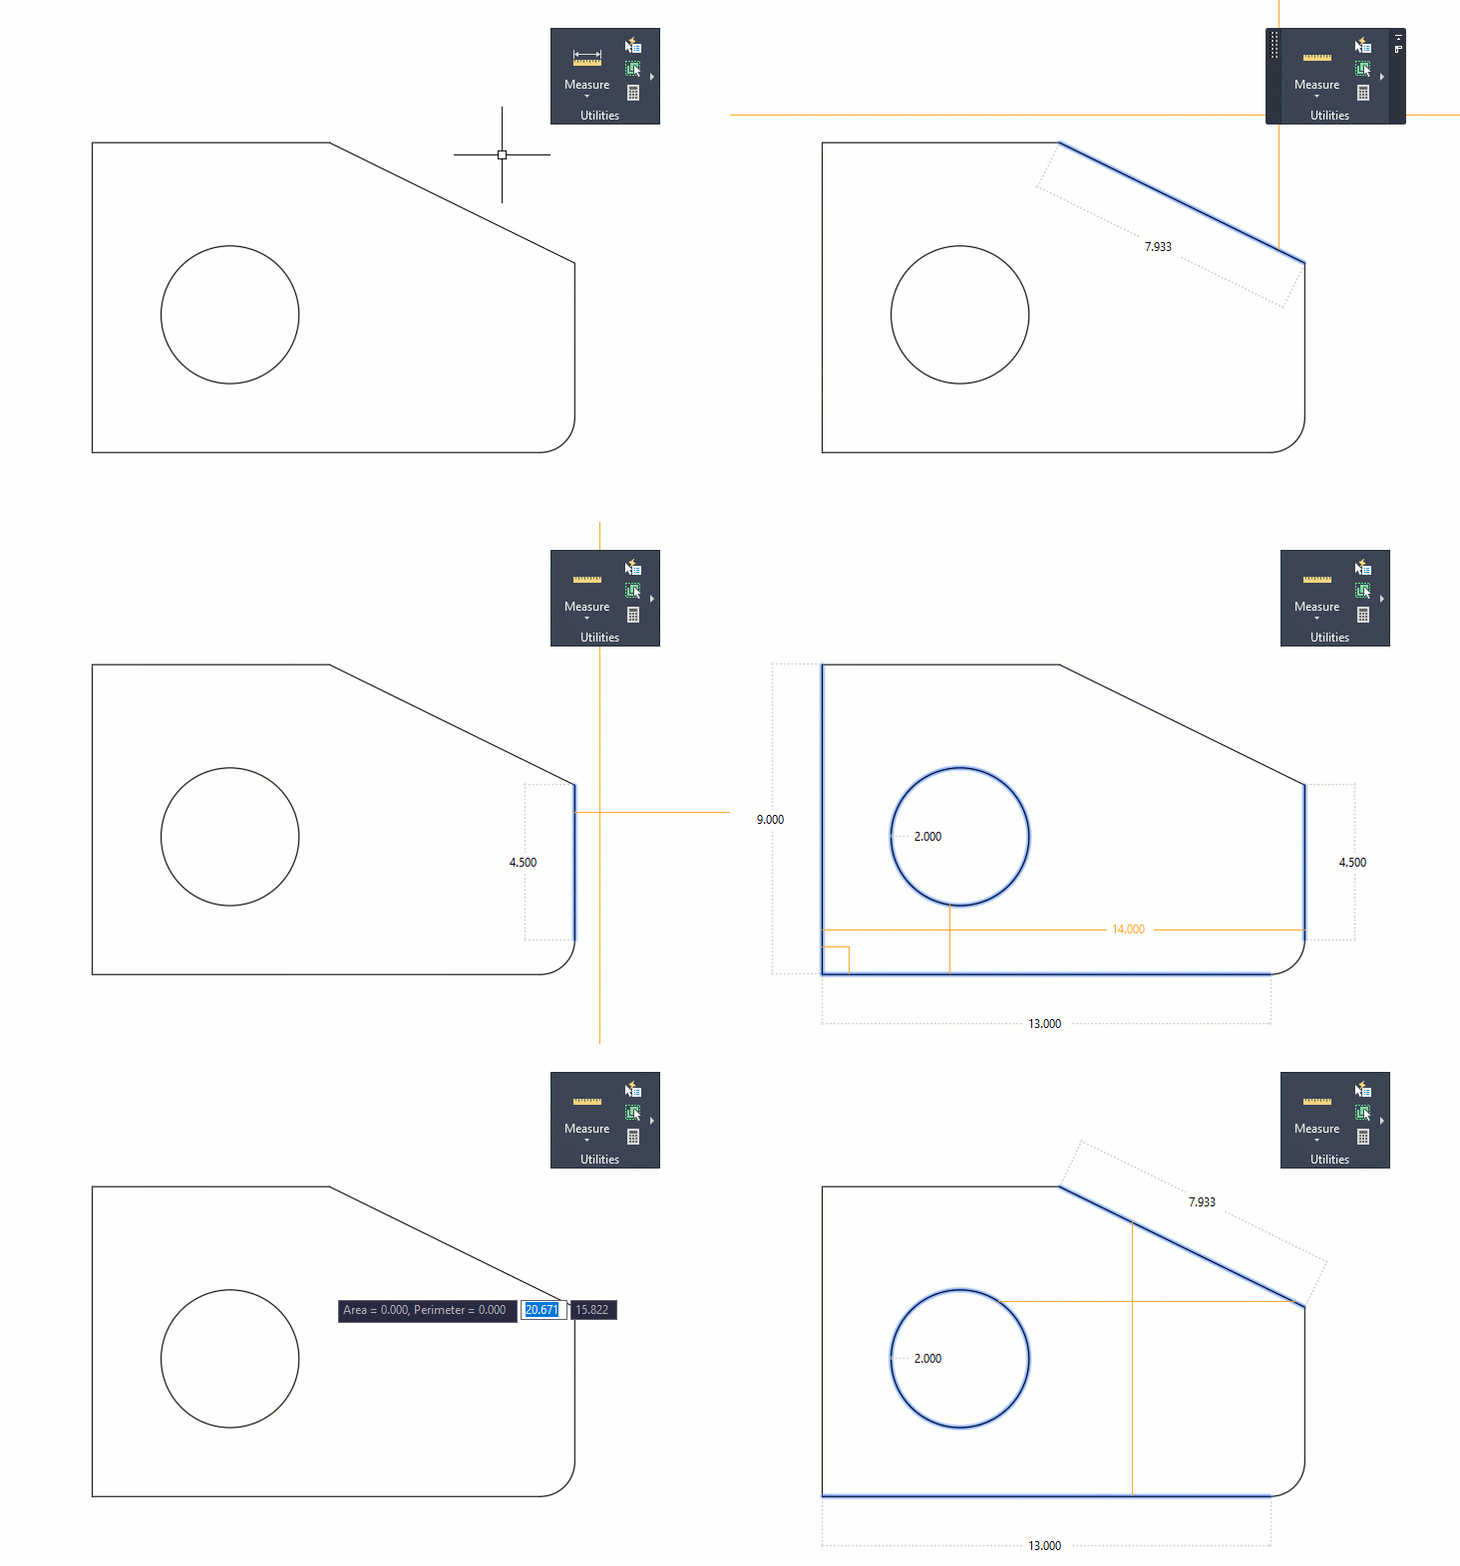
When you run MEASUREGEOM in Quick mode, your cursor will change color and switch to full screen. The information displayed to you is determined by the first object each axis touches. So, as you move your cursor around, you’ll notice that the temporary dimensions it creates are constantly changing. If you’ve not used Quick mode before, that may sound annoying, but trust me, in practice, it’s fantastic, and you’ll learn to love it right away.
So, if one of your crosshairs touches a line, you’ll get its length. If it touches an arc or circle, you’ll get its radius. If both axes touch joined lines, you’ll get the angle between them.
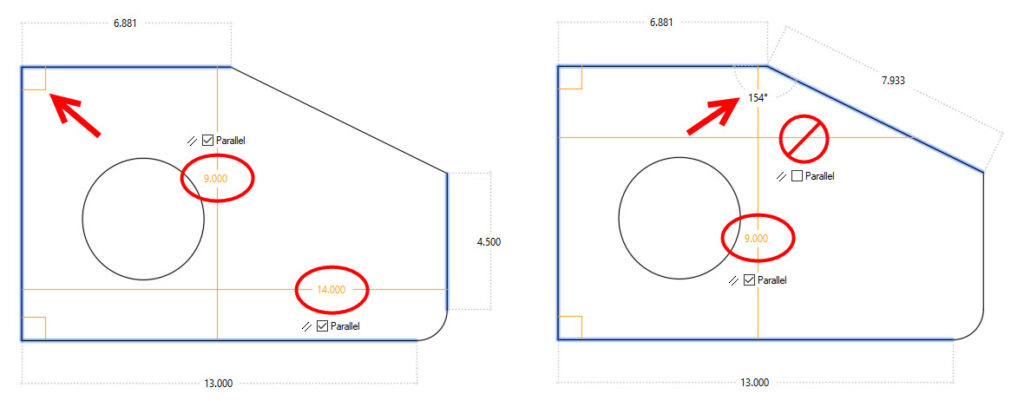
But there are a few nuances you should know about. If the two lines being touched are perpendicular to each other, small orange squares will appear in the corners, indicating that the lines are at a 90° angle. If you’ve ever had a drawing where it looked like there was a 90° angle, but it was actually 89.9998°, you’ll love this visual feedback.
There’s also a terrific visual for indicating that two lines are parallel. Note the images below. If one of your axes touches a line on both ends, a dimension will appear upon it if those lines are parallel. Don’t see a dimension? They’re not parallel.
The same goes for an angle display. Have you ever assumed two lines were joined, but if you zoom in far enough, you’ll find that they’re off by just a little bit? (you’ve run into this if you ever worked with that one guy I did). If you don’t see an angle when you expect to, they’re not actually joined. With that being said, dear readers, please use Object Snaps.

As I said earlier, AutoCAD continues to evolve, and the Quick Measure feature has already done so. The year after its release, it added the ability to display the Area and Perimeter of a closed object.
Simply click within the geometry, and the area within will be highlighted green and displays the calculated values in the Command window and a dynamic tooltip in the current units format.
If you use Shift+click to select (or deselect) several areas, the cumulative area and perimeters are calculated. The perimeters of enclosed islands are also included.
Quick Measure in Action
Let’s look at Quick Measure in action. I’ve tried to capture everything you’ll see in one animation, but no doubt I missed something. However, it will give you a good idea about how easy it is to query your geometry quickly.
One other thing to note. Since the temporary dimensions stay the same size, and many may appear simultaneously, I recommend zooming in to the area you’re measuring. If you’re zoomed way out, you probably won’t like the results.

That’s All, Folks
Wow! How’s that for a lot of functionality? You’ll quickly find yourself to be dependent on this fantastic new tool if you’re anything like me (and the jury is still out as to whether that is a good thing or not).
Trust me, once you’ve tried it, you’ll miss it if you don’t have it. So, the next time you find yourself having to verify your drawing’s geometry, give Quick Measure a try. I think you’ll be glad you did.
More Tuesday Tips
Check out our whole Tuesday Tips series for ideas on how to make AutoCAD work for you. Do you have any favorite AutoCAD tips? Tell us in the comments!


