This article is part of a community spotlight series from The Big Room, where industry professionals share real-world construction workflows. In this installment, Derek Wilfong, Senior VDC Coordinator at Lease Crutcher Lewis, talks about combining 2D section views with 3D model context in Autodesk Forma to improve coordination and visualization.
Construction documents have a long history and have traditionally served as a familiar source for visual representation of our work. As projects become more complex, we now have the ability to combine familiar 2D representations with 3D model elements, adding spatial depth that previously had to be imagined.
One feature I learned about not too long ago is the ability to publish 2D section cuts alongside your model so they’re visible when viewing the Revit model in Autodesk Forma.
The following is a workflow we commonly use on projects.
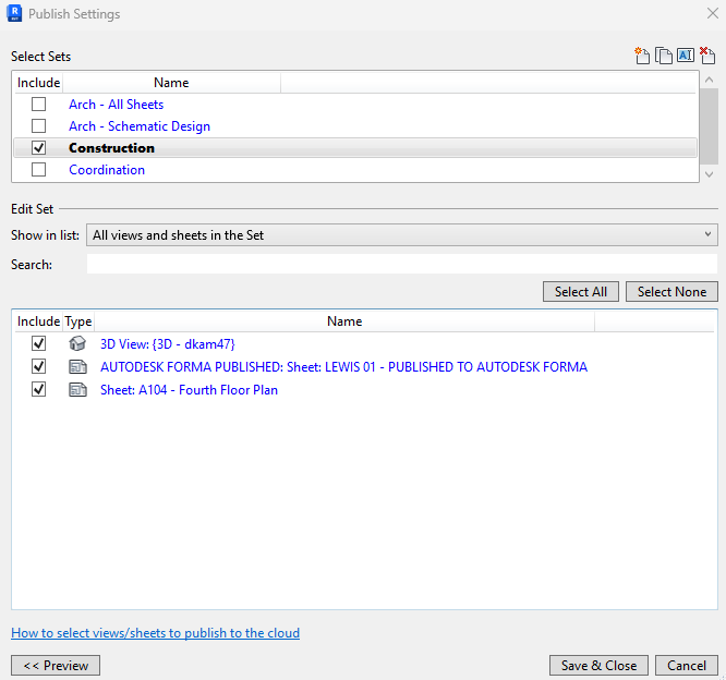
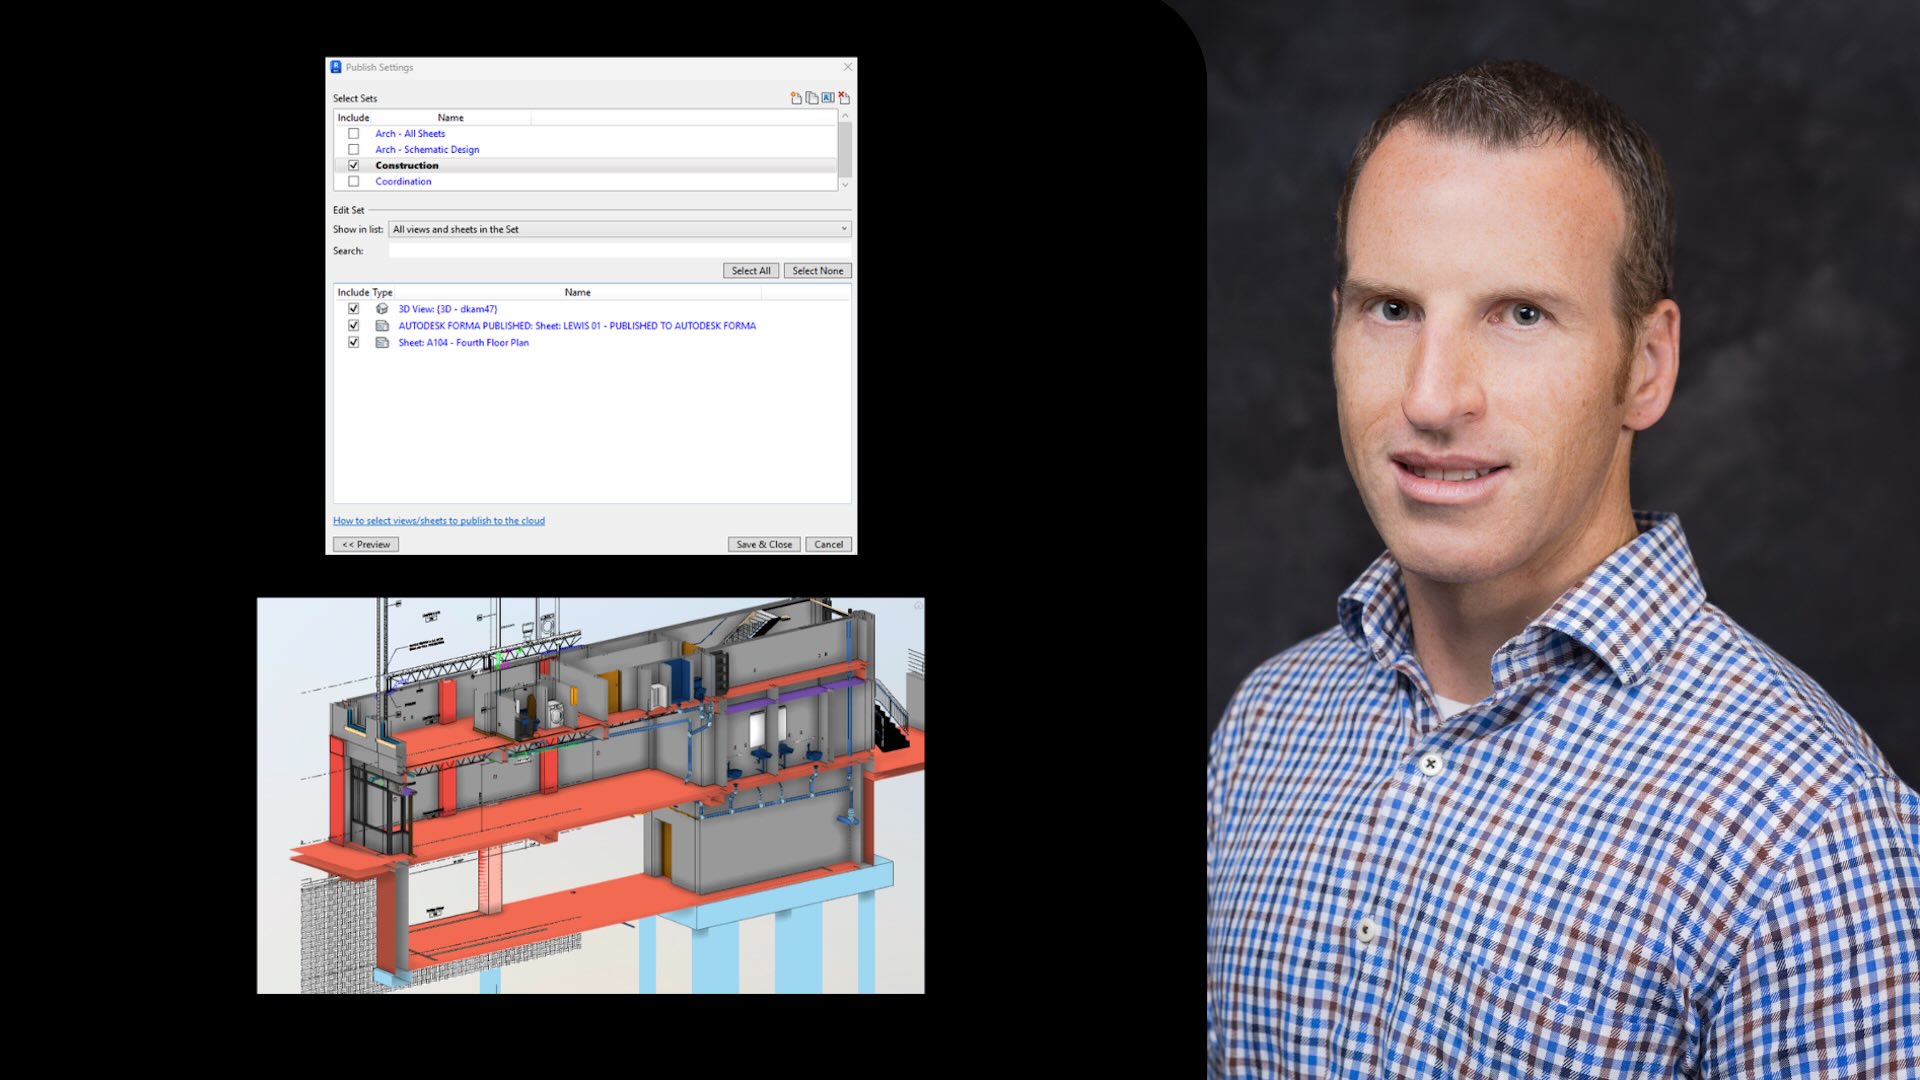
In addition to the 3D model that you publish to Autodesk Forma, you can include both section and plan views that have been placed on sheets in Revit. When publishing, these sheets should be included in the Select Sets under the Publish Settings. (See image above).
Pro tip: Want to improve collaboration? Incorporate linked models into the published section view to enhance visualization and enable you to see multiple trades when overlaying the 2D content on a 3D view. In our team, we usually use a separate coordination model with these linked files set up on our projects for this purpose.
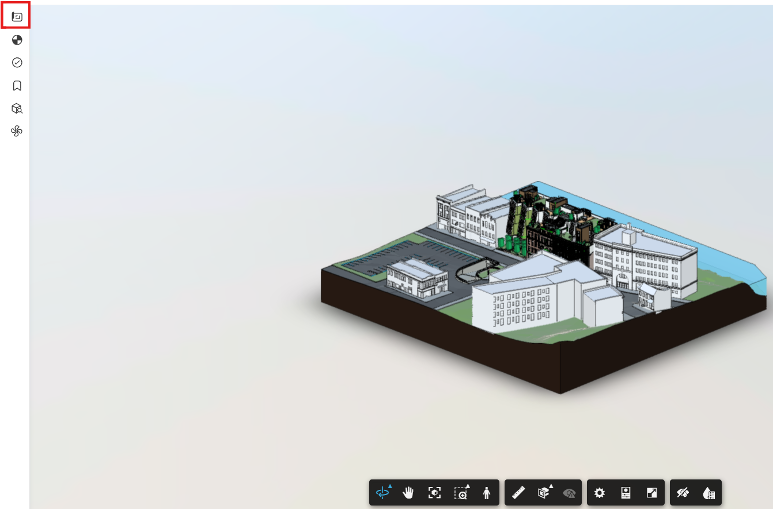
In Autodesk Forma, navigate to the location where the Revit file has been published and select the file to view the model.
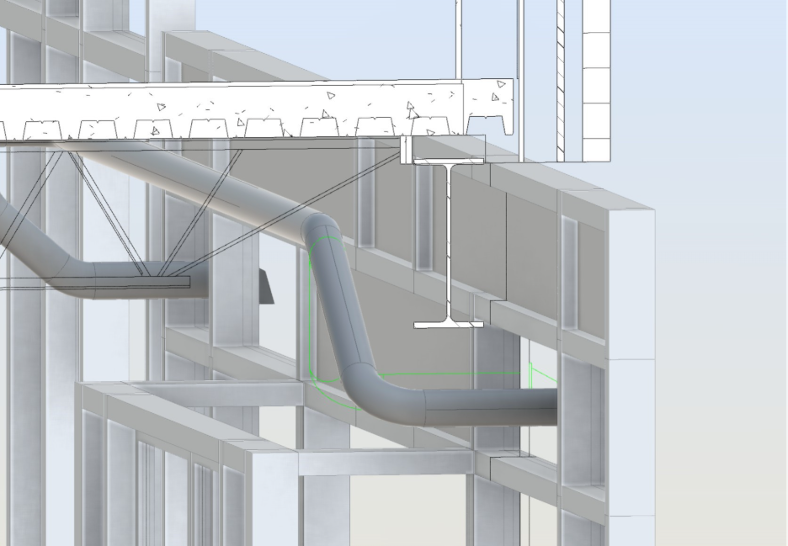
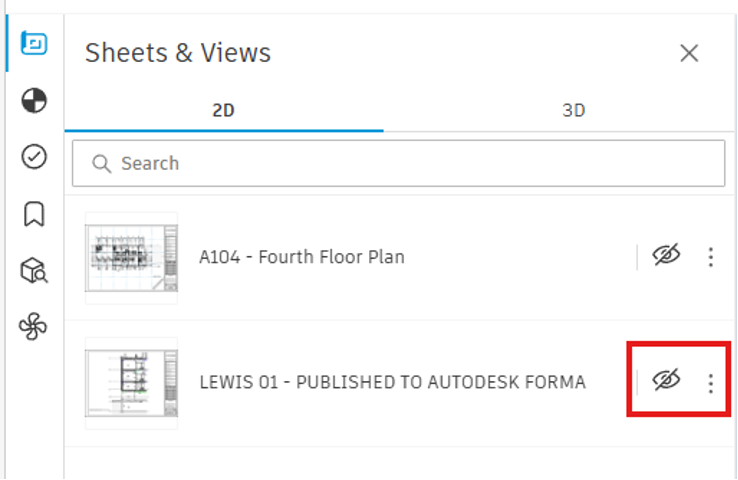
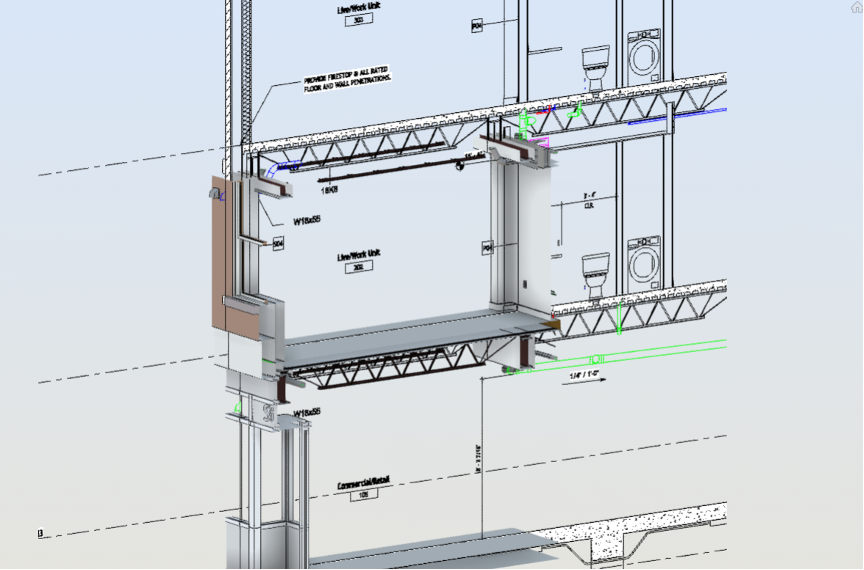
Expand the Sheets & Views tab to the left, which displays the 2D and 3D views that have been published from Revit. In a 3D view, you can select the visibility icon next to the 2D sheet to overlay it onto the plane where the section was cut in Revit.
Similar to sections, plans that have been published to a view will be cut at the floor plane where they were created.
Pro tip: In the section overlay, several features are available in the view, such as the ability to crop, filter, and apply color. These changes can be saved as a viewpoint so you can easily return to the view later.
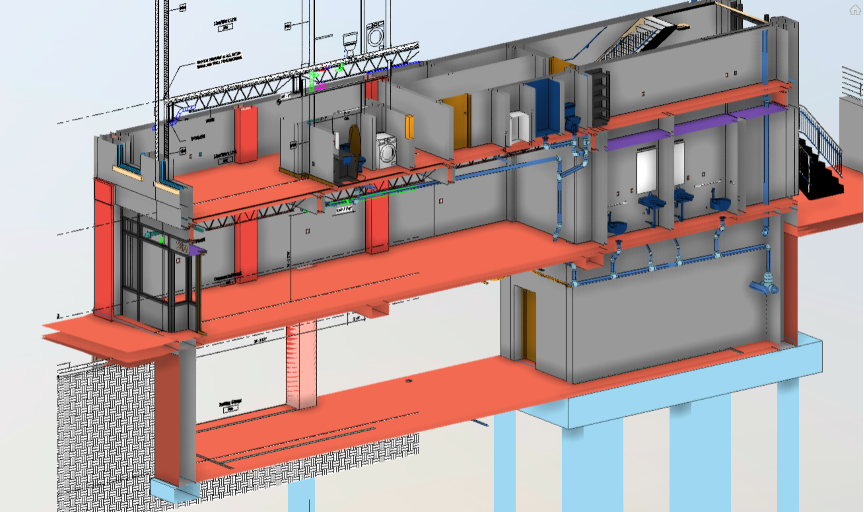
Bridging traditional 2D documentation with advancing digital tools enhances our ability to understand and coordinate our projects. It creates clearer connections and enables teams to visualize, communicate, and resolve the complexity of modern construction.
Workflows like this also help teams preserve the familiarity of traditional documentation while gaining the added context that 3D environments provide. As coordination workflows continue to evolve, combining 2D and 3D views can create a more intuitive and connected project experience for everyone involved.